First and foremost, please avoid the use of chemical pesticides and fertilizers which have a lot of hazardous effects on humans and animals. That’s the main reason, why we promote the use of natural agents in this gardening portal.
Turmeric rhizome contains a substance called Curcumin, which is a very potent antioxidant, has antimicrobial, anti-inflammatory, hepatoprotective effects, and it is very beneficial in boosting the immune system of our body. Turmeric is not only good for the human body but also has some amazing benefits in the garden. You can easily grow turmeric plant from a small piece of turmeric rhizome and harvest a lot of turmeric.
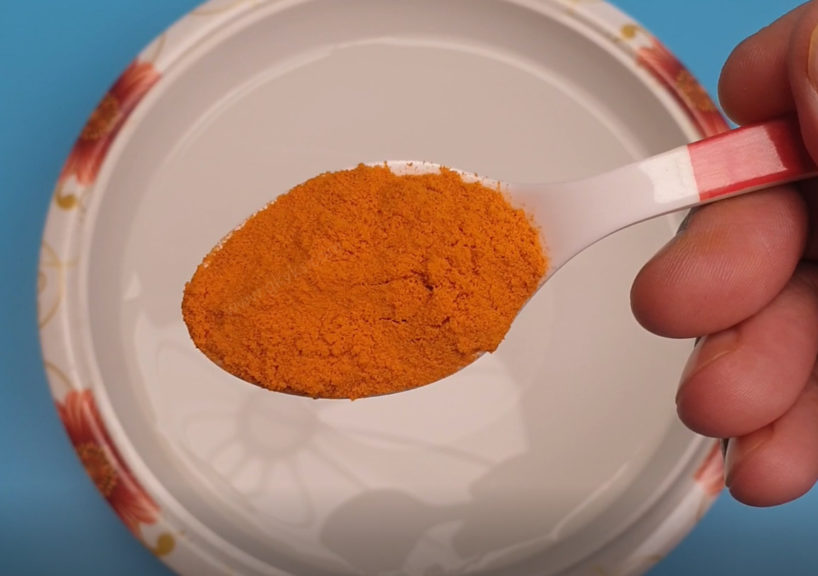
- ANT REPELLANT: Sometimes Ants, especially if there are lots of them, can be a menace to your garden. They seem to be particularly sensitive to turmeric’s strong odor.
- How to Use Turmeric to Get rid of Ants? Simply sprinkle turmeric powder around your plants and even over the surface of the soil. Just few pinches and not too much. This can repel ants and help you get rid of these unwanted visitors in your garden, which can sometimes pose a serious threat by carrying mealybugs to the growing ends of plants. Yes! Mealybugs and ants have a symbiotic relationship. Ants carry mealybugs to growing ends of plants in exchange for the honeydew excreted out of their anus. So, Ant control means mealybug control.
- SOIL PEST CONTROL: You can get rid of soil pests particularly fungal root rot and fungus gnats in the soil by mixing turmeric in soil. You can mix about 1 tablespoon per gallon of soil while making your potting mix or whenever you repot your plant. Remember, adding too much of it can have negative impact on the beneficial soil microbes. The other method to use for plants that cannot be repotted, is mixing 1 tablespoon of turmeric in 1 gallon of water or 1 teaspoon per liter of water and thoroughly water your affected plant with this solution. We will shortly discuss on how to make a powerful pesticide spray using turmeric. Please watch it till the end.
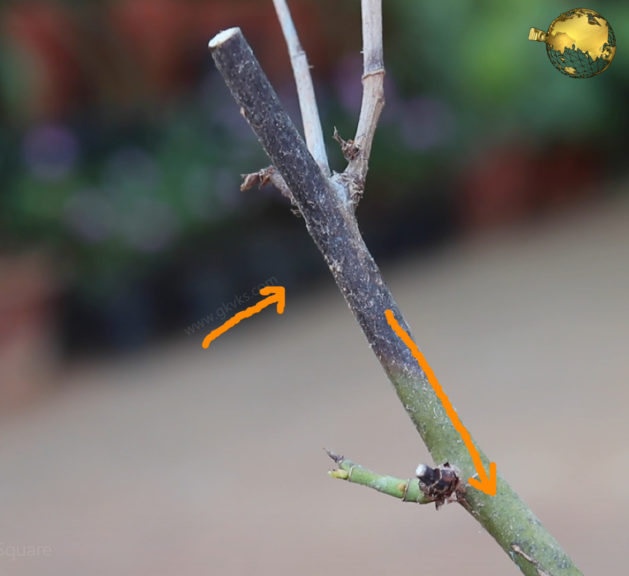
- HEALING TREE WOUNDS: Similar to humans, open wounds or injuries in plants, can make them susceptible to different kinds of diseases and infections, particularly fungal rot. Due to its natural antiseptic and antibacterial properties, turmeric is also a natural remedy to heal various types of plant wounds. You can make a turmeric paste and apply over the wound to save the plant. This also helps in plant stem or branch fractures. You apply the paste and tie a polythene or grafting tape to save the plant. This turmeric treatment is also commonly used after pruning tree branches to cut wounds, also used in grafting, and any other similar situations when the plant becomes exposed to external damaging factors.
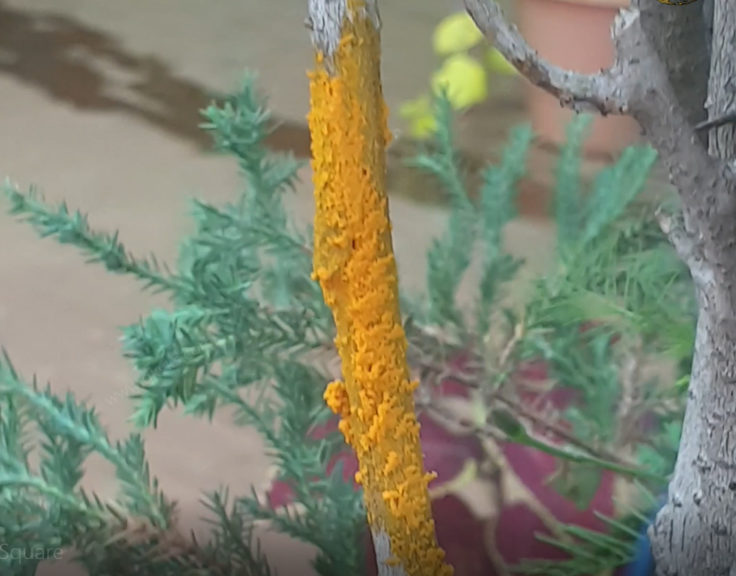
- TO TREAT ROSE DIE BACK DISEASE: Rose dieback is a condition commonly affecting rose plants where there is browning or blackening of the tip of the rose stem or a branch which then travels down toward the graft and may engulf the whole plant causing death. It can either be a Branch die back or the main stem dieback towards the graft. It is in fact a commonly encountered problem by every gardener and can sometimes be too bad causing death of the plant if no intervention is done. Though, the main treatment of Dieback disease is pruning the involved stem or branch, applying turmeric paste over the wound after pruning helps prevent progression of Rose dieback disease.
- AS A ROOTING AGENT: Though not a rooting hormone, turmeric can be used to increase the chances of rooting plant cuttings. This is mainly because of its anti-microbial and anti-fungal effects.
- PESTICIDE SPRAY: Turmeric alone as a spray can be used to treat few fungal plant diseases and pests like powdery mildew and other fungal spots. But it is not effective against pests like mealybugs, aphids, mites and other pests. For minor fungal spots and powdery mildew, you can mix 2 tea spoons of turmeric powder in 1 litre of water and spray on the affected plant.
Though there is no substitute to neem oil for pest control, you can make a powerful and broad-spectrum pesticide using turmeric and other stuff, especially if neem oil is not available in your location. You need to mix other stuff depending on what you want to treat.
- For Powdery mildew, you can mix 2 teaspoon of Turmeric powder, 100 ml of milk and 2 teaspoons of distilled white vinegar to 1 litre of water and spray on the affected plant. This is the most powerful natural remedy to treat powdery mildew.
- If Neem Oil is not Working on Certain Pests: You can add Turmeric and Garlic to neem oil solution if the pests are resistant to neem oil. You mix 5 to 10 ml neem oil in 1 litre of water and add 1 – 2 teaspoons of turmeric powder or even fresh turmeric rhizome and then add 4 to 5 cloves of crushed garlic to this mixture and sieve it fine to avoid clogging of spray bottle. Spray this once weekly. Patch test on a leaf may be important, depending on the concentration of your neem oil brand.
This Hydroponic two in one plant cloner can be a very nice school project for kids and instil an interest in them in gardening.
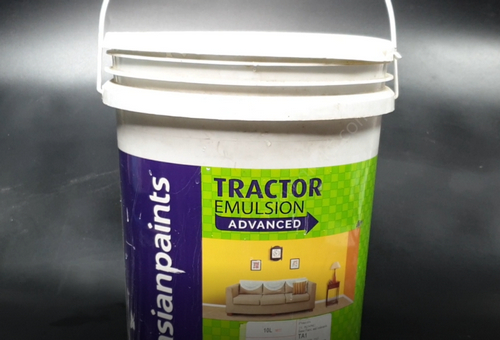
First of all, you need at least a 20 litre or a 5 gallon plastic bucket with a lid. The cheapest solution to this is to use a 5 gallon empty paint bucket which is easily available from any junk store or perhaps from your store room.
Take out the lid and carefully drill some holes on it. Firstly you need to mark the diameter of these holes on the lid. First decide, what you want to insert, 1 inch hydroponic collars or your own diy foam inserts or 1 inch net pots or 2 inch net pots, depending on what you want to grow.
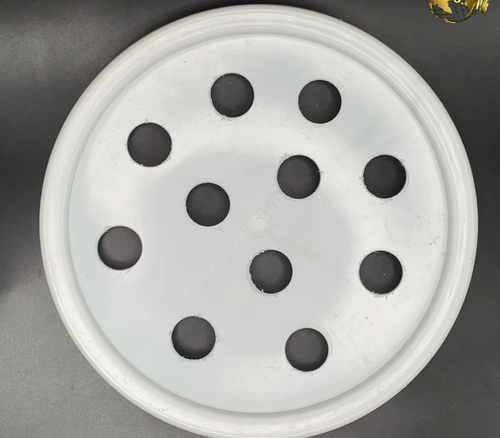
Here I want to insert 1 inch foam inserts or 1 inch net pots, so that I get more number of slots to insert. So, mark the slots on the lid properly spaced and as many as you want. Make sure, the diameter of each hole should not be more than the diameter of the pot. The top diameter of this pot is max 3 cm, and the bottom is 2 cm. So 2.5 cm or 1 inch is the ideal cut out for inserting these pots.
Now using a 1 inch hole saw bit or door knob drill bit or whatever you call it, carefully make as many holes you want. 5 or 10 or whatever number you want. Do not make them too close to each other, the first reason is because, this can make the lid weaker and secondly there can be root entanglement underneath the lid once the plants start to grow.
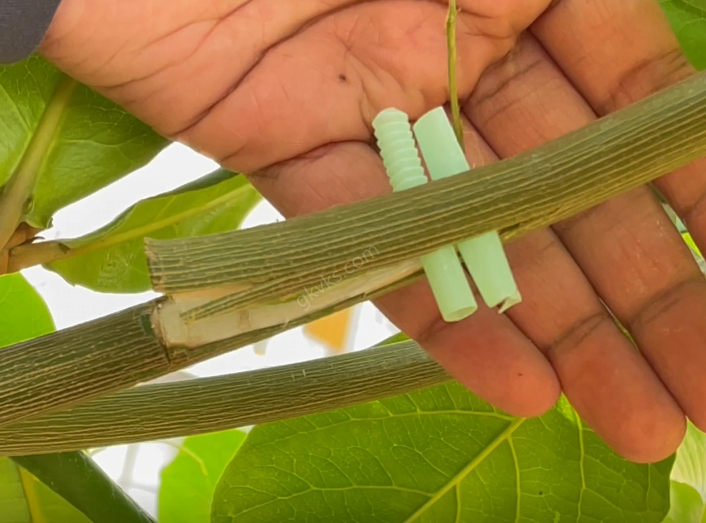
Now if you want to use it as a plant cutting cloner or plant propagator, you need to make few 1 inch foam collars to insert your branch cuttings. These are readily available to purchase – like these Neoprene hydroponic collars or you can easily cut out any thick foam – that’s recycling some packaging foam from your junk. Try to carefully cut the sizes, and the top diameter should be little more than 2.5 cm. If you have a thinner foam sheet, you can cut and paste multiple pieces with glue and make these foam collars to insert cuttings. Making a cut from one side towards the centre is better to easily insert your cuttings without damaging the nodes, rather than making central holes into the foam, because the thickness of the cuttings also can vary.
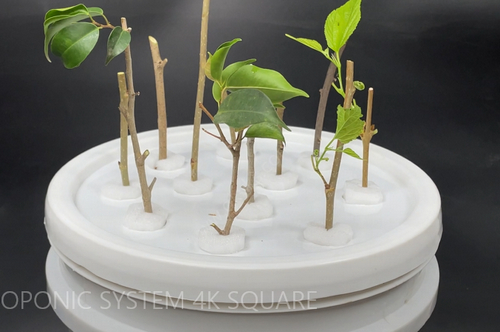
So you can insert these foams to make it a plant cloner device or install net pots to use it for hydroponic growing.
Now let’s look into setting up pipes inside this bucket. You just need a 16 mm drip irrigation pipe like this and a T-connector. I got this again from my store room from my left over stuff I used for my drip irrigation for home done for my terrace garden.
Now measure the inner circumference of the bucket, 1 or 2 inches below the rim. Cut a 16mm pipe of this same length and make a circle using 16 mm pipe into the inner side of the bucket. Connect this T-connector to complete the cirlce.
Now fix or place a small pump like this at the bottom. This is again very cheap submersible pump. You can use a 12 watt or 18 watt pump depending on the size of your bucket. If you want to make a larger hydroponic system, you can use 18 watt or more.
Now measure the vertical dimension left between the pump and the t-piece and cut out 16mm pipe piece and connect one end to T-piece bottom and the other end to the pump.
Now Punch some holes into this 16mm pipe circle using the drip hole-maker and insert these little sprinklers or sprayers uniformly – like each around 2 inches apart or some 8 to 10 of them.
Optionally, fix this loop to the bucket with some cable ties or twist ties. Then take out the wire of the pump from the top of the bucket to avoid leakages.
Now pour water into the bucket, about half or less than half to test the system or the sprinklers by connecting the pump to power supply.
Now let us take some plant cuttings, a few ficus cuttings, a few mulberry tree cuttings. You can try any cuttings. Please follow the basic rules of taking cuttings like 45 degree cutting angle and other stuff we have already discussed in one of our post on 10 rules of cloning plants.
Now insert these cuttings, first into the foam collar and then insert the foam collars into the holes and keep it turned on.
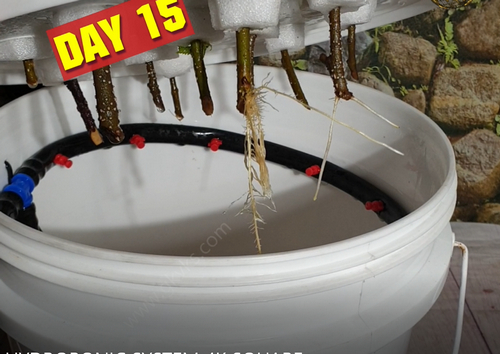
Now let’s look into the results on Day 8 and on Day 15.
On Day 8, You can see rooting has already started in most of the cuttings. In this setup roots develop faster, the main reason is oxygen supply which is directly taken up from the air. If we go into the details of hydroponic and its types, we are using Nutrient film method in this setup. You can also add nutrient solutions to this water, like mainly phosphorous to start rooting faster. Once rooting starts, introduce Nitrogen and Potassium into the water like how you do in hydroponic farming. Another hack to induce rooting faster is to add half or 1 tablet of Aspirin 350mg dispersible tablet into the water. Aspirin is acetyl salicylic acid and induces rooting faster.
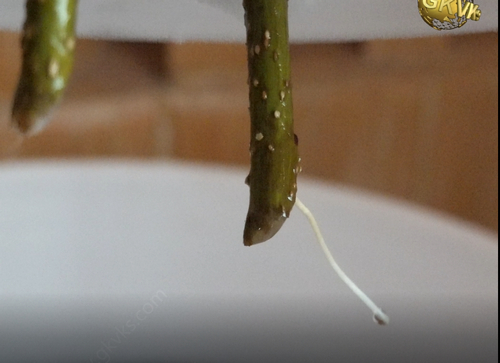
On Day 15, you can see more roots have started growing, with nice new set of leaves growing in to start photosynthesis. This is really fast when compared to conventional method of growing a cutting in soil, which usually takes 4 to 6 weeks time. You can also see some cuttings have progressed faster with more root formation and healthy roots. And you can also see nice foliage growth and even fruit formation in these mulberry cuttings. One simple tip here is: Snip off any fruits early to redirect the plant energy or rather conserve the energy for root and leaf development for now.
You can repot these into independent containers after 4 to 6 weeks once sufficient roots develop.
Few years back we made use of the Deep Water Culture type of hydroponics to make our plant cloner by using air stones.
When it comes to propagating or multiplying plants, our mind usually jumps to taking branch cuttings and trying to root them, but most often end up with poor results. But what if I told you that there are 5 different ways to multiply plants with 100% success results, especially for those difficult-to-root trees or woody or semi-woody branches? Even a newbie gardener can easily succeed in these methods. And moreover, these methods will produce genetically identical new plants which will carry all the characteristics of the parent plant. Let’s start these one by one.
5. SIMPLE LAYERING: This is the easiest method and many a times this process occurs naturally. This can be accomplished by bending a low growing or a flexible branch to the ground. You can optionally injure or strip the outer bark to expose the cambium layer of the branch for faster rooting. You can optionally apply a rooting hormone powder if you have. Then, Cover part of it with soil, leaving the remaining 6 to 12 inches above the soil. You can keep some weight over it to prevent it from coming out of loose soil. Make sure you keep watering your plant regularly. The rooting will start within 4 weeks. Once you see roots, you can separate it from the mother plant and transfer it to an independent container.
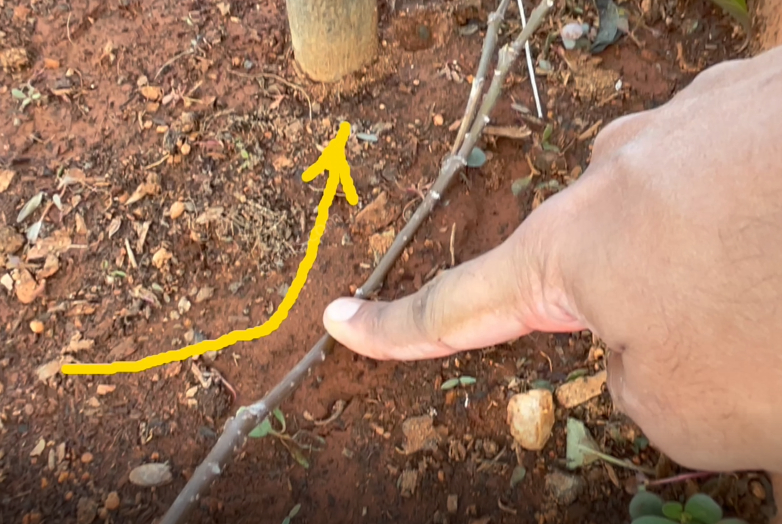
4. TIP LAYERING: This is quite similar to simple layering method. Dig a hole and Insert the tip of a plant branch shoot and cover it with soil. The tip grows downward first, then bends sharply and grows upward. Roots form at the bend.
3. CLASSIC AIR LAYERING: This method has further two variations depending on whether the plant is a Monocot or a Dicot. This is actually very interesting. Quick differences between monocot and dicot trees. Monocot – One Cotyledon, Dicot – Two cotyledons. Monocot – Parallel veins, Dicot – Branching veins, Monocot – Fibrous root system, Dicot – Tap root is must, Lastly Floral petals usually in multiples of three in monocots, whereas in dicots they are in multiples of four or five.
Alternately, if you know the name of the tree, you can simply google it whether it’s a monocot or dicot.
For monocots: Make an upward 1 to 11⁄2-inch cut about one-third through the stem. The cut is held open with a toothpick or wooden match stick or any small piece of plastic. Now you need a growing medium or air layering mix. This can be a simple peat moss, or cocopeat, or sphagnum moss or even just plain soil. Here I am using a mixture of cocopeat and compost. You have to make it fully moist first and then wrap around a polythene sheet and surround the wound with this air layering mix, about a handful of it. Hold in place tightly using anything to tie around at both ends, like with cable ties, twist ties or electrician’s tape, strings or whatever you have. Tie each end of the plastic securely, to retain moisture and to prevent water from entering in. If exposed to the sun, the plastic should be covered by any dark cloth or Aluminum foil if you have.
For Dicots: the process is similar, except a 1-inch ring of bark is removed from the stem. With a sharp knife, make two parallel cuts about an inch apart around the stem and through the bark and cambium layer, just below a node. Connect the two parallel cuts with one long cut. Remove the ring of bark, leaving the inner tissue exposed. Scrape if necessary to properly peel the tissue and to prevent a bridge of callus tissue from forming. Apply some rooting-hormone powder to the exposed wound if you have. But this is optional. Then wrap around a polythene sheet and surround the wound with the same air layering mix. Then tie both ends with cable ties, twist ties or string or anything. If exposed to the sun, the plastic should be covered by any dark cloth or Aluminum foil if you have. Rooting should start within 4 weeks. You can open it after 4 to 6 weeks to see the roots filling in and then cut off this branch below this level and plant it independently.

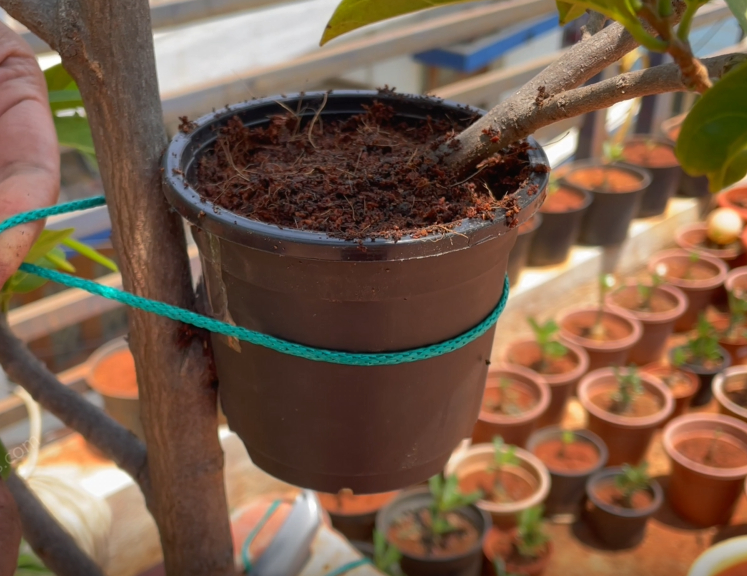
2. POT LAYERING: This is just a variation of classic air layering methods. You use pots for air layering in this method. Just strip off the bark with a sharp knife to expose the inner tissue. Now cut through a plastic pot and fix this to the branch. You can use anything to tie it properly to the branch, like a duct tape, cello tape or strings. Fill the pot with the potting mix. And finally water this and cover it with a polythene cover to retain moisture. Rooting should start within 4 weeks. You can open it after 4 to 6 weeks to see the roots filling in and then cut off this branch below this level and plant it independently.
1. WATER LAYERING: This is another variation of air layering where we use water as growing medium. This is very useful for monocots but also works on dicots. Take any waste plastic bottle and cut a small window at its upper middle part. Now make an upward 2 inch cut about one-third through the stem. Then the bottle is introduced through this cut and fixed using some strings or ties. Fill the bottle with water. Make sure you support the branch with some stick or support or else the branch can break off easily. If exposed to the sun, this can be covered by any dark cloth. You can add a quarter tablet of aspirin 350 mg to this water for faster rooting. Aspirin is acetyl salicylic acid which helps in faster rooting. Roots start as early as 10 days. You can cut of this from mother plant and replant it to an independent container.
The Bonus Tip is adding Aspirin tablet – like one tablet in 1 litre water and mixing it with the air layering mix to make it moist. For bottle or water layering, you can drop a quarter tablet directly into the bottle. For pot layering, you can water the pot with this solution and for classic air layering, you could mix it while wetting the mix or if you have forgotten, you can load it in a syringe and inject into the air layering pouch. You can read a detailed post on the uses of aspirin in gardening here.
Technically, Aspirin is not an organic solution, however, it is a safe and very inexpensive option that contains far fewer chemicals than the store-bought chemical products for gardening. I think most of us might have exhausted their regular pesticide stocks during this lockdown period, especially the great neem oil. Do not worry and watch this video till the end.
Aspirin is chemically Acetyl Salicylic Acid and medically a non-steroidal analgesic and anti-inflammatory medicine, inexpensive and easily available in almost all medical stores.
So, what is the actual concept behind using Aspirin in gardening and farming. Salicylic acid is naturally found in willow bark and many other trees. Studies have found that the plant hormone salicylic acid is released in tiny amounts when plants are in stress. So this concept has been utilized and many benefits of Aspirin have already been proven. Here we are using Aspirin 350 mg dispersible tablet – brand names like Disprin, Ecospirin, Bayer Aspirin and so on. If you are not getting a dispersible tablet, you can crush the non-dispersible tablet and powder it and use it.
- Aspirin for Plant growth: Many university research studies have been conducted on this. They sprayed plants with an aspirin water once every three weeks for the course of an entire growing season and found that, the plants sprayed with the aspirin solution were found much bigger and had more fruits and flowers than their counterparts.
So, How to use Aspirin in your garden? You can dissolve one tablet of aspirin in one gallon of water and drench your plants with this solution once in a month. You can spray this solution on the leaves and also water your plants with this water. This enhances the immune system of plants and helps them in combating with pests and microbial attacks and prevents the formation of fungus leading to increased growth of plants and improves the overall health if your plants. - Aspirin Improves Seed Germination: A low dose of aspirin water significantly improves seed germination and in one study the plants treated with the aspirin water had a 100 percent germination rate, while the plants that weren’t treated had more inconsistent results. To make this solution or spray, drop half a tablet of a 350 mg Aspirin per gallon of water or a quarter tablet per litre of water and stir well. One method is to Spray on the seeds already planted and another method is to soak the seeds in this solution for 1 to 2 hours before planting them.
- Aspirin as a Rooting Hormone: As already discussed, Salicylic acid is naturally found in willow bark and many other trees. Willow bark extract is being used since ages as a Rooting agent to clone plant cuttings successfully. If you do not have rooting hormone powders like naphthalene acetic acid and indole butyric acid, you can use aspirin for this job.
Take one teaspoon of cinnamon powder from your kitchen and add it to 1 litre of lukewarm water and then drop in half a tablet of 350mg aspirin and stir it well. Then dip the cuttings into this solutions for about 30 to 60 minutes and then plant those cuttings into soil. If you are trying to root cuttings in water, drop half a tablet of aspirin per litre of water. If you are changing this water, you need to again add half a tablet of aspirin into the container till rooting starts.
- Aspirin as an anti fungal to treat Blight in plants: Blight means a specific symptom affecting some plants like tomatoes and peppers due to infections by pathogenic microrganisms, leading to rapid and complete chlorosis, browning, then death of plant tissues started from leaves, branches, flowers and fruits. The dosage is same, that is one tablet per gallon of water as a spray or drench your plant with this water.
- To keep Cut flowers stay fresh for a longer time: Put a 1/4th tablet of aspirin in a vase with fresh cut flowers from your garden to help them stay fresh longer. If the vase is larger add half a tablet.
Now! The PESTICIDE RECIPE:
– Take a Large Onion and drop it into a kitchen blender
– Add 4 fresh cloves of garlic into this.
– Add 2 teaspoons of Red Chilli Powder.
– Add 1 teaspoon of Cinnamon Powder.
– Blend this into a fine paste by adding some water.
– Now Add about 2 Cups of Water to this and mix well and allow it to steep overnight.
– Then in the morning, strain out the liquid using a nylon cloth or a fine sieve to get your pesticide concentrate. You can even store this concentrate in refrigerator.
– To Apply as pesticide, Use it in 1:5 dilution in water. That is to one cup of this pesticide add 5 cups of water and most importantly do not forget to add some 10 drops of liquid detergent soap for the surfactant effect and to coat the leaves and retain the pesticide effect for longer time. Use this twice weekly until all pests are eradicated. This will successfully kill common pests like aphids, mealybugs, whiteflies and many others.
Onion skin and peels are usually thrown into the bin. But starting today and after watching this episode till the end, you will never throw them again!
Onion skin and peels have antioxidant and antimicrobial properties and contain many useful substances like sulphur, quercetin, Potassium, phosphorus, zinc, iron, iodine, vitamins, pectins, saponins, flavonoids and so on.
Have you even wondered why tears start flowing out of your eyes as soon as we start chopping onions? This is Onion-Chemistry. Before we start with the 5 uses of onions in gardening, let’s quickly know the scientific reason behind this interesting scene:
While chopping onions, cells inside the onion are broken down and the gas that comes out forms sulfenic acid. This acid gets mixed with enzymes and forms a gas called propanethiol S-oxide. When this gas reaches our eyes, it gets mixed with our tears and forms sulphuric acid which causes irritation of the tear glands and that’s it.
Well, Now let’s list out the benefits of onions for plants and gardening:
5. COMPOSTING: If you are not using earthworms for making your compost, You can drop onion skins and peels a little deeper into the compost bin and get a nutrient-rich compost in the final result. But You should avoid adding them in your worm composting bin, this is because earthworms hate onions and similar odorous substances.
4. MULCHING: For Beginners, A mulch is a layer of material applied to the surface of soil for benefits like preserving soil moisture, reducing weed growth and so on. You can use onion skins for mulching and the dry onion peels will decompose soon and enrich your soil with potassium and calcium, which is so good for your plant growth.
3. ONION PESTICIDE RECIPE: If you do organic vegetable gardening without using any chemical pesticides and fertilizer, you will certainly realise the importance of these organic recipes, especially if you do not have the universal organic pesticide like the great neem oil. Do not worry!, you can make a potent organic pesticide using onion and other stuff.
– Take a Large Onion and drop it into a kitchen blender
– Add 4 fresh cloves of garlic into this.
– Add 2 teaspoons of Red Chilli Powder.
– Add 1 teaspoon of Cinnamon Powder.
– Blend this into a fine paste by adding some water.
– Now Add about 2 Cups of Water to this and mix well and allow it to steep
overnight.
– Then in the morning, strain out the liquid using a nylon cloth or a fine
sieve to get your pesticide concentrate. You can store this concentrate in
refrigerator.
– To Apply as pesticide, Use it in 1:5
dilution in water. That is to one cup of this pesticide add 5 cups of water and
most importantly do not forget to add some 10 drops of liquid detergent soap
for the surfactant effect and to coat the leaves and retain the pesticide
effect for longer time. Use this twice weekly until all pests are eradicated. This
will successfully kill common pests like aphids, mealybugs, whiteflies and many
others.
2. ONION
PEEL FERTILZIER: There are two
methods to make onion peel fertilizer, one is to boil the onion peels for few
hours in water and the other method is to soak the onion peels in water for 24
hours. Some do not recommend boiling.
So, take 2 to 3 handfuls of onion peels
and drop in 1 litre of water and allow it to soak for 24 hours.
After 24 hours, strain out the liquid and use it as a liquid fertilizer. You
can use it without dilution or with further dilution of 1:1 in water if you
regularly fertilize your plants. Use it once in 15 days to see the effect in
about 3 months.
1. ROOTING HORMONE RECIPE: Not really a rooting hormone, but you can call it a rooting agent. Onion due to its antimicrobial properties and when mixed along with other stuff will certainly improve the results of rooting your plant cuttings. To prepare this:
– Take ¼ Onion
– Add ½ a Cup of Fresh Aloe vera Juice extracted from a leaf.
– Add some cinnamon or willow bark into this – Its better to have it Presoaked in a cup of water for 24 hours.
– Now Add this cup to the blender and make a paste or solution. Then Strain out this liquid to use as as rooting agent. Just dip the cuttings into this solution or apply this with your finger and plant the cuttings. You can watch a detailed post on the 10 natural rooting agents you can use to add into this recipe or experiment this recipe with more stuff.
In horticulture, Cloning means making duplicate plants out of branch or stem cuttings from a mother plant. It is a great way to multiply a plant, specially if it’s a rare variety or very precious to you or if you wanna gift some plants to your friends and neighbours.
The simplest way of cloning a plant is just pinching a small branch or stem cutting and inserting it into the soil. But, the success rate of this cutting is generally low. If you want to increase the success rate, then you need to follow certain simple rules to accelerate the root formation and increase the success rate of cloning.
Most plant cuttings will naturally produce their own rooting hormones after a short period of time. Actually, many plants can be easily cloned by simply placing the cutting in some clean water and following some simple rules. You can check a detailed article on the 10 Golden rules of cloning.
Rooting hormones can be natural or synthetic chemicals and contain Indole butyric acid (IBA) and naphthalene acetic acid (IBA). IBA is the natural plant auxin or hormone responsible for the stimulation or the formation of roots. If you are purchasing these commercial rooting hormone powders, make sure you check composition on the label to contain atleast one of these compounds.
Now lets list out the best 8 natural rooting hormones or agents that can be used to accelerate rooting in cuttings and increase the success rate of cloning.
8. Your Own Saliva: Not joking! Nothing advanced about this. Human or animal saliva is definitely an anti-bacterial and anti-fungal for plants. The main idea is to prevent the cutting from rot and stimulate the root formation. This very first step to prevent rot can be achieved by just dipping your cutting insertion end into saliva and then insert into the potting soil. This is definitely like Something is better than Nothing!
7. Apple Cider
Vinegar: This is another proven natural rooting hormone stimulant. Add 5
drops in half a cup of water and mix well. Do not use more than this quantity,
because it can have an opposite effect and may prevent rooting and also vinegar
is a natural weed killer in strong concentrations.
Just dip the cutting insertion end into this cup and then insert into soil.
6. Cinnamon Powder: Cinnamon is an anti-bacterial and anti-fungal agent that will definitely double your cloning success rate. Make sure the cinnamon bark is finely powdered and just dip the cutting into this powder for about an inch and then insert into soil.
5. Willow Bark: The bark of willow tree contains two important compounds – salicin and Indole butyric acid. Salicin is chemically similar to aspirin (which is acetylsalicylic acid). And Indolebutyric acid (IBA) is a plant hormone that stimulates root growth as already discussed.
If you are lucky and have a willow tree around you, you can
make a willow tea.
IBA hormone is present in high concentrations in the growing tips of willow
branches. So if you can take these cuttings and soak them in warm water, you
can get enough quantities of IBA hormone into this water what we call Willow
Tea.
4. Honey: Honey is another natural antiseptic and anti-fungal agent which helps these little cuttings to remain healthy and strong. Remember pure honey is said to have a more beneficial effect than the processed bottle honey. Do not directly dip your cuttings into honey because this can attract many insects and ants. So, the commonly used recipe for using honey as rooting agent is:
Add 1 teaspoon honey to 2 cups of boiling water or half teaspoon honey to 1 cup of boiling water. Do not boil after adding honey, just stir it well and allow it to cool down before dipping the cuttings.
3. Aloe Vera Gel: Fresh aloe vera gel contains salicylic acid along with other useful enzymes, amino acids and minerals. I have demonstrated this in one of my older posts. You can check that aloe vera experiment here.
Just take out the gel from a fresh aloe vera leaf and dip the cuttings into it and plant them in soil.
2. Aspirin: Though not natural, but an inexpensive way is to use aspirin 350 mg tablet, either as crushed powder or dropping a tablet in a glass of water and then dipping the cuttings into it.
Now! If you want to make a more powerful and potent rooting agent, you can mix one or more of these things and try experiment each formula on few cuttings and see which one works best for you.
For example: Willow tea + Honey or Cinnamon + Honey or Aloe vera Gel + Honey and so on..
Happy Gardening!
If you haven’t watched that yet, please check HERE.
This simple Hack am showing you today will actually overcome one limitation of using air stones or other similar bubblers, That is they get clogged easily, specially if they are of low quality. After watching this hack, you may not feel like purchasing air stones at all. Yes, this is a permanent solution to this drawback of using air stones or similar stuff.
What you can do is: Just take two Ball pens like these. These are the famous Reynolds pens. Am sure all of us know about these pens.
Remove the refills and make tiny holes into the white plastic body by heating a needle. Make tiny holes as many as you want.
Then connect the air tube to the open end of the pens and place them into your cloning chamber. That’s it.
You can see how nicely and uniformly the bubbles are appearing. Also one more point and update is: you need not keep the bubbler continuously switched on. You can switch it on and off intermittently or atleast for 10 minutes 2 or 3 times in a day to get best results.
Also if you have a PH testing gadget, try to maintain the ph of the rooting solution or water to a slightly acidic ph of around 6.0 for best results.
We will start with the term – MYCORRHIZA (that’s a Greek word mycos, “fungus”, and rhiza, “root”). It is a Symbiotic association (mutually beneficial – symbiosis is a process of mutual benefit) between a fungus and the roots of a plant.
We will look into a simple explanation to this: The plant prepares food and energy coming from the sun that’s by way of photosysnthesis and supplies these carbohydrates and other nutrients to the fungi through the roots, and the fungus in turn supplies water and mineral nutrients taken from the soil to the plants. So, Mycorrhizae are located in the roots of the plant. In general, most of the plant species can form these mycorrhizal associations. We will not go into details or types or classifications of these associations. The most common is the Arbuscular type which is also called Vesicular-arbuscular mycorrhiza (VAM) and this is present in 70% to 80 % of plant species. And Mycorrhizae are especially beneficial for the plants growing in nutrient-poor soils. Because the fungal mycelia or hyphae – that’s fine hair like structure can uptake the nutrients from the soil, These are better than the thinnest fibrous roots of the plants. This in scientific terms is called increasing the vascularity, similar to certain drugs in medical field which increase vascularity and increase blood supply to an organ.
There is a lot of research done on this and it is proved to be very much beneficial to plants. You can check out links to some of the website articles on these topic from the description of this video.
Well, Now at home gardening level, How to utilize this benefits of mycorrhiza to boost the growth of our plants.
There are two options am showing you here. You can checkout links to these items from a card linked to this video or visit our website at gkvk.net.
- Plant Tablets or Root Tablets
- VAM powder containing these mycorrhizae.
This one is in Tablet form. Its called Root booster tablets. This comes with a leaflet and instructions with dosage for various plants. For home plants, use 1 or 2 tablets depending on the size of the container and size of the plant.
Now how to use this: Make a deep hole like about 4 to 6 inches, till u approximately feel you are reaching the roots of the plant. Then insert this tablet into the hole and cover it with soil. Then water slowly to make the soil wet. This should contain spores of the beneficial fungi which should reproduce and start their actions. You should see the effect within 3 months. You can test this on your anaemic plants and see the improvement in about 3 months. If your anaemic plant is showing significant interval change, then this mycorrhizae are into action and providing the plant with the necessary micronutrients like iron, magnesium and others.
Now the second Product is called VAM – Vescicular Arbuscular Mycorrhizae. This comes in powder form and each gram contains 100 to 200 propogules. So, approximately add one teaspoon of this powder near the plant roots by digging a hole or while repotting sprinkle the powder and repot your plant.
Now another interesting Use of this Mycorrhizae. That is Using Mycorrhiza for a Rooting Hormone effect to grow stem cuttings, that is rooting your cuttings. You can dip the lower end of a cutting into this powder and insert them into the soil. You can apply all the other rules of cuttings like the 45 degree cutting angle and others. You can watch one of my old videos on this topic from a card linked at top right corner of this video or search in my channel.
So before going to our important and interesting quiz question.
Will summarise the benefits, Mycorrhizal fungi make plants stronger and healthy, increasing the yields, increasing flowering and fruiting, make them drought tolerant, reduce fertilizer and water usage, protect plant against harmful pathogens in soil, improve soil quality and drainage system, Increase tolerance to soil PH changes and many other benefits.
Now lastly one quiz question. Actually even I do not know a proper answer to this. Can we use broad spectrum antifungals like SAAF powder (carbendazim and mancozeb) to mix with water and water the plants. Will this not kill these mycorrhizae? Please answer in the comment box below the video.
Ref:
https://www.ncbi.nlm.nih.gov/pmc/articles/PMC4717633/
https://link.springer.com/chapter/10.1007/978-94-011-3176-6_8
What is a Rooting Hormone?
Rooting hormones are chemicals or substances that help promote fast and healthy onset of new roots. They can be either synthetic chemical or naturally occurring or organic rooting hormones.
These are available in form of powders, liquids or gels forms and are an important stuff in cloning process in gardening – cloning is growing a plant from its cuttings taken from mother plant.
And one more thing, You must know is that most plant cuttings will naturally produce their own rooting hormones after a short period of time. In fact, many plants can easily be cloned by simply placing the cutting in some clean water without any external aid like a rooting chemical.
However, some plants are difficult and do not grow well with this ordinary method. Other plants may take a really long time to develop roots without the use of a rooting hormone. This slows down the production of the entire garden. Hence, The use of a rooting hormone will provide more consistent results than cuttings just placed in water or soil for rooting.
Auxins are one of the main plant hormones that aid in the creation of initial root growth. More specifically, indole acetic acid (IAA) is the natural auxin found in plants that is responsible for natural root stimulation.
IAA is involved in just about every aspect of plant growth and development, including the formation of embryo development, induction of cell division, stem elongation, vascular tissue differentiation, fruit/flower development and the induction of rooting.
Most rooting products do not contain this exact IAA but rather a synthetic form of indole-butyric acid (IBA) and/or napthaleneacetic acid (NAA). These rooting hormone products come in different forms, each with their own advantages and disadvantages.
The one you are seeing here is called Rooter and contains this IBA chemical. This I got it for really cheap for about 250 bucks. The link to purchase online is shared in description and also link at top right side of this video.
Make sure you get a sealed packed product and also check the bar code. Then open the cork and see whether its sealed properly. So this contains the indole butyric acid as the rooting powder. Will share you the results of this in my future videos, whenenver I grow cuttings and see which is better, whether organic or inorganic.
Now the organic powder, what we have been using till now is cinnamon bark powder which is easily available in your kitchen or grocery store. Its mainly used for its antiseptic / antifungal properties for propagating cuttings.
Also Honey is another excellent product used for fast rooting and has similar action to the cinnamon powder.
Then lastly, how do we use these hormones in powdered form. We have been doing these in propagating cuttings. We just dip the cutting base in this powder and then make a hole in the soil and insert the cuttings. Also watch the video and Press Like and Subscribe to our Video channel at https://youtube.com/gardentips