What’s in this article?
- A brief Introduction
- Why use this product?
- What are the various uses?
- How to use it for Mass multiplication, As a Bio fertilizer, As a Bio Pesticide,
- For Seed Treatment,
- how to make DIY micronutrient fertilizer using this product.
Currently, about 2 billion metric tons of waste is produced annually worldwide and only about 5 percent of this is recycled for composting. This means the waste is not managed properly and instead either dumped or openly burnt which can be really bio hazardous. To overcome this problem, the NCOF, ministry of Agriculture, India, developed a great product which is a consortium of micro-organisms, mainly azotobacter isolated from desi cow dung. And this took 11 years to standardise the mass multiplication technique at the farm level.
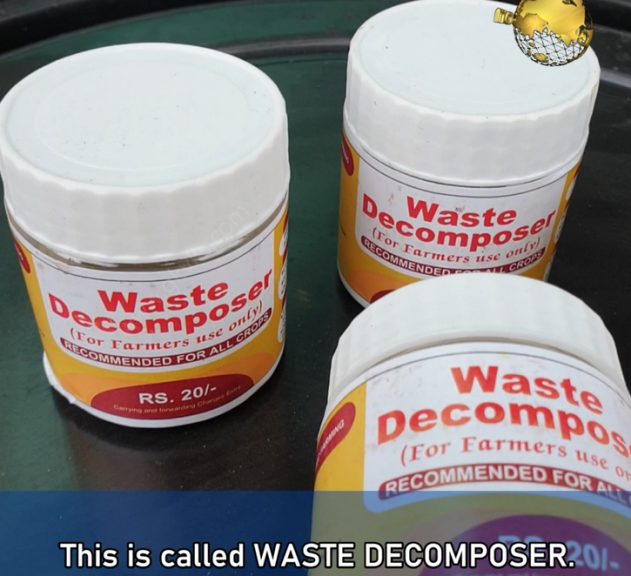
So, What is this Product Called? This is called WASTE DECOMPOSER. This is perhaps the world’s cheapest bio fertilizer and bio pesticide made till date. This product comes in a bottle of 30 gms costing just 20 INR per bottle, that’s less than 20 cents for international viewers and you need to buy only once because you can easily reproduce or do mass multiplication of this product and use it repeatedly for ever. A single bottle of waste decomposer decomposes bio-waste of more than 10000 metric tons in just 30 days and this bottle has a shelf life of 3 years. This is unbelievable.
So, Where to purchase this waste decomposer bottle? You can order this online from NCOF website or even amazon and these links below. International users can possibly import this product.
Amazon: https://amzn.to/2Spjj7G
NCOF website: https://ncof.dacnet.nic.in/
Now let’s learn how to use Waste Decomposer?
The first thing you should do is perform mass multiplication of waste decomposer. There is nothing sophisticated about it. It’s really a simple process. I will show you step by step.
Take a Large Plastic Barrel like this one, preferably a 200 litres container. You can take even 100 litres or whatever you have.
Fill this drum with water.
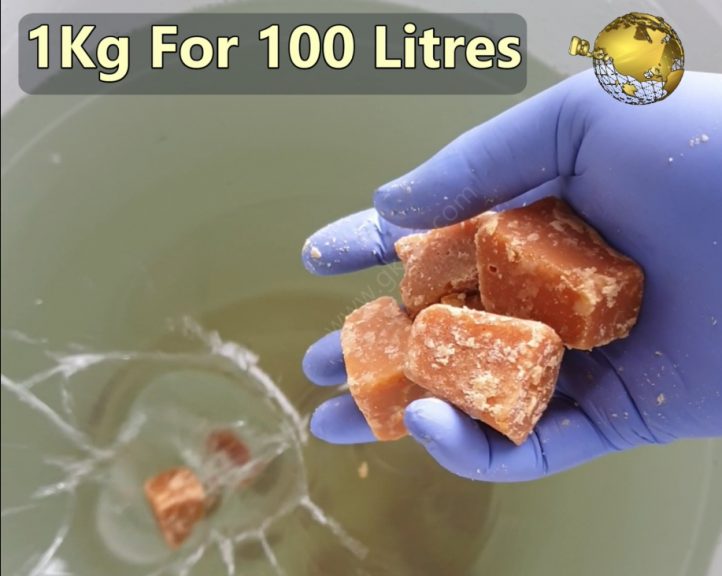
Now add 2 kilograms of Jaggery for 200 litres of water or 1 kilogram for 100 litres. This is the food for these microorganisms.
Now take 1 bottle of waste decomposer and pour all its contents. Make sure you avoid direct contact of its contents with bare hands. Mix it thoroughly using any stick or any pipe.
Then cover the container with a cloth. You need to open this daily and stir the solution once in 24 hours.
After 5 days or max 7 days depending on the climate, this solution turns creamy which means now you have 200 litres of water decomposer ready to use.
We will discuss on the uses of this solution shortly. To restart mass multiplication, now you don’t need to buy waster decomposer again. After use, Just leave around 20 litres of this solution in the barrel and add water again, then add jaggery again and repeat the procedure to maintain this for ever.
Now let’s discuss on The Various uses of this waste decomposer:
1. SEED TREATMENT: Simply spray or sprinkle waste decomposer solution uniformly over the seeds. You can even soak the seeds if you are doing this on a large scale. This works on all types of seeds. Keep the treated seeds in shade for about 30 minutes and then plant the seeds. Seed treatment with waste decomposer shows 98% early and uniform germination and provides protection against various seed borne diseases and also plays a role in strengthening the plants defence mechanisms.
2. FERTILIZER AND SOIL TREATMENT: Watering with waste decomposer solution significantly changes the biological as well as the physical properties of all type of soil within 21 days of application and it also helps to generate earthworm population in the soil which is so beneficial. You can dilute the waste decomposer in 1:2 ratio with water, that is one part waste decomposer to 2 parts water and water your plants once every 15 days or even once in a month. This is also proven to control many soil borne diseases in crops.
3. FOLIAR SPRAY: It acts as a potent bio pesticide when sprayed on plants.You need to dilute it to 1:3 ration to use it as a foliar spray. This helps control a variety of fungal, bacterial and viral diseases in crops when sprayed once in 10 days for 4 times in the growth cycle of a crop.
4. COMPOSTING: This is a compost accelerator and your compost will be ready within 30 to 40 days depending on the type of waste used for composting. For conventional pile method of composting, you need to sprinkle waste decomposer for every layer of compost and maintain the basics of aerobic composting like maintaining moisture, aeration by turning the compost pile and stuff like that. You can check my 4 episode series on composting from a link in description below. If you do composting at home in small scale, you can sprinkle waste decomposer solution once or twice and get that compost ready within 30 to 40 days.
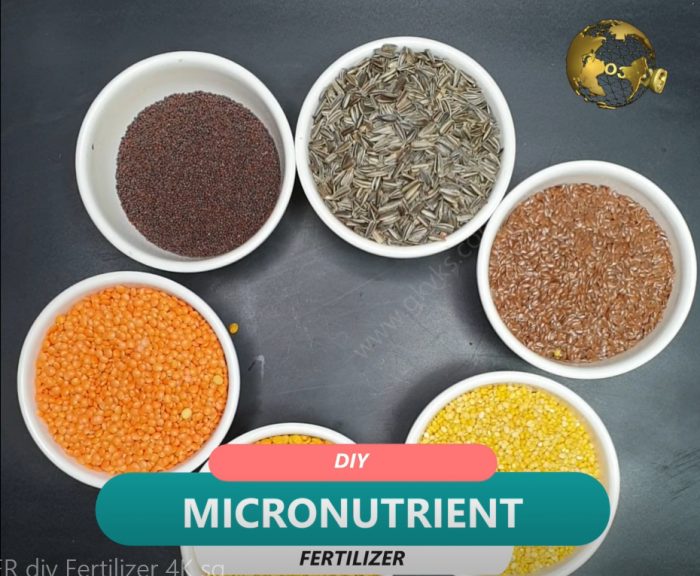
Now, Let’s prepare the DIY micronutrient rich organic fertilizer using this waste decomposer, as recommended by the national centre for organic farming.
The basic principle of making this micro nutrient fertilizer is: Adding foods that are rich in proteins, vitamins and major and minor elements including Nitrogen, phosphorous, potassium, iron, copper, zinc, calcium, magnesium, boron and so on. Adding these into the waste decomposer results in break down of these elements into soluble forms by the microorganisms, enzymes and organic acids present in waste decomposer.
Well, Now let’s prepare this fertilizer and learn how to use this for your plants.
First of all – Things You Need: We will prepare this in around 25 litres of waste decomposer solution. Do not worry too much on the quantity and over dosage. This is not a problem with organic fertilizers.
1. Atleast 3 varieties of Oil seeds like 100 gms each of sunflower seeds, mustard seeds, flax seeds, or any other like soya, castor oil seeds, nigella seeds or any 3 varieties.
2. 3 varieties of Pulses or lentils of your choice like Red Lentil (Masoor dal), Yellow or Green split gram (Moong dal), Bengal gram (Chana dal), You can also take Red gram (Arhar dal), Black gram (urad dal) and so on.
3. Some 4 to 5 old iron nails or any small pieces of junk iron stuff.
4. Some copper source – like some old copper wires extracted from wires lying in your junk yard or any old copper vessel if you have one.
5. Some Zinc source – like one or two dry cells which are made up of zinc container.
Firstly, powder these seeds and pulses, this helps in faster decomposition. Add these into 25 litres of waste decomposer. Now add iron nails, then copper wires, then the zinc source. Mix it well and leave it for 10 days. Do not forget to stir this once daily.
After 10 days, your potent nutrient rich organic fertilizer is ready. So, How do we use this. You can use it in 2 ways. One, as a liquid fertilizer to water your plants and secondly as a foliar spray to instantly feed your plants through leaves stomata.
For watering your plants, you need to dilute this to 1:5. That is one part of this liquid to 5 parts of water. Where as for foliar feed, you can dilute this to 1:10 and spray thoroughly on your plants including the undersides of your leaves, because the stomata or the leaf openings are more concentrated at the bottom side of leaves.
Before you throw away banana peels to trash, think twice! Banana peel is one of the highest organic sources of potassium. Potassium helps your plants by strengthening the stems and protects them from disease. It also helps the flowering process and is thought to be able to improve the quality of the fruit of your plants. Also in addition to potassium, it also contains phosphorous and calcium which are equally important for plants.
Let’s start the recipe for making banana peel fertilizer and then banana tea.
For Making Banana Peel Fertilizer:
- Collect some banana peels, preferably from ripe bananas.
- Next step is to dry these peels. You can dry whole peels or cut them into pieces for faster drying. You can sun dry them for atleast 2 days so that they become crisp and should break easily when you crush them. You can also dry them in microwave oven if you do not have adequate sunlight.
- Then once they are crispy and black, crush them to make a powder. That is it!
- This powder is our banana peel fertilizer powder.
- You can add one table spoon every 15 days around your plant and then water your plant. Preferably raking the soil before application is recommended. You should see some positive results within 3 months.
Then For Making Banana Peel Tea:
- You can take some banana peels and cut them into small pieces of any size.
- Add them into a bowl or any container.
- Add water to the container to soak these peels for atleast 3 days. All the nutrients from banana peel, mainly potassium is released into this water.
- You can discard the banana peels and use this banana tea in 1:5 dilution to water your plants.
Adding or burying raw banana peels directly into the soil around plants is not recommended, because its not only attracts insects and maggots but also it takes a long time to decompose and in its process of decomposition, it might even steal away nitrogen from the soil and your plant might develop nitrogen deficiency.
Before I list out the remedies that really work, we will try to know the reasons or causes of this Blossom end rot disease in tomatoes.
The main
reason for this problem is lack of calcium:
Either calcium deficient soil or poor absorption of calcium from the
soil or Soil PH issues not allowing the absorption of nutrients.
So How do you treat this BER? If you think the soil is deficient in calcium, you might just think of supplementing this calcium by crushed or powdered eggshells or even calcium tablets or similar stuff. This type of application should be used for prevention of the disease and not for the treatment as this cannot happen instantly, because the plant simply cannot suck calcium from the soil as soon as you add it.
So, How to Stop this or Prevent this. Remember Always Prevention is better than cure. I conducted one simple experiment. I used my magic foliar spray solution on all my tomato plants once every 15 days and I kept one tomato plant as a control and did not spray anything on this plant. And this plant as you can see developed blossom end rot in tomatoes. The plants who got their calcium and other nutrients through foliar spray never developed this problem. I will let you know the recipe for this magic foliar spray solution now.
Also other points to remember to prevent this problem are:
Sowing seeds on right time. Just at the end of Spring is the perfect time to sow tomato seeds. Thats in feb or march first week.
Well now you can checkout the recipe for the foliar spray liquid to treat tomato blossom end rot problem. I will quickly list out the ingredients one by one and quickly explain the benefit of each of these components.
1. Water: Nothing to explain about this universal solvent. We will formulate this recipe for 1 liter of water.
2. Milk: You can use skimmed milk or if available Raw milk is best. You can even use spoilt milk, butter milk or stuff like that. Use it with lower than 20 percent dilution in water that is 1:5 dilution. So you can add about 100 ml or 200 ml milk to our universal solvent. Milk is not only a source of calcium, but also an antifungal for treatment of powdery mildew and blossom end rot disease on tomato and other vegetable plants. It also kills many plant viruses like tobacco mosaic virus. In place if milk you can add 1 liter of a special water. Yes that’s special calcium rich water for plants. It s nothing but the left over water after you hard boil few eggs. The egg shells release a lot of calcium into this water during boiling.
3. Epsom Salt that’s magnesium sulfate which is a greatest source of magnesium and sulfur. This is easily available at a gardening store or at your local pharmacist and even online. So the dosage is max 5 gms or little lesser than a teaspoon per 1 liter of water.
4. Then the Most important ingredient for adding the major NPK elements into the foliar spray is COMPOST TEA. So, how do you make compost tea? Its really simple. Just Add a handful of decomposed manure or compost like cowdung powder or vermicompost per liter of water. You can make your own quantity of 2 liters or 5 liters depending on your garden size. Allow this to brew for atleast 1 week. Make sure you stir this atleast once every 24 hours to oxygenate this mix till 1 week. Then strain out the liquid using a cloth and use this liquid. I shall make a detailed video some other time on how to use some simple gadgets like an aquarium air pump to quickly make your compost tea.
Well, For now, Once the compost tea is ready, you should dilute this like 1:5 in water and then add about 1 liter to the above solution. Normally if you are using only the compost tea as a foliar spray, you need to use 1:10 dilution. But here we are making a 2.1 liter solution in total. I Hope you got my point!
That’s it, mix it thoroughly and load the spray bottle or use your electric sprayer or whatever and foliar feed your plants. Spray very early in the morning or late in the evening because leaf stomatas are well opened at this period so that absorption happens at its best.
Well, before I show you the actual recipe or the Formula for the making of our so called magic solution, you must know some Basic concepts. Please do not skip these 5 points am gonna discuss now. Will try to make it as short and as simple as possible, specially for beginners.
1. What do you mean by foliar Spray? Foliage means leaves! So the term foliar spray says it all, that is Spraying a liquid fertilizer on your plants foliage which aids in absorption of certain essential elements like calcium, magnesium through their stomata. Stomata are pores found in the epidermis of leaves which help in nutrient absorption and also gas exchange.
2. Calcium and Its importance: Calcium is the most important component of a plants cell wall. Hence for cell division and growth its indispensable, especially in rapid growers like tomatoes. So we will keep this point in mind and add calcium into our mix.
3. Magnesium and Its importance: Did you know Magnesium is the central atom in between four nitrogen atoms in the chlorophyll molecule. For beginners, Chlorophyll is the pigment present in leaves which is essential for photosynthesis – that’s plant food production. So we will keep this point in mind and add magnesium into our mix using our famous organic Epsom salt.
4. Soil PH concept: We have discussed in detail about the importance of soil ph in nutrient absorption in my video titled Ideal Soil PH for plants. You can check that HERE. Well! when it comes to foliar spray of fertilizer solution, its completely independent of the soil PH, because nutrients are absorbed through leaves.
- And last concept: Many Experts recommend applying egg shells andcalcium tablets to soil and some evenmake a smoothie juice or paste using all kitchen waste like banana peels, fruit peels and what not. This in perhaps unscientific according to me to directly apply to your plants. I don’t know! If you have any scientific explanation to this, please do write in the comment box. What I feel is why not utilize this idea of making this smoothie and keeping a dedicated heavy duty blender or mixer for this purpose for faster composting. Yes! if you are adding this paste to your compost bin and feeding your earth worms, this can accelerate composting process.
So you can utilize this concept of foliar feeding if your plants are not performing well despite all your efforts, care, fertilizing, watering promptly and what not! Many viewers keep asking the same question. So why not make it a habit of alternating your feeds – that’s fertilizing your plants once in 15 days with foliar spray to feed your plants. Because this idea is independent of soil PH value.
Now The Formula or the recipe of this Magic Fertilizer liquid.
I will quickly list out the ingredients one by one and quickly explain the benefit of each of these components.
1. Water: Nothing to explain about this universal solvent. We will formulate this recipe for 1 liter of water.
2. Milk: You can use skimmed milk or if available Raw milk is best. You can even use spoilt milk, butter milk or stuff like that. Use it with lower than 20 percent dilution in water that is 1:5 dilution. So you can add about 100 ml or 200 ml milk to our universal solvent. Milk is not only a source of calcium, but also an antifungal for treatment of powdery mildew and blossom end rot disease on tomato and other vegetable plants. It also kills many plant viruses like tobacco mosaic virus. In place if milk you can add 1 liter of a special water. Yes that’s special calcium rich water for plants. It s nothing but the left over water after you hard boil few eggs. The egg shells release a lot of calcium into this water during boiling.
3. Epsom Salt that’s magnesium sulfate which is a greatest source of magnesium and sulfur. This is easily available at a gardening store or at your local pharmacist and even online. So the dosage is max 5 gms or little lesser than a teaspoon per 1 liter of water.
4. Then the Most important ingredient for adding the major NPK elements into the foliar spray is COMPOST TEA. So, how do you make compost tea? Its really simple. Just Add a handful of decomposed manure or compost like cowdung powder or vermicompost per liter of water. You can make your own quantity of 2 liters or 5 liters depending on your garden size. Allow this to brew for atleast 1 week. Make sure you stir this atleast once every 24 hours to oxygenate this mix till 1 week. Then strain out the liquid using a cloth and use this liquid. I shall make a detailed video some other time on how to use some simple gadgets like an aquarium air pump to quickly make your compost tea.
Well, For now, Once the compost tea is ready, you should dilute this like 1:5 in water and then add about 1 liter to the above solution. Normally if you are using only the compost tea as a foliar spray, you need to use 1:10 dilution. But here we are making a 2.1 liter solution in total. I Hope you got my point!
That’s it, mix it thoroughly and load the spray bottle or use your electric sprayer or whatever and foliar feed your plants. Spray very early in the morning or late in the evening because leaf stomatas are well opened at this period so that absorption happens at its best.