Many of my viewers ask a very important question – what is the correct soil ph for plants and how do I test this and how do I change it? The answer to this question is not so simple, but I shall try to make it simple and tell you what is the perfect or the ideal Soil PH for most plants and also few natural ways to soil amendment that can make your soil PH to the desired level.
Sunlight, water, nutrients—these are the basic factors for plants to thrive. But there is another crucial factor that determines whether your plants thrive or struggle to grow? It’s a soil property called ph. An ideal range of soil PH is indispensable for proper nutrient absorption by the roots.
What is PH? PH is a just a number or a value ranging from 0 to 14. 7 – that’s the middle of the scale is considered Neutral PH and anything below 7 is called Acidic or Sour in layman’s term and Anything above 7 is called Alkaline or Sweet.
So, what is the Perfect or the Ideal or the desired Soil PH for most plants? How will I measure this and How will I adjust the soil ph to this desired level?
This Value of Ideal soil pH could make a huge difference and really an important step for those looking to grow bountiful gardens. Because most of the nutrient absorption at root level happens at this ideal ph level. You may be adding a lot of fertilizers, supplements like micronutrient powders and stuff like that regularly to your plant, but if it’s not producing good results and you still have anaemic plants, then you should suspect something wrong with the soil PH, either it’s not favourable to your plant or the plant is unable to adapt to the ph changes.
For most plants, the ideal ph has to be SLIGHTLY ACIDIC, like around 6.5. but this doesn’t mean that plants cannot grow outside this range. Places with lots of vegetation and rain, such as forests, tend to produce acidic soils whereas Dry and arid zones like deserts are more likely to be alkaline. We will learn about acid loving plants and alkaline soil preferring plants later in this episode.
How do I test Soil PH at home?
Let me demonstrate 3 easy ways to test your soil PH at home. This soil testing is actually fun and you can share this with your kids to teach them simple science or chemistry.
The First Method is using Litmus Paper. This is simple school chemistry. And this is not expensive. You can buy this simple litmus paper kit at any stationary store or even online. This is just litmus paper with color chart showing a PH value for each color that matches with your test result. PH of 7 is Neutral, PH below 7 is acidic and above 7 is alkaline. The most important thing is to use distilled water for all these tests you conduct, because the PH of distilled water is neutral.
So, How to Test Soil Using Litmus Paper Method?
Collect one tablespoon of soil from your garden either from container or from ground. You can take the soil from a little deeper like 2 inches below the soil.
- Add equal amount of distilled water – that’s 1:1 ratio. We are taking distilled water because it has neutral PH of 7. You can also take water from your water purifier, test it with litmus paper first.
- So, for 1 table spoon of soil you would add 1 tablespoon of water.
- Now nicely mix this by Stirring for few seconds.
- Let it sit for 10 minutes.
- Start stirring the sample again and now dip the litmus paper to take your measurement. Wait for few minutes for color change and then match it with the color coding chart that came along with your litmus paper kit.
Purchase Litmus Paper kit: https://amzn.to/3jKY4ec
The Second Method is a rough and easy DIY method you can try at home to know whether your soil is acidic or alkaline.
- Take a small amount of soil from your garden or container in a small glass.
- Now Pour some vinegar to this soil sample. If it fizzes and bubbles you have an alkaline soil because the alkaline content in soil reacts with acid like vinegar which is chemically acetic acid.
- Take another soil sample from your garden. Here for demonstration purpose, I know that this is an acidic soil. Now Add baking soda one or two teaspoons and mix it with soil.
- Then wet the soil baking soda mix with distilled water. If it fizzes and bubbles your soil is acidic, because the acidic content in soil reacts with a base or alkaline stuff like baking soda. That’s it!
The Third Method is using Soil PH Testers – There are two types of soil ph meters. Manual type or digital soil PH testers. Which one of these to choose? And These are easy to use portable gadgets with probes to insert into the soil. These give instant readings. These manual type of probe testers are not so reliable but they are inexpensive and handy. But These digital testers are more accurate but little expensive. These are actually 3 in one or 4 in one meters which also test Temperature, Light and Moisture along with PH. These factors are also important for gardening. We will discuss in detail about these meters in some other episode and how to make use of these for max benefit in gardening.
PURCHASE LINKS:
Manual Ph meter:
Digital Ph Tester:
How do I adjust my soil PH if its too Alkaline or even neutral to achieve the ideal PH around 6.5.
- Rain Water: If it’s a rainy season and if soil is neutral or alkaline, you don’t have to do anything. Just check the soil PH after rains. Rain makes the soil acidic naturally.
- Adding Compost to your soil: This is the basic requirement. At least 20 to 30 percent of your soil or potting mix should have a well decomposed manure like cowdung or horse dung or leaf compost or even vermicompost. If you add compost to your soil now, you need to wait for at least a month or two to see the ph change effect because this is a gradual process.
- Vinegar: White Vinegar about 1 or 2 teaspoons per litre or water can be used to lower the soil ph drop. Watering with this solution thoroughly once a month or even once in 15 days will help.
- Coffee ground or even Tea waste: The tannic acid present in this will lower the ph of your soil slightly. You can even add used tea or coffee waste to your plants to lower ph.
- Lemon Juice: Some even recommend adding 1 -2 teaspoons of lemon juice per liter of water and watering with this solution once in a month.
- Shredded Pine barks or any evergreen barks if available can be used to mulch on the top soil to make your soil acidic.
- Sphagnum Peat Moss is another remedy to lower soil ph.
- Alum : chemically called Potassium Aluminum Sulfate is a compound commonly used in water purification. This is available in powder or in crystal form. You can powder the crystals and use about 5 – 10 gms per liter of water and water your plants monthly once. You can watch a detailed episode on Alum and its uses in Gardening from a link in description below.
- Chemical or commercial products containing elemental sulfur can also be used to lower soil ph.
- And Lastly, If your soil is too acidic and you may want to raise the soil ph a bit higher, then you can use wood ash as a natural remedy for this job. Wood ash is a cheap remedy to make your soil alkaline.
Purchase Links: Alum: https://amzn.to/3JNvHGN
Wood Ash: https://amzn.to/3JNjPV6
Before we start, I always start with the word “Organic Gardening” which uses natural and organic sources of fertilizers and pesticides. Please avoid the use of chemical fertilizers and pesticides to protect our mother earth from the hazards of chemicals. Now, Let’s list out the 10 organic secrets and tips to boost flowering in Hibiscus bush.
10. REPOTTING: Most of us think repotting is the first and foremost task as soon as you bring your plant home from a nursery or a garden store. No! This is not true. Do not repot immediately. Allow your plant to settle down for at least one week to its new place and then consider repotting. During repotting, you need to mix some important ingredients into the potting mix like for a 12-inch pot, roughly about 1 tablespoon of steamed bone meal powder which is a great source of phosphorous. Phosphorous strengthens the root system and a strong root system is indispensable for flowering and plant growth. The vegan alternative to bone meal is Organic rock phosphate. Optionally you can also mix the Mycorrhizae fungi – the beneficial fungi or even pseudomonas and Trichoderma powder. You can check my detailed posts on these topics from HERE.
9. CONTAINER SIZE: A simple concept to remember while choosing your pot size is: if you choose a deeper container, the plant will start focussing more on root development due to increased soil space and less on flower production. Though this may be useful in the long run. But to get faster results and boost flowering, the best one is a container that is wider than the usual nursery pot, but still not too deep. Like for instance, if your plant came in a 6-inch container, go for a 8 inch container. If you choose this method, you might need to repot it every year in a graded manner like increasing 2 inches every time you repot.
8. LOCATION: Keep your plants away from the traffic and pollution. Dust accumulating on the leaves can impair photosynthesis – that’s plant food production, which in turn reduces plant growth and flowering. It can also reduce the flower size. So, you might want to remember this tip to get big sized flowers. The solution to this problem if you have no option to shift the plant to a better location is – misting the plant with water and cleaning the leaves with a soft cloth. Or if you have lots of plants, then using your watering hose in shower mode and gently pressure wash your plants while watering.
7. SUNLIGHT: Place your plant in a location where you get adequate direct sunlight. Hibisucs needs at least 6 hours to 8 hours DIRECT SUNLIGHT for proper flowering. Without direct sun, you cannot expect hibiscus to flower. If it’s too hot like in summer season or to protect it from noon sunlight which can sometimes cause leaf burning and drying, you can install a 50% green shade net in summer season.
6. WATERING: If you are growing in containers, daily watering is must specially in summer season. Here you don’t need to check using moisture meter or finger dip method. Just daily watering and deep watering. If it’s winter season, it may need less frequent watering depending on the zone you live in. One most important thing to check is the drainage hole of your container. Check for its patency. Make sure water flows out of it after you thoroughly water your plant. Water stagnation can result in root rot and death of your plant. Do not worry about over watering if you have a patent drainage hole and also if you are using a well-draining soil mix. We will discuss about the potting mix shortly.
5. PEST CONTROL: Controlling pests is very important step to keep the plant healthy and blooming. Examine the plant closely for pests and insects including underside of the leaves. Common pests like whiteflies, aphids, mealybugs can be easily eliminated using organic neem oil + liquid soap spray weekly once. Depending on the ppm concentration of your neem oil brand, you add 5 to 10 ml of neem oil per litre of water and few drops of liquid soap. Shake well and spray this once every week to treat pests and once every 15 days as a preventive measure.
4. RAKING OR TILLING THE SOIL: This is just loosening your top soil using a raking or tilling tool. This is an important step everyone must follow before applying any fertilizer or manure to your plant. Raking or tilling the soil is recommended once every 15 days, which improves soil aeration and has many benefits. Make it a habit to rake the soil and then apply your fertilizer every 15 days.
3. POTTING SOIL: Here you should remember few important factors like:
a) Soil PH b) Thing to mix in Potting soil to get more flowers c) Keeping the soil well-draining. The First factor is PH. Hibiscus prefers a slightly acidic soil like around 6.0 +/-0.5. If you have a PH testing meter, you can alter the soil ph to acidic by using Alum powder hack. Even if you do not have this meter and your plant is not performing well, you can roughly add about 5 gms of alum powder in one litre of water once every 15 days to maintain this acidic level, which is very important for absorption of nutrients in the soil. The other alternative to Alum is to use 1 – 2 teaspoon of white vinegar per litre of water weekly once to make your soil acidic.
Now the potting mix recipe. To get adequate flowering, you can follow a simple formula: 30% Garden Soil, 30% Compost like cow dung or vermicompost and 30% Cocopeat or Peat moss. 10 percent additional stuff like bone meal powder, neem cake powder, mycorrhizae, Trichoderma, etc as discussed earlier.
2. FERTILIZER: In this video, I will be talking only about organic fertilizers and not chemicals like NPK or DAP.
You add a handful of decomposed cowdung or horsedung or even goat dung or vermicompost on the top layer of the soil once every 15 days after nicely raking or tilling the top soil. This should be the minimum fertilizer use and frequency to get big sized flowers as well as increase flowering. If you want to get still better results, You can also use compost tea sprays or even mustard cake tea sprays or watering and other foliar feeds once in a while like once in month. You can also prepare a Cocktail Fertilizer Powder containing most of the useful organic fertilizers available. You can check a detailed post on how to prepare this mixed fertilizer powder.
1. PRUNING: Yes this is another important step which many of us neglect. Some newbie gardeners actually hesitate to trim the plants. But this should not be the case. Pruning or trimming the plant branches encourages the formation of more branches and hence more flowering. You can soft prune or trim the plant all round the year. And you can do hard pruning once in a year. You can check detailed post Pruning Tutorial – on when to prune and how to prune and what pruning tools you need. You also need to perform deadheading of the flowers from time to time. Dead heading means removing the dead and dried flower along with its twig or branch and this is another important step for maintaining blooms as this will divert the energy to plant growth and more flowering rather than seed formation.
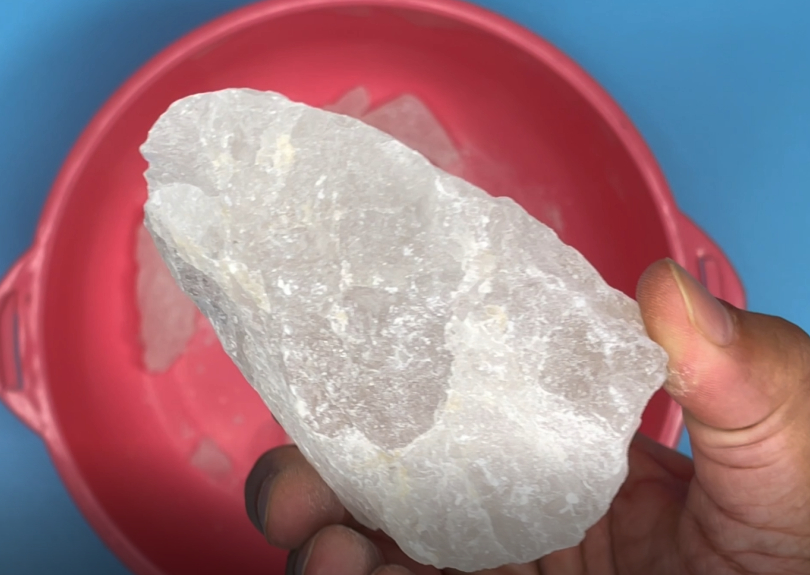
Alum or Potash Alum is a hydrated double salt available in crystal form or in powdered form or even in liquid form. This can be white alum or red alum, but the compound is the same. It’s chemical name is Potassium Aluminium Sulphate. This compound is eco-friendly and has no hazardous effects on plant, animal, or human ecosystems. It is easily available at any grocery stores or supermarkets and even in some garden stores. This is also available in various shapes like these blocks. These are actually meant to use as an after shave disinfectant.
Food-grade alum is approved by the FDA for household use and also medical use. But how is alum useful in gardening and what are the benefits of Alum in garden or on plants? Let’s list out these five best uses of alum for plants one by one.
5. ALUM PESTICIDE: Alum acts on pests by two modes: one by infiltrating into the body surface of the pest and second by ingestion by the pest. Alum pesticide in 10 to 20% concentration is found to be very effective on many pests including aphids, whiteflies and mealy bugs which are the most common pests in our gardens. It’s also effective in vegetable gardening to kill cabbage worms, cut worms, and other bugs. This pesticide can be used as an alternative to neem oil. Neem oil is not available in many parts of the world.
How to make Alum pesticide?
We will show you the recipe for 1 litre of water in 3 quick and simple steps.
Step 1: Take 100 to 200 grams of alum. For home gardening you can use 100 gms of alum but to kill larger pests like cabbage worms or cutworms, you can take 200 gms.
Crush the larger crystals into smaller ones or use Alum Powder.
Step 2: Take 1 litre of clean water in a spray can or any container and add 100 to 200 gms of alum as discussed, depending on the pest type and intensity.
Step 3: Now add a surfactant like liquid soap or glycerine like about 5 to 10 ml.
You can now load into your spray bottle, Shake it well and spray it on the affected plants. Make sure you do a patch test on a leaf first to test the potency, before spraying on the entire plant.
4. TO REPEL INSECTS: Alum keep slugs and snails away and also certain other insects like cockroaches. Just sprinkle some alum powder or coarse crystalline powder over the affected areas.
3. MOSQUITO CONTROL: It’s an effective larvicide and kills mosquito larvae in stagnant waters in your home and garden. Just sprinkle alum powder over these stagnant waters and you are done.
2. SOIL AMMENDMENT: The first thing you must know is “Alum is NOT a fertilizer”. First and foremost use of alum in garden is to alter the soil PH.
For beginners: Soil PH plays a very important in plant growth and a balanced soil PH is really important for absorption of nutrients by the roots. A pH level of 7.0 is neutral, a pH below 7.0 is acidic, and a pH above 7.0 is alkaline. Also People living in Dry climates often have an alkaline soil, while climates with higher rainfall typically have acidic soil. Generally, most plants do well with soil pH between 6.0 and 6.5 – i.e, a slightly acidic PH. However, there are some plants which love a more acidic soil like hydrangeas, grapes, strawberries, blueberries, and even our rose and hibiscus trees. These are called acid loving plants.
But, before adding alum to soil, you first need to check your soil PH. A simple PH testing tool like this is really useful. You can also purchase a digital soil PH testing tool like this. If you do not have soil PH meter, you can roughly test your soil PH – like whether alkaline or acidic, using baking soda and vinegar hack. You need to add alum only if your soil is alkaline.
If you soil is alkaline or neutral you need to add 1 teaspoon of alum powder per litre of water or 1 tablespoon of alum per gallon of water. Mix it well and then water this to your plant thoroughly and check soil PH after 10 to 15 days. Repeat again if necessary.
1. INCREASE FLOWERING: Sometimes, your plant may not be flowering at all, even with proper sunlight, watering and fertilizing. The fault may lie in improper soil PH. Like acid loving plants including rose and hibiscus need a soil PH of 5.5 to 6.0 for proper absorption of nutrients. In such cases, you need to alter the soil PH as discussed in point number 4. This will certainly boost flowering in these plants.
When plants and animals die, their molecules become available in soil for use by other organisms like bacteria and fungi. This product is the final break-down constituents of the natural decay or decomposition of plant and animal materials through the biological activities of micro-organisms. This product is commercially available in powdered form as well as liquid form for horticultural use.
How does this work on plants? It chelates the complex nutrient compounds in the soil to convert them to simple forms suitable for plant absorption. This reduces the fertilizer usage by upto 30% and increases flowering and fruiting by up to 70%. So, this is not a fertilizer, but a bio-catalyst and bio-stimulant for the plant. This is an excellent natural and organic way to provide plants and soil with a concentrated dose of essential nutrients, amino acids, vitamins and trace elements.
Before I reveal you the name of this product, let’s quickly know some of the functions or benefits of this powder.
- Improves Soil Structure by providing more space for root growth and beneficial microbial activity. They bind to soil molecules and improve soil structure, and this is especially noticeable in high-clay and compacted soils.
- Reduces Soil Toxins: They don’t just make nutrients easily available for absorption, but also chelate harmful toxins in the soil, preventing them from entering the plant.
- Increases Water Retention in soil by reducing water evaporation by upto 30%.
- Improved Microbial Activity in the soil and chelation of complex nutrient forms to simple forms for better uptake by the roots makes the plant grow healthier with little fertilizer application and increases flowering and fruiting.
Having said that, let’s know what this is called and how to use it properly for best results.
This is called Humus which consists of three components–humic acids, fulvic acids, and humin.
This is available as powdered form and also liquid form. The Liquid is a concentrated humic acid and needs to be diluted with water before applying on plants. Humic acid is easily available at your local garden store or you can even order online.
PURCHASE LINKS:
Now, Let’s learn how to use it. This is particularly beneficial if your plant has nutritional deficiencies due to poor absorption of nutrients from the soil, which manifests as various leaf yellowing patterns.
So, How to use this? Three Methods to use this:
- Soil Application: The Dosage is 1 teaspoon per litre of water. Mix it well and water 1 cup, that’s about 250 ml of it per plant. If you are using liquid humic acid, add 3 ml of it per litre of water. You should see results within 1 – 2 weeks.
- Foliar Spray: You can add one teaspoon of this per gallon of water and spray on the plants. 1 gallon = 3.78 litres. Please check the usage instructions on the product label and use accordingly. If you are using liquid humic acid, add 1 ml per litre of water for foliar spray.
- Compost Tea: You can add 1 teaspoon per gallon to your compost tea while brewing. This will certainly help in better absorption of nutrients. For beginners, Compost tea is made by adding compost like decomposed cowdung or vermicompost into water and allowing it to brew for 5 to 7 days and then you dilute this further like in 1:10 ratio and water your plants.
The three primary nutrients essential for plants are the NPK – Nitrogen, Phosphorous and Potassium. Nitrogen (N) is largely responsible for the growth of leaves on the plant. Phosphorus (P) is largely responsible for root growth and flower and fruit development. Potassium (K) is a nutrient that helps regulate important physiological processes or the functional processes in a plant.
Having said that, now let’s look into what is Rock Phosphate and the difference between Rock Phosphate fertilizer and Bone meal fertilizer.
Rock phosphate, also called phosphorite, is a natural mineral fertilizer obtained by mining from sedimentary clay deposits and rocks that contain phosphorus. Rock phosphate is a long-standing or slow release best organic fertilizer for adding phosphorus to your vegetable garden.
Both Rock Phosphate and Bone Meal are good sources of organic phosphorous for home gardeners. Bone meal is mainly used as a short term phosphorous supply and rock phosphate as a long term phosphorous supply, as it’s slower to break down plus it’s a non leachable source of phosphorous and calcium.
Now let’s look into 5 important benefits of using organic rock phosphate in gardening and How much and how to use it:
- STRONG ROOT SYSTEM: Rock phosphate promotes the development of strong roots throughout the growing stage of a plant and makes your plant healthy and high yielding by accelerating plant maturity.
- RESISTANCE TO PEST ATTACKS: a strong root system and a healthier plant means a plant highly resistant to pest attacks. Applying phosphorous at early growth stage of a plant will confer a great immune system and help resist pests.
- FLOWERING PLANTS: Any flowering perennial plant like rose and hibiscus love rock phosphate as it helps them develop more buds and larger sized flowers.
- VEGETABLES AND FRUITS: Strong roots, healthy immune plant and more buds means more vegetables and fruits. One or two applications of rock phosphate early in the growth stage is important to achieve this.
- Improves Soil Structure and water holding capacity. Rock phosphate is in Powdered form and hence can be mixed with soil and proves very beneficial while you prepare the potting soil before planting.
- EARTHWORMS and Beneficial microbes in soil are not harmed and infact they love it.
- DOSAGE and How to Apply: Best way is to mix the rock phosphate powder in your potting mix along with other stuff like compost, cocopeat or peat moss and others. This is because for proper phosphorous uptake by plants, the soil PH has to be slightly acidic and and adding compost like decomposed cowdung or vermicompost will help achieve this task. You can watch a detailed video on making the best potting soil here.
Well, Now, How to use Rock phosphate in potted plants and plants grown in ground or raised beds.
First of all loosen the soil around the plant by raking or tilling the top layer. For Potted Plants start with 1 teaspoon per container and then add 1 tablespoon after 15 days. For ground plants or raised beds start with 1 tablespoon per plant, preferably in its growing stage and then two tables spoons after 15 days. And this one time application will help your plant throughout its stages of growth till flowering and fruiting.
Let’s look into the Topics Covered in this episode:
- Plant Purchase: Seed grown vs Cuttings grown vs Grafted Trees.
- Repotting: Should I repot immediately after purchase?
- 10 Golden Rules to Follow while repotting a plant
- Common Care Tips for Growing Fruit Trees.
Let’s begin:
- Plant
Purchase:
I am sure most of us might have this question in mind: Growing from Seeds vs
Growing from Branch Cuttings or Choosing to Purchase a Grafted tree. Which one
do you thing you should opt for?
First of all, growing from seeds is a great fun thing to do and we all have done it many times for gardening fun and experimenting. But the major disadvantage of seed grown tree is they are not “true to seed” – meaning they may not produce identical fruit tree and more over it might take ages for the seed grown trees to products fruits, but of course there are some exceptions.
Secondly, Plants grown from cuttings including the air layering method may produce the genetic clones of the parent tree. Fruit trees such as figs, pomegranates, mulberries and many others are generally grown by this method. But the major problem with this method is they do not have enough roots developed to support fruit production and more over there are only fibrous roots and no tap roots which are important for fruit trees for anchorage. Whereas Seed produced plants have a well developed tap root system and this concept is used in Grafting. The ‘root stock’ which is the lower portion of the plant with strong root system and the ‘scion’ which is the branch from selected delicious fruit tree which is grafted on to the root stock.
Having Said that, its time to choose which trees to purchase for your container gardening. It’s obvious that grafted trees, specially dwarf varieties are the best one to grow in containers.
- REPOTTING: Whether Purchased online or offline from a local nursery, people often have a misconception that immediately repotting a newly purchased plant into a larger container and a nutrient rich potting soil will make your plant grow like crazy. This is not always true.
Now let’s discuss some Very important points and concepts, that you must keep in mind if you want to keep your newly purchased plant healthy and avoid the so called repotting or transplant shock.
To answer this question, let us ask 2 QUESTIONS:
- When Do I repot a New Plant Purchased offline, that’s from a Local Nursery or Garden Store?
- When Do I repot a Plant Purchased Online? Like from nurserylive.com or amazon
Now, lets quickly look into the conceptual answers to these queries.
- If your plant just came home from a local garden centre or nursery, DO NOT REPOT IMMEDIATELY. Let it adjust to its new environment for few days or atleast a week before repotting it. This is because the Plants are already in shock at their new residence until they get used to new factors like light, temperature, and humidity conditions.
- Then in second scenario, that is when you purchase a plant online. Repotting immediately is the best solution in most cases. Because, it is very much likely that the plants would have travelled hundreds or thousands of miles and many days without any water or moisture before reaching its final destination. The plant will be going through a recovery period and an acclimation period during these days of transport in whatever medium the seller packs them in. So, Why let the plant re-acclimate twice in this situation.
- The 10 Golden Rules of Repotting:
Let’s quickly list them one by one:
- Water the plant the day before you plan to repot.
- Perform Repotting in the evening hours to prevent shock to the plant during sunlight that is the day time which is the active period for photosynthesis. Let it get overnight period of rest and recovery.
- To Remove the Root Ball, Gently Tap the rim of the pot to a hard surface like a table or a counter. This is to loosen the root ball instead of pulling it with force which can damage the roots or the stem. If the root ball resists to come out, run a knife between the pot and the root ball to loosen the root ball.
- Inspect the root ball for things like: any root worms or maggots, root disease and if they are root bound to decide whether you want to repot in a larger container or perform root pruning.
- Choosing the Right Container: For fruit and Vegetable plants especially if you are growing on terrace, choose fabric grow bags as your first preference. This is because they are not only light but also follow the principles of AIR PRUNING and can grow into healthy trees using this principle.
Then It’s also very important to choose a pot that is of appropriate size for the plant. Like, You should never pot a 6 inch pot plant into a 14 inch or a very large pot. Go Step by Step, Choose one or two steps higher, like 6 inch pot, you can plant in 8 inch or 10 inch pot and so on.
- Drainage Holes: This is probably the most important factor you should consider. If you do not make enough drainage holes at the bottom of the pot, your plant will stand in water and lead to root rot and death of the plant.
- Choosing the Right soil: . As a general rule use a well draining nutrient rich soil with atleast 30 percent compost like vermicompost or decomposed cowdung. To make it well draining, you might have to add cocopeat or peatmoss to garden soil in proper proportions. Make sure you also add stuff like bone meal or soya bean meal for inducing flowering and fruiting. Check the best Potting Mix recipe or formula from my post.
- Partially fill the container with potting mix and then place the root ball exactly in the center of the pot. Then add additional soil to cover the empty space. Make sure the surface of that root ball is below the rim so you can cover it adequately with potting soil or compost and also this good space for properly watering your plant.
- Gently tap the pot on a hard surface to remove air pockets and to level the soil from within.
- Finally After Repotting, water the plant thoroughly and this remove the left over air pockets and stuff like that. Then to counter the Repotting or Transplant Shock, you can follow these simple steps: Water the plant with Epsom salt solution weekly once for a about a month. The dosage is 1 teaspoon Epsom salt per litre of water. Finally keep the plant in indirect sunlight or under a green shade net for atleast a week, before shifting to full sunlight.
Happy Gardening!
Any gardener or farmer desires for faster, better and bigger plants with higher yields. The information gained from this experiment, may be used to help gardeners achieve a great success in gardening and farming. In our previous episode we investigated the effect of electricity on plant growth and seed germination.
In this experiment we will investigate the effect
of magnetism on seed germination and plant growth and evaluate the results on
Day 4, Day 6, Day 8 and so on. Even this
experiment can be a very good school project for kids.
Now, Lets start with hypothesis which states:
“Seeds germinate faster and plant grow faster and stronger in the presence of magnetic field in the soil.”
MATERIALS & METHODS
– 3 plastic Containers
– Strong Magnets
– Identical Potting Mix for all 3 containers
– 3 Identical Seeds
– A Ruler or a Measuring Tape.
The constants in this study are:
- The Potting Mix
- The Water plant receives
- The Location / Light the Plant receives
- The Seeds.
PROCEDURE
- Label the 3 Containers as A, B, and C. Pot C will be the Control for the experiment.
- Fill the 3 containers with the identical potting mix.
- In pot A place a permanent magnet in the center with the magnetic field is narrow and stronger.
- In Pot B, insert multiple bar magnets around the container preferably with the same polarity facing the plant, so as to create uniform magnetic field. You can determine the Polarity of the Magnets using a Compass needle if you have one.
- Plant 3 identical seeds into all three containers. Pot A will receive the strongest magnetic field.
- Water all the 3 containers with the same amount of water.
- Place the 3 containers at the same location – like on a window sil.
RESULTS
On Day 4. You can clearly see the Seed in Container A which received the highest magnetic field has germinated and there are no signs of sprouting in B and C.
On Day 5. The Seed in Pot B with a weaker magnetic field also has germinated. No result yet in pot C. Pot A there is further growth and a nice little shoot has begun.
On Day 6. Germination has begun in the Control Pot too without any magnetic field. The Pots A and B show more growth.
On Day 8. This hypothesis is getting proved. Plant in Pot A is the tallest, Next come Pot B and lastly Pot C.
Conclusion: The results of the experiment clearly prove that magnetic field has a strong effect on the rate of seed germination and plant growth. You can see the roots are stronger and much widespread in A and B.
Now, The question here is how do magnets affect plant growth?
Hibiscus plant needs no introduction. It is one of the most
common flowering plants grown at home gardens. Generally all hibiscus plants
are very much durable plants and perform well if proper care tips are followed.
However if you wish to achieve maximum flowering and get big sized flowers, you
need to apply some extra hacks and tricks.
Let’s discuss all these points one by one:
8. SUNLIGHT: Hibiscus needs 6 to 8 hours DIRECT SUNLIGHT not only for its growth but also to produce flowers. Here, One very important tip on sunlight: If your plant is newly bought from a nursery or if it’s recently repotted, then you have to protect it from scorching noon sunlight like from 12 to 2 pm. Too hot sun, specially in summer at this time of the day can cause stress on the plant. Using a Green shade net is a good idea, especially in summer.
7. WATERING: Simple rule for watering hibiscus in summer is – Daily Watering. In other seasons, specially winter, its always better to use finger dip method to check the soil for moisture before watering, because over watering can kill any plant. Make sure to check drainage holes of the container. The Water should freely flow out of the container while watering.
6. CHOOSING THE CONTAINER: Hibiscus actually performs well when its slightly root bound. So when you see this root bound plant, do not jump into repotting it in a very large container. Prefer to choose only a slightly the next size of the container.
5. POTTING SOIL: This is very important.
a) The PH of soil should be slightly acidic like 5.5 to 6.5 is the ideal PH for hibiscus. A simple PH testing tool like this can be very handy. If PH is on higher side, you can alter it by adding some 10 gms of Alum per litre of water and add this to your container. You can also use white distilled vinegar about 1 to 2 teaspoon per liter of water once in a month.
b) The potting soil should well draining. So add stuff like coco peat or peat moss, perlite and compost in proper proportions to your garden soil. One such potting mix recipe is discussed in one of my articles.
4. FERTILIZERS TO INDUCE FLOWERING
AND INCREASE THE SIZE OF THE FLOWERS: You can add 1 table spoon bone meal per
container while making your potting mix or if its already potted, add this
little deeper into the container after removing the top soil, once every 3 to 6
months. This is very important if you want your plant loaded with flowers.
Then, you can add compost like Decomposed Cow dung or vermicompost into the
container once every 15 days or atleast once a month after tilling or raking
the top soil.
3. PEST CONTROL: Controlling pests is very important step to keep the plant healthy and blooming. Examine the plant closely for pests and insects including underside of the leaves. Common pests like whiteflies, aphids, mealybugs can be easily eliminated using neem oil 10 ml + few drops liquid soap in 1 litre of water. Or adding oils like Clove Oil or eucalyptus oil increases the efficacy specially if its heavily infested. You can use neem oil spraying once 15 days or monthly once for maintenance even if there are no pests and weekly twice for few weeks if its loaded with pests.
2. FOLIAR SPRAY WITH EPSOM SALT: Once in a month foliar spray of 1 teaspoon Epsom salt per liter of water provides magnesium needed of chlorophyll and makes your plant lush green and improves photosynthesis and overall growth and flowering.
1. PRUNING or trimming your plant: Yes this is another important step which many of us neglect. This promotes more branching and makes it more bushy and hence more flowers. The best time to hard prune hibiscus is at the end of winter or just the beginning of spring. Also deadheading of the flowers from time to time is the most important step for maintaining blooms. Dead heading means removing dead and dried flowers form the plant and this diverts the plant energy from seed formation to plant growth and more flowering.
This experiment can be a very good school project for kids to develop their interest in gardening.
This experiment is based on two observations:
- Plants appearing healthier after a thunderstorm possibly due to the effect of lightning and electricity.
- Plants growing near an electric power cable generally look greener and healthier.
Let’s conduct this experiment starting with our:
Hypothesis: Seeds germinate faster and Plants grow faster and healthier when electrocuted with a low voltage DC current.
I came across a lot of research articles online on electroculture studies. According to electrocuture technique, Plants are sensitive to electricity and magnetism. Improved plant growth and increased yields are some of the positive effects of electroculture. This technology can even be used to protect plants from pests and diseases.
The mechanism of action? Well, I could not fine convincing answers. May be due to the copper electrodes causing electrolysis or electrophoresis and releasing copper and other salt ions within the soil, or the electromagnetic field from the electric current causing movement of different ions into the roots.
Now let’s jump into the experiment:
Materials and Methods:
The materials required for this gardening
project are:
– 3 plastic Containers
– Identical Plant seeds for All 3 containers
– Identical Potting Mix for All 3 Containers
– A DC 9V Battery, A DC 3V Battery
– Copper rods or Copper Wires as Electrodes
– A Ruler or a Measuring Tape.
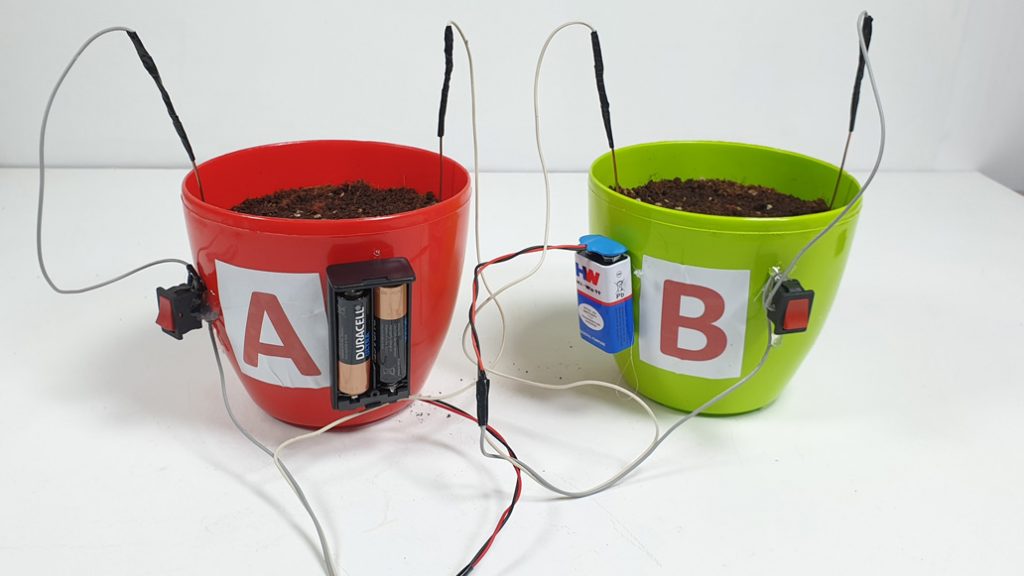
Step1: Label the 3 Containers: Pot A and B are for experiment and Pot C will be the Control for the experiment with no current applied on it.
Step 2: Identical Factors or Constants for the experiment: Fill All the 3 containers with the same potting mix or soil. Plant the same seeds into all three containers. Keep all the 3 containers in exactly the same location to receive the same amount of light and Water them with exactly the same amount and at the same time.
Step 3: Prepare The Circuit: For Pot A we will electrocute with 3 Volt battery and For Pot B, we will use 9V Battery. We will use this copper wire to make our electrodes which will be inserted into the soil.
Step 4: Sowing the identical seeds into all 3 containers at the same time. You can use any plant seed for the experiment. Sow exactly the same amount of seeds into each container and water them with exactly the same amount of water daily. Keep all 3 pots on the same location like on a window sill.
Step 5: Applying Electric Current to Pots A and B: Two copper rods are inserted into the soil at opposite sides of the pot and should not touch each other. The 3V battery will be connected to Pot A and 9V Battery to Pot B. The circuit is switched on for these pots for 15 minutes daily and the plant growth in all 3 containers will be measured on Day 4 for Seed Germination, Day 7 and then Day 12, 15 and so on.
Now! Let’s look into the Results: Watch Video below:
On Day 4, As you can see, both seeds are about to germinate in Pot C first which infact received no voltage. In Pot A one seed has germinated and in Pot B there is still no definitive signs of germination. You can see in Pot B, perhaps due to high voltage the earthworm is struggling to survive and this indicates high currents are harmful for beneficial soil organisms.
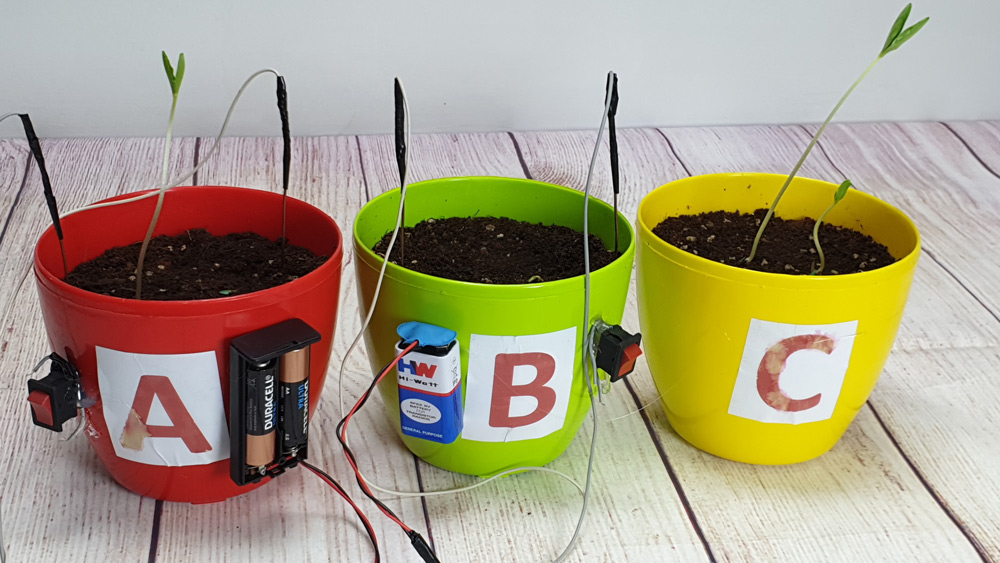
On Day 7, You can notice that the height of the plants in pot A is still lesser when compared with the Control Pot C. And Pot B which received 9V is just starting to germinate now. So till Day 7 this theory on electroculture is getting disproved. I am not sure what went wrong with this experiment and this needs further investigation.
Will later post an update on this on Day 15. We can even Try to repeat this experiment using different DC voltages like 1.5V, 6V or even DC12V. The experiment can also be done by changing length of exposure time to the DC current and comparing plant growth.
In our next episode, we will conduct a similar experiment to study the effect of magnetism on plant growth and seed germination.
Well, Last year, we prepared a Mixed fertilizer containing both chemical and organic fertilizers with a detailed discussion and calculations on how to calculate the total NPK value. For beginners and those interested in these scientific calculations, please check out that article.
Now, we will quickly start the recipe for this well balanced organic mixed fertilizer, you can use for any plant in varying dosage to produce healthy growth, increase flowering and fruiting. We will also total the NPK value of by adding the NPK values of each of these components. For beginners – NPK means Nitrogen, Phosphorous and Potassium which are the Major nutrients required for plant growth.
- COW DUNG: Whatever animal
manure you are using, whether horse dung or cow dung or even goat dung. Note
down its NPK value. Here we are using decomposed
cow dung. So NPK is 3-2-1.
We are taking 2000 grams of cowdung powder.
- COMPOST (
Whether home made compost or VERMICOMPOST): In this recipe, we are adding
vermicompost which also contains many useful trace elements, so no need to add
that micronutrient powder containing trace elements. The NPK of vermicompost is
1.78, 0.77,0.94
We are taking 2000 grams of Vermicompost.
- BONE MEAL POWDER, you can also use any of the other meals like sterameal, fishmeal or bloodmeal. If you are a pure vegetarian, you can use soya bean meals as a substitute for bone meal. So the NPK for bonemeal is 3.5, 18, 0
Here, will add both bone steamed meal
powder as well as coarse bone meal chips powder mixed. This fine powder is just
to make it quicker for release of nutrients.
We are taking 1000 grams of Bone meal powder.
- we shall also add some optional stuff into this for additional fortification which also act as soil pesticides or pest repelling agents, particularly neem cake powder or Karanj powder. Then we will also add Mustard cake powder. We will discuss the benefits of each of these some other time.
Well, the first one Neem Cake Powder: NPK of neem powder is here:
N(Nitrogen 2.0% to 5.0%), P(Phosphorus 0.5% to 1.0%), K(Potassium 1.0% to 2.0%).
N – 2.0% to 5.0%, P – 0.5% to 1.0%, K – 1.0% to 2.0%
We are taking 1000 grams of Neem cake powder +
1000 gms Karanj Powder +
- of Mustard cake powder.
- Optionally, You can add 500 gms of Epsom Salt + 500 Grams of Micronutrient Powder to include those trace elements or micronutrients like Mn, zinc, Fe, boron and many others to safeguard our plants from any deficiencies. Also you can add more ingredients you wish to like used tea powder and any other stuff, because this is a one time mix and you offer this on a periodic basis and only once in 15 days or so and you add almost all organic nutrients and this reduces burden and saves you a lot of time, plus this become a quality mix!.
Nothing to worry about over dosage which is an issue with chemical fertilizers which can cause chemical burns. This is pure organic fertilizer with hardly any adverse effect on over dosage.
After Approximate Calculation, the Total NPK value of this fertilizer mix is:
22, 25,07
Have a look at this equation in the table:
| Ingredient | N | P | K |
| Cow Dung (3-2-1)-2000g | 6 | 4 | 2 |
| Vermicompost -2000g | 3.5 | 1.5 | 2 |
| Bone Meal -1000g | 3.5 | 18 | 0 |
| Neem, Mustard etc | 9 | 1.5 | 3 |
| TOTAL | 22 | 25 | 7 |
Then optionally you can perform a soil PH test and mix either woodash or lime to make your soil more alkaline if its too acidic and if your soil is too alkaline, you can add alum powder into this mix.
And one more important point from storage point of view: you might feel some moisture in this mixture due to some moist ingredients like vermicompost. You can either use completely dry ingredients before mixing or you can dry this mixture in sunlight and then store in air tight containers. It will not loose its NPK value much on drying. Remember to mix the ingredients thoroughly well for best results.
RECOMMEDED DOSE PER PLANT? Depending on the plant, you can use one tablespoon once every 15 days, specially for flowering plants and once in a month for other plants. Make sure you apply this after tilling or raking the top soil and apply around the plant – not directly on roots.
Check out the Best Pure Organic Pesticide Recipe.