There are so many plant grow lights available in the market and choosing the best one can be a really tough job! So, Then How do you choose the right LED grow light to grow plants indoors?
There are many important factors to consider while choosing led lights, let’s split this into 5 sections. And please follow this video till the end. Will try to keep it as concise and simple without bothering you with too much physics.
- The Purpose of Buying a Plant Grow Light?
A grow light or plant light is an artificial light source to stimulate plant growth by emitting a light appropriate for photosynthesis. This light spectrum is similar to that of the sun. Grow lights are used for horticulture, indoor gardening, plant propagation from cuttings, seed germinations, Indoor food production – specially for those zones which do not receive adequate sunlight, indoor hydroponic gardening and to grow aquatic plants.
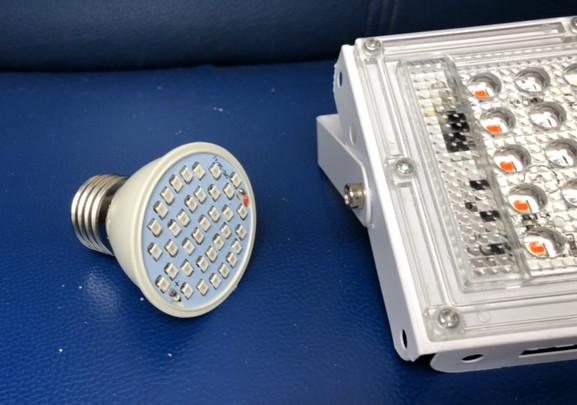
These are some of the cheaper options you can find online on amazon. Most of these are some cheap products without any warranty or proper specifications. If you want to grow indoor plants that need very less amount of light, then you can use these options. But at your own risk as there is no warranty and you won’t know how long they will last. The cost of these ranges anywhere from 5 dollar for a 5 watt bulb to 30 dollar for this type of model. But the light intensity and quality of photons they emit is too low and you may require multiple number of lights kept too close to the plants which is practically difficult.
The best option is to invest on a good quality reliable grow light like atleast a TS-1000 grow light from Mar-Hydro Company. It’s a very reliable company and into this LED grow light business since 9 years. They have a lot of products and models of LED grow lights and even grow tents for different uses. You can check their website mars-hydro.com. I have linked that in description below.
This TS-1000 set up costs around 200 USD for this powerful 150 Watt light including this beautifully designed large grow tent.
Now lets move on to the next factor in choosing your grow light:
- LIGHT INTENSITY: This is the most important factor. It simply means the amount of light a bulb emits out. We will not go into physics or science of this. But To decide on this, check out the manufacturer’s recommended foot print to know the area in square foot covered by this light. For example, this TS-1000 model covers a 3 x 3 feet in bloom stage and 4 x 4 feet in the vegetative stage with a distance of about 18 inch and 24 inch from the source respectively. If you know a bit of physics, You should also look into PPF, PAR chart and PPE values given by the manufacturer to decide on the light intensity.
Few more tips on this: The light is most intense at the middle of the light source and less intense at the peripheries. Seedlings and Young plants require cooler light intensities than vegetative and blooming plants. So, this can be achieved by either increasing the distance of these from the light source or placing seedlings and younger plants at the peripheral areas.
- COLOR SPECTRUM: Make sure you pick the correct spectrum depending on which stage your plant is in like the vegetative stage or the blooming stage or a full cycle of growth from seedling to harvesting stage. There are two types of spectums for LED lights – Targeted and the Broad Spectrum. More blue spectrum is better for Veg, Red is better for flowering stage and some fixtures have a tunable spectrum like red only or blue or stuff like that.
This Mars-Hydro Ts-1000 is a broad spectrum led light which works perfectly from seedling stage to harvest stage. You only need to adjust the distance using the rachet mechanism provided. You can look at these multi color LEDs. This is actually very bright, though in camera it may not appear that much bright. This one also got a dimmer screw right here. You can dim this further depending on your needs. - WATTAGE: or the electrical power measured in Watts. This actually does not determine the intensity or the quality of light. This only gives you a general idea on how powerful your led grow light is. The model number like TS-1000 doesn’t mean 1000 Watts. Make sure you do not misinterpret this number. This Mars-hydro light is about 150 Watts. One thing you may need to know here is: How many watts are required for the area in square foot. Generally 30 to 50 Watt is required for 1 foot x 1 foot area of coverage. Like about 30 watt or even less for veg stage or indoor plants and about 50 watt per square foot for flowering plants.
- WARRANTY: 99 percent LED lights from good companies will never have any problem and they have a very high lifespan of atleast 50,000 hours of usage. But still go for a company that provides a warranty of atleast 1 year. Mars-Hydro offers a 3 year extensive warranty on every grow light they sell. That’s really good!
- You can use Discount code GARDENTIPS and avail a discount on their website mars-hydro.com.
This method of cloning plant cuttings in water is an age-old practice.
If you want to increase the success rate of growing plants in water or rooting your cuttings in water, you need to follow certain simple tips. The most important advantage of this, whether cuttings are grown in soil or water or even air layering, you get an identical copy of your Parent plant (also called the Stock Plant). But This is not the case with seed grown plant, which differs significantly from its Parent plant.
Please Watch all these Steps and Tips till the end to achieve a great result and have fun with your gardening hobby. Also some scientific concepts specially Tip #4 and Tip #8 like the nitrogen draining concept and the oxygenation concept may be completely new and really interesting to most of us. Also Some of these tips are common when you are propagating cuttings in soil. With these simple tips and scientific concepts, you can achieve a success rate of nearly 100 percent.
- 1. Taking Healthy Cuttings:Yes this is the first and foremost job which is most important to achieve a good successs rate. Take a cutting from a healthy mother plant, which is free of pest and disease and has good active growing branches. Choose Semi-woody cuttings, not hard woody or too soft ones which can easily rot.Making a Sharp Cut at 45 degree angle. A sharp cut with a sharp cutting tool or blade is also an important factor for success. Preferably sterilize the cutter with some disinfectant like hydrogen peroxide or any household antiseptic like Dettol.
Cut about half an inch below a node – this is the area where rooting starts and which is to be inserted into water or your rooting solution.3. Length of Cuttings: This is generally 6 to 10 inches or atleast 2 or 3 nodes above the rooting node. The length depends on the internode distance of a branch. Remember one rule of thumb: , the success rate of cloning is inversely proportional to the internode distance. That means the lesser the internode distance, the greater the chances of success.
4. Drain Out Nitrogen for the Branch: As you all know, nitrogen slows down rooting process. Pouring lot of water on the plant or the branch which is to be cut, is believed to drain out nitrogen. Do this and then take your cuttings from the plant. I don’t know how this happens. but if u know about the concept please let us know in the comments box below this video.
5. Do Not Fertilize your Parent Plant: Applying the same concept of nitrogen drain out, better not to feed the plant atleast 15 days prior to taking cuttings.
6. Prepare Rooting Solution: You can use just plain clean soft water. Better avoid salty water or chlorinated water to increase the chances of success. The second option is to add some ingredients into this water which serves two functions. First, prevents contamination and rot and secondly, it helps accelerate the actual rooting process. You have many options for this:
a. Rooting Hormone Powder with indole butyric acid or NAA (naphthalene acetic acid) – just add half a teaspoon of this to your glass or the container holding the cutting and mix it well. Add this everytime you change the water till the rooting starts.
b. Aspirin or willow water: Aspirin which is chemically Acetyl Salicylic Acid serves both functions, including rooting. You can watch a detailed video on this from a link at top right corner of this video.
c. Fresh aloe vera gel extracted from aloe leaf also contains salicylic acid and other ingredients which help in preventing rot and accelerate rooting.
7. Use Clean Containers and Change Water or your Rooting Solution every 2 to 3 days: Take clean containers preferably transparent ones, so that you can actually see through for the root development.
- Oxygenate the tissues: Yes this is another important tip for succuessful rooting. Lift the cutting out of the water once daily and stir the water atleast once to oxygenate it. Scientists have proved that plants need dissolved oxygen to survive and that the cutting will consume all the dissolved oxygen in the immediate vicinity of its rooting zone, so water needs to be stirred in order to maintain healthy root formation. This is infact the basics of Aeroponics and Hydroponics which will try to discuss in detail in some other episode.9. Submerge the cutting into water or your rooting solution, atleast 2 inches above the lowermost node, that is the rooting area. Keep it Undisturbed preferably on a window sill to receive indirect light and also optionally Suspend the Cutting into the Container through a plug like a piece of foam or a cloth. Also it’s a good idea to cover it with a polythene bag intermittently, specially in night time if its too cool. This is to provide the optimum temperature and humidity levels for rooting.
Now the Question is: what do I feed them: giving nutrients would be pointless until roots develop as the cuttings cannot absorb any mineral content. Once the rooting starts, you can feed with very dilute solutions of water soluble NPK or even very dilute compost tea. But one hack to counter the stress or the shock to these little cuttings. Vitamin B1 that is Thiamine in the rooting solution is thought to help alleviate any stress, like how we use Epsom salt solution to water the plants to counter transplant shock. This effect of vitamin B-1 is actually derived from researches based on tissue culture media. But I am not sure of this and the mechanism of action and the molecular concepts behind this.
10. Transplant into Soil: Once you see multiple roots atleast 4 to 5 roots of atleast about an inch in length, you can carefully transplant into your potting mix.