 GKVKs – Gardening Tips and Store Gardening Tips and Store
Related Articles


In our previous post, we showed you the nursery secrets to successfully grow adenium from seeds. Today we will show you some basics of transplanting adenium seedlings after 2 months of growth.
Well, Now these beautiful little adenium seedlings are about 2 months old.
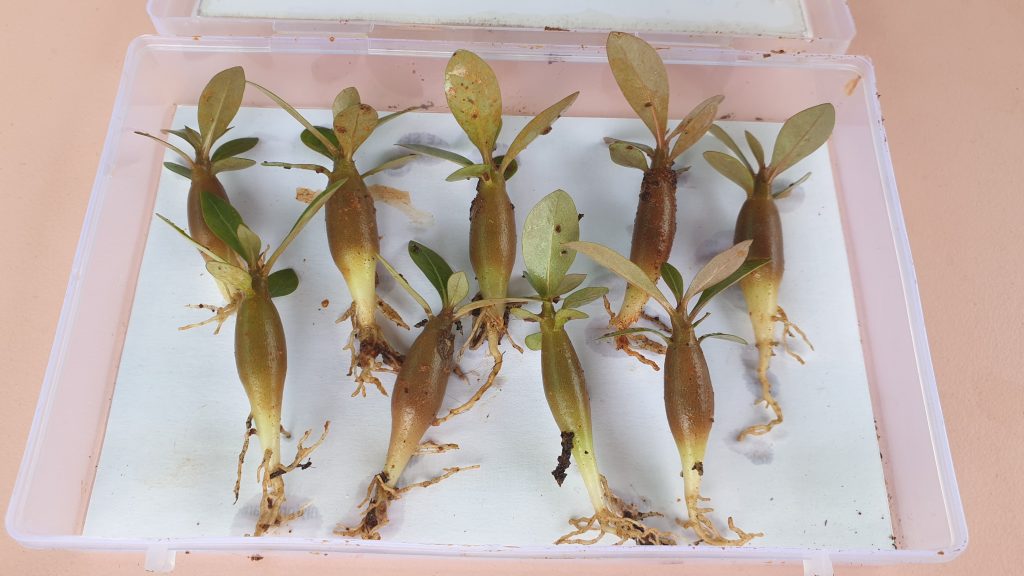
This is the best time to repot them into independent containers, because the nutrient requirement will increase as they grow and also increased chances of overcrowding and due to this the more aggressive ones will siphon supply off the nutrients from their neighbours affecting the weaker ones.
At about 2 months, they are about 2 to 3 inches in length and remember they are not so delicate or sensitive as you might think. You can transplant or repot them easily. But you need to remember few important points during the process of repotting and post transplant care.
Here are some 10 useful points to remember:
- Choosing Containers: You can use 4 to 6 inch clean new containers or clean up existing containers with baking soda or any mild disinfectant and make sure they have good number of drainage holes.
- Potting Mix: You can use any succulent potting mix with about 50 percent sand, Garden soil and perlite and other optional stuff as mentioned in one of my post on Potting mix for succulents and cacti.
- Taking out Seedlings: You can use the spoon method to carefully dig out the little ones by holding a leaf and gently digging and pulling out. This should be easy because we have germinated the seeds in sand and cocopeat.
- Inspect the seedlings and discard any rotting or rotten ones.
- Repotting: Have a look at the structure and the markings. The first mark is to demarcate the level above and below the soil. Make sure you insert the plant’s future caudex above the level of soil. If its too below the soil level, it can lead to rot and death.
- Optional Tap Root Cutting: This step can be performed after 6 months or 1 year to make the caudex more fatter. This time it may be little risky to cut the tap root at the mark shown here. I have shown all steps to make the caudex thicker in one my older episodes last year.
- After Repotting: Its always safe to either spray and antifungal solution like bavistin or water these with dilute antifungal mixed in water.
- Water Requirement: Check the soil for moisture before watering. Over watering can kill these little ones. Roughly you can water once in 3 to 5 days.
- Fertilizer: If you have added some compost into the potting mix, they don’t require any feeding for atleast 2 or 3 months. If you use NPK water soluble feed, water them with a 50 percent dilute solution of this once in 15 days for faster growth.
- Sunlight: This is very important. After repotting keep them in indirect light or even shade for 3 to 4 days and then shift to full sunlight once they are out of transplant shock.