First and foremost, I always repeat these lines: Please avoid the use of chemical pesticides and fertilizers which have a lot of hazardous effects on humans and animals. That’s the main reason, why we promote the use of natural agents or organic pesticides and fertilizers in this gardening website.
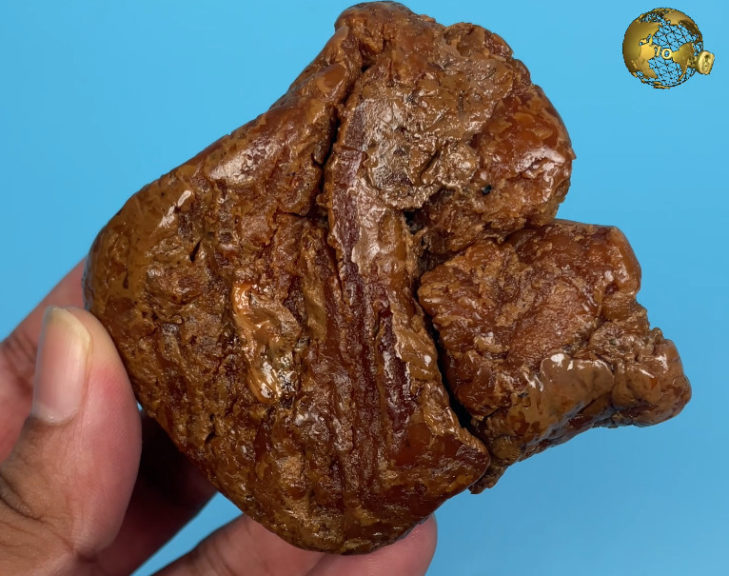
What is Asafoetida?
Asafoetida, also known as hing, is a common flavoring agent found in most kitchens. It’s actually dried latex or gum exuded from the rhizome or tap root of Ferula Asafoetida plants.
What is the Scientific Basis of its use in gardening and Farming?
First of all, let’s look into its composition. Typical asafoetida contains about 40–64% resin, 25% endogenous gum, 10–17% volatile oil, and 1.5–10% ash. The resin portion and the volatile oil portion contains a lot of strong compounds that are responsible for its pungent odor and its beneficial properties. Apart from it’s medicinal properties, Asafoetida has some amazing uses in gardening and farming as a pesticide to control many pests and insects including termites, also to repel rodents and animals from your garden or farm, and also to treat some plant diseases like leaf curl virus or leaf curl disease which otherwise has absolutely no treatment. We will look into how to use Asafoetida for each of these problems.
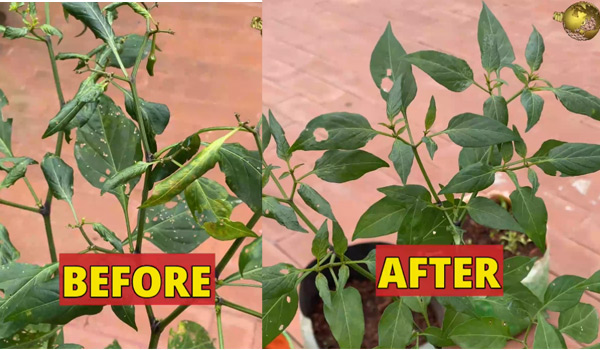
How to use Asafoetida to treat Leaf Curl Disease?
Take one liter of sour butter milk. You can also take 500 ml, if you have fewer plants.
Add one teaspoon or about 5 gms of Asafoetida powder to it and mix well.
Let it stay for 1 or 2 hours.
Sieve this solution using a fine cloth to avoid spray bottle clogging.
Spray this thoroughly over the affected plant including the underside of the leaves.
Repeat this every 3 days for 3 – 4 times. Leaf curl disease which is common in pepper and tomato plants will be completely cured by this treatment most of the times.
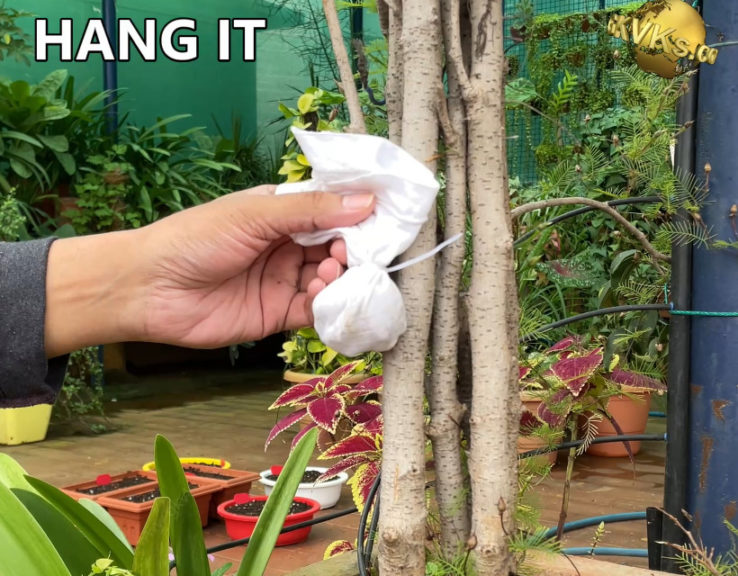
How to use Asafoetida to Repel Insects and Termites?
Take 50 gms of Asafoetida – raw cake form is better.
Put this in a piece of cotton cloth and make a small sac like this.
Hang this over the tree or plant where you want to repel unwanted insects including termites. The disagreeable odour repels termites and other insects.
How to use Asafoetida to Repel Unwanted Animals and Rodents?
Sometimes these rodents and other animals including our pets like cats and dogs create havoc in our gardens. Most of these animals hate the strong pungent smell of asafoetida. To make it effective you need to use a lot of Asafoetida wrapped up in cotton cloth to repel these animals. Perhaps about 100 gms of Asafoetida may help protect and area of about 1 to 2 square meters. It may not be so much cost effective, but it depends on the intensity of your problem.
How to Use Asafoetida as an Organic Fertilizer and Why?
Using Asafoetida as a liquid fertilizer is said to boost plant immune system and protect it from various diseases in the long run.
- Add 2 grams of raw Asafoetida or pure powder form to 1 litre of water.
- Mix it well by stirring continuously.
- Then water your plants with this solution once in a while, preferably in early growth stages of the plant.
- You can also mix more of it per liter of water and then dilute the solution accordingly and water your plants once in a while.
- You can also foliar spray this solution over your plants.
How to use Asafoetida as an Organic Pesticide?
Asafoetida alone may not be effective to control common pests in our gardens like Aphids, mealybugs, whiteflies, thrips, mites and so on. But mixing this with other ingredients can make it a powerful natural pesticide to control these pests.
- Take 1 litre of water and add 5 gms of Asafoetida powder or cake form.
- Add Neem oil of about 5 ml.
- Mix it well and spray it on the affected plants once weekly.
The word ‘organic farming’ has become one of those buzzwords you are hearing everywhere. No wonder! It is tragic that in today’s era of rapid agricultural production, the use of chemical fertilizers and chemical pesticides has brought disastrous effects on public health and our beautiful mother earth is contaminated with all left over chemicals. Organic Farming comes to our rescue. Organic Gardening and Farming is based on using natural methods like the use of natural fertilizers and natural pesticides for plant growth and pest control and a complete NO to synthetic or chemical fertilizers and pesticides.
Having said that, Let us preview two special books on organic farming using unique ultra-low cost methods which are really effective in horticulture. These books are even available in eBook editions at amazon.
The First book: JADAM Organic Farming – The Ultra-Low Cost Agriculture – second edition published in 2016.
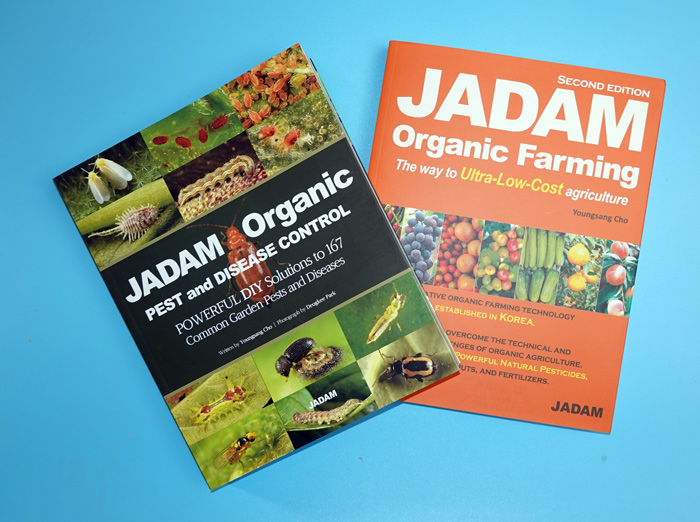
The second book: JADAM Organic Pest and Disease Control with Powerful DIY Solutions to 167 common pests and diseases, published quite recently in June 2021 and probably I am the first to review this book.
About the Author: Dr. Youngsang Cho, from South Korea with over 30 years expertise in organic farming with a Master’s Degree in Horticulture and PHD in Plant pathology. He learnt agricultural technology from his father, Hankyu Cho, who was a founder of Korea Natural Farming (KNF). He started his agricultural research since 1991 and developed several low cost innovative technologies in organic farming and plant pest and disease control. These books are translated into 20 different languages and available worldwide.

Let’s First Preview:
JADAM ORGANIC FARMING – The way to Ultra-Low-Cost Agriculture.
This is the second edition of this book published in the year 2016 and the first edition was published way back in 2013. This book has about 379 pages.
The thing which I like most in this book: are these Four Aims of JADAM Farming Technology: SIMPLE – principles are simple and not complicated, EASY: Easy to make and use, SCIENTIFIC: that’s based on scientific research and results and lastly EFFECTIVE: these are highly effective and ultra-low-cost.
Now let’s check out Contents of this book:
So many interesting chapters starting from basic principles, Soil managment tips, Natural pesticides for all types of pests and much more. We will quickly flip through few pages and see how useful this book is.
- Some new concepts of symbiosis with grass or weeds looks interesting to me. This is explained in detail and scientifically.
- The Current State of our Soil – contaminated by chemical pesticides and fertilizers.
- Leaf Mold Soil, Seed and Seedling Treatment using leaf mold soil.
- No-Till Soil Management method using landscape fabric.
- The Main Chapter on Making Organic Fertilizers – which has topics like Natural Mineral Water, DIY Advanced Irrigation System, DIY electric Power Distribution Board,
- Making of JADAM Microorganism Solution (JMS), JADAM liquid Fertilizer, using boiled potatoes, Grass, Food Waste, Human Excreta, Fish meal and a lot of other stuff, like how we discussed on the Waste Decomposer technology by National Centre for Organic Farming, Indian Agriculture, in one of my episodes. Everything explained with beautiful photographs and illustrations.
- Natural Pesticides. Jadam DIY Water Softener, Then Jadam Wetting Agent, Jadam Sulphur, Jadam Herb Solution and much more.
Let’s quickly Preview the second book by the same author:
Jadam Organic Pest and Disease Control with Powerful DIY Organic Pest Control solutions with proven effectiveness. This book is published recently in June 2021. This book has about 506 pages.
We will quickly look through table of contents: some basic principles, then natural solutions to various types of pests like Mites, Aphids, whiteflies, Thrips, scales, bugs, Moths and other pests and insects. Then about the beneficial insects – that’s biological pest control. Then a detailed chapters on various plant diseases like blackspot disease, mildew, blight, mosaic virus, Damping off and many more and controlling with JADAM natural pesticides. The effect of JADAM natural pesticide has been proven by the National Agricultural Research Institute. This book is beautifully explained with nice clear photographs and illustrations on various pests and diseases.
These books will certainly help bring a revolution in organic agriculture if implemented worldwide without the need of commercial pesticides and can reduce the cost of pesticides by more than 95%. I am certainly going to try some of these methods mentioned in these books and implement them.
If you have any questions about Organic farming, you are most welcome to visit jadam website and ask them through ‘Sharing JADAM’. Another good thing is JADAM has not patented any of its knowledge and technologies but shared it all through seminars, books, and their website. These books are available worldwide at Amazon both as kindle editions and hard copies.
Book Links:
(Sales are good around the world, so stocks are often out of stock.This book stock will be filled right away. E-books are also being prepared.)
– JADAM Organic PEST CONTROL BOOK: (https://amzn.to/3wkYGf7
– JADAM Organic Farming Book: https://amzn.to/3jqEgOf
– Jadam Website: https://en.jadam.kr
What’s in this article?
- A brief Introduction
- Why use this product?
- What are the various uses?
- How to use it for Mass multiplication, As a Bio fertilizer, As a Bio Pesticide,
- For Seed Treatment,
- how to make DIY micronutrient fertilizer using this product.
Currently, about 2 billion metric tons of waste is produced annually worldwide and only about 5 percent of this is recycled for composting. This means the waste is not managed properly and instead either dumped or openly burnt which can be really bio hazardous. To overcome this problem, the NCOF, ministry of Agriculture, India, developed a great product which is a consortium of micro-organisms, mainly azotobacter isolated from desi cow dung. And this took 11 years to standardise the mass multiplication technique at the farm level.
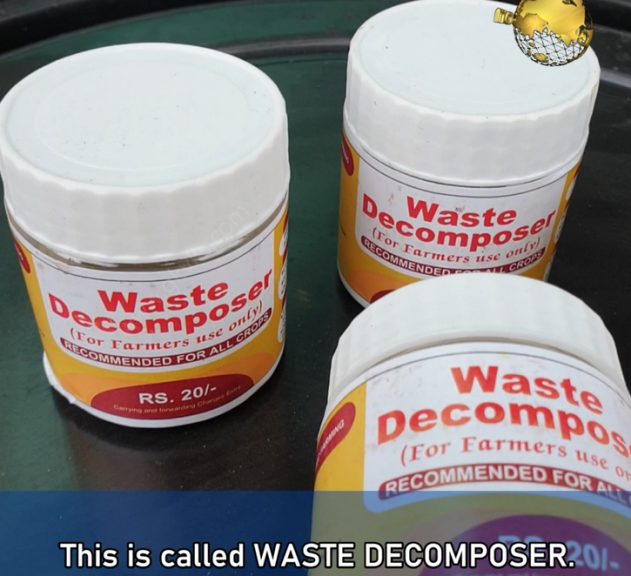
So, What is this Product Called? This is called WASTE DECOMPOSER. This is perhaps the world’s cheapest bio fertilizer and bio pesticide made till date. This product comes in a bottle of 30 gms costing just 20 INR per bottle, that’s less than 20 cents for international viewers and you need to buy only once because you can easily reproduce or do mass multiplication of this product and use it repeatedly for ever. A single bottle of waste decomposer decomposes bio-waste of more than 10000 metric tons in just 30 days and this bottle has a shelf life of 3 years. This is unbelievable.
So, Where to purchase this waste decomposer bottle? You can order this online from NCOF website or even amazon and these links below. International users can possibly import this product.
Amazon: https://amzn.to/2Spjj7G
NCOF website: https://ncof.dacnet.nic.in/
Now let’s learn how to use Waste Decomposer?
The first thing you should do is perform mass multiplication of waste decomposer. There is nothing sophisticated about it. It’s really a simple process. I will show you step by step.
Take a Large Plastic Barrel like this one, preferably a 200 litres container. You can take even 100 litres or whatever you have.
Fill this drum with water.
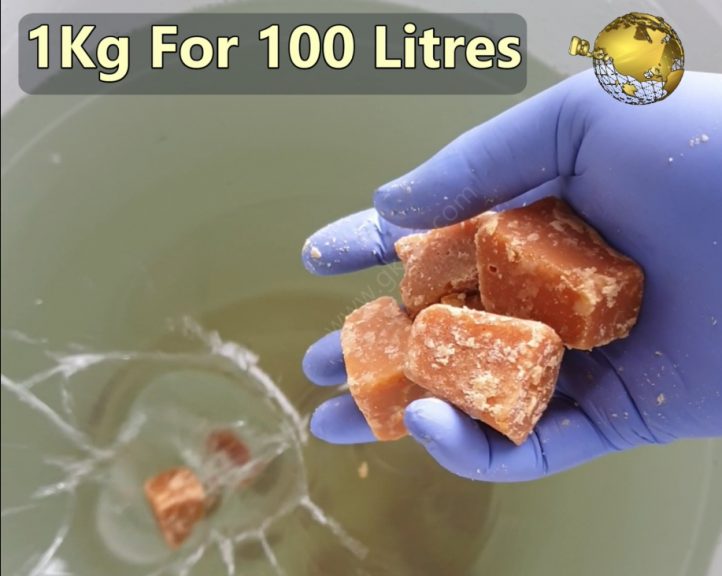
Now add 2 kilograms of Jaggery for 200 litres of water or 1 kilogram for 100 litres. This is the food for these microorganisms.
Now take 1 bottle of waste decomposer and pour all its contents. Make sure you avoid direct contact of its contents with bare hands. Mix it thoroughly using any stick or any pipe.
Then cover the container with a cloth. You need to open this daily and stir the solution once in 24 hours.
After 5 days or max 7 days depending on the climate, this solution turns creamy which means now you have 200 litres of water decomposer ready to use.
We will discuss on the uses of this solution shortly. To restart mass multiplication, now you don’t need to buy waster decomposer again. After use, Just leave around 20 litres of this solution in the barrel and add water again, then add jaggery again and repeat the procedure to maintain this for ever.
Now let’s discuss on The Various uses of this waste decomposer:
1. SEED TREATMENT: Simply spray or sprinkle waste decomposer solution uniformly over the seeds. You can even soak the seeds if you are doing this on a large scale. This works on all types of seeds. Keep the treated seeds in shade for about 30 minutes and then plant the seeds. Seed treatment with waste decomposer shows 98% early and uniform germination and provides protection against various seed borne diseases and also plays a role in strengthening the plants defence mechanisms.
2. FERTILIZER AND SOIL TREATMENT: Watering with waste decomposer solution significantly changes the biological as well as the physical properties of all type of soil within 21 days of application and it also helps to generate earthworm population in the soil which is so beneficial. You can dilute the waste decomposer in 1:2 ratio with water, that is one part waste decomposer to 2 parts water and water your plants once every 15 days or even once in a month. This is also proven to control many soil borne diseases in crops.
3. FOLIAR SPRAY: It acts as a potent bio pesticide when sprayed on plants.You need to dilute it to 1:3 ration to use it as a foliar spray. This helps control a variety of fungal, bacterial and viral diseases in crops when sprayed once in 10 days for 4 times in the growth cycle of a crop.
4. COMPOSTING: This is a compost accelerator and your compost will be ready within 30 to 40 days depending on the type of waste used for composting. For conventional pile method of composting, you need to sprinkle waste decomposer for every layer of compost and maintain the basics of aerobic composting like maintaining moisture, aeration by turning the compost pile and stuff like that. You can check my 4 episode series on composting from a link in description below. If you do composting at home in small scale, you can sprinkle waste decomposer solution once or twice and get that compost ready within 30 to 40 days.
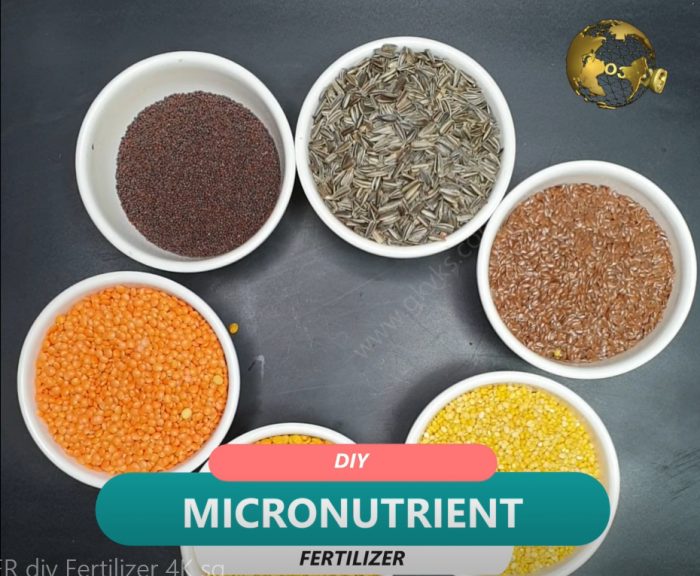
Now, Let’s prepare the DIY micronutrient rich organic fertilizer using this waste decomposer, as recommended by the national centre for organic farming.
The basic principle of making this micro nutrient fertilizer is: Adding foods that are rich in proteins, vitamins and major and minor elements including Nitrogen, phosphorous, potassium, iron, copper, zinc, calcium, magnesium, boron and so on. Adding these into the waste decomposer results in break down of these elements into soluble forms by the microorganisms, enzymes and organic acids present in waste decomposer.
Well, Now let’s prepare this fertilizer and learn how to use this for your plants.
First of all – Things You Need: We will prepare this in around 25 litres of waste decomposer solution. Do not worry too much on the quantity and over dosage. This is not a problem with organic fertilizers.
1. Atleast 3 varieties of Oil seeds like 100 gms each of sunflower seeds, mustard seeds, flax seeds, or any other like soya, castor oil seeds, nigella seeds or any 3 varieties.
2. 3 varieties of Pulses or lentils of your choice like Red Lentil (Masoor dal), Yellow or Green split gram (Moong dal), Bengal gram (Chana dal), You can also take Red gram (Arhar dal), Black gram (urad dal) and so on.
3. Some 4 to 5 old iron nails or any small pieces of junk iron stuff.
4. Some copper source – like some old copper wires extracted from wires lying in your junk yard or any old copper vessel if you have one.
5. Some Zinc source – like one or two dry cells which are made up of zinc container.
Firstly, powder these seeds and pulses, this helps in faster decomposition. Add these into 25 litres of waste decomposer. Now add iron nails, then copper wires, then the zinc source. Mix it well and leave it for 10 days. Do not forget to stir this once daily.
After 10 days, your potent nutrient rich organic fertilizer is ready. So, How do we use this. You can use it in 2 ways. One, as a liquid fertilizer to water your plants and secondly as a foliar spray to instantly feed your plants through leaves stomata.
For watering your plants, you need to dilute this to 1:5. That is one part of this liquid to 5 parts of water. Where as for foliar feed, you can dilute this to 1:10 and spray thoroughly on your plants including the undersides of your leaves, because the stomata or the leaf openings are more concentrated at the bottom side of leaves.
When plants and animals die, their molecules become available in soil for use by other organisms like bacteria and fungi. This product is the final break-down constituents of the natural decay or decomposition of plant and animal materials through the biological activities of micro-organisms. This product is commercially available in powdered form as well as liquid form for horticultural use.
How does this work on plants? It chelates the complex nutrient compounds in the soil to convert them to simple forms suitable for plant absorption. This reduces the fertilizer usage by upto 30% and increases flowering and fruiting by up to 70%. So, this is not a fertilizer, but a bio-catalyst and bio-stimulant for the plant. This is an excellent natural and organic way to provide plants and soil with a concentrated dose of essential nutrients, amino acids, vitamins and trace elements.
Before I reveal you the name of this product, let’s quickly know some of the functions or benefits of this powder.
- Improves Soil Structure by providing more space for root growth and beneficial microbial activity. They bind to soil molecules and improve soil structure, and this is especially noticeable in high-clay and compacted soils.
- Reduces Soil Toxins: They don’t just make nutrients easily available for absorption, but also chelate harmful toxins in the soil, preventing them from entering the plant.
- Increases Water Retention in soil by reducing water evaporation by upto 30%.
- Improved Microbial Activity in the soil and chelation of complex nutrient forms to simple forms for better uptake by the roots makes the plant grow healthier with little fertilizer application and increases flowering and fruiting.
Having said that, let’s know what this is called and how to use it properly for best results.
This is called Humus which consists of three components–humic acids, fulvic acids, and humin.
This is available as powdered form and also liquid form. The Liquid is a concentrated humic acid and needs to be diluted with water before applying on plants. Humic acid is easily available at your local garden store or you can even order online.
PURCHASE LINKS:
Now, Let’s learn how to use it. This is particularly beneficial if your plant has nutritional deficiencies due to poor absorption of nutrients from the soil, which manifests as various leaf yellowing patterns.
So, How to use this? Three Methods to use this:
- Soil Application: The Dosage is 1 teaspoon per litre of water. Mix it well and water 1 cup, that’s about 250 ml of it per plant. If you are using liquid humic acid, add 3 ml of it per litre of water. You should see results within 1 – 2 weeks.
- Foliar Spray: You can add one teaspoon of this per gallon of water and spray on the plants. 1 gallon = 3.78 litres. Please check the usage instructions on the product label and use accordingly. If you are using liquid humic acid, add 1 ml per litre of water for foliar spray.
- Compost Tea: You can add 1 teaspoon per gallon to your compost tea while brewing. This will certainly help in better absorption of nutrients. For beginners, Compost tea is made by adding compost like decomposed cowdung or vermicompost into water and allowing it to brew for 5 to 7 days and then you dilute this further like in 1:10 ratio and water your plants.
Before you throw away banana peels to trash, think twice! Banana peel is one of the highest organic sources of potassium. Potassium helps your plants by strengthening the stems and protects them from disease. It also helps the flowering process and is thought to be able to improve the quality of the fruit of your plants. Also in addition to potassium, it also contains phosphorous and calcium which are equally important for plants.
Let’s start the recipe for making banana peel fertilizer and then banana tea.
For Making Banana Peel Fertilizer:
- Collect some banana peels, preferably from ripe bananas.
- Next step is to dry these peels. You can dry whole peels or cut them into pieces for faster drying. You can sun dry them for atleast 2 days so that they become crisp and should break easily when you crush them. You can also dry them in microwave oven if you do not have adequate sunlight.
- Then once they are crispy and black, crush them to make a powder. That is it!
- This powder is our banana peel fertilizer powder.
- You can add one table spoon every 15 days around your plant and then water your plant. Preferably raking the soil before application is recommended. You should see some positive results within 3 months.
Then For Making Banana Peel Tea:
- You can take some banana peels and cut them into small pieces of any size.
- Add them into a bowl or any container.
- Add water to the container to soak these peels for atleast 3 days. All the nutrients from banana peel, mainly potassium is released into this water.
- You can discard the banana peels and use this banana tea in 1:5 dilution to water your plants.
Adding or burying raw banana peels directly into the soil around plants is not recommended, because its not only attracts insects and maggots but also it takes a long time to decompose and in its process of decomposition, it might even steal away nitrogen from the soil and your plant might develop nitrogen deficiency.
Well, Last year, we prepared a Mixed fertilizer containing both chemical and organic fertilizers with a detailed discussion and calculations on how to calculate the total NPK value. For beginners and those interested in these scientific calculations, please check out that article.
Now, we will quickly start the recipe for this well balanced organic mixed fertilizer, you can use for any plant in varying dosage to produce healthy growth, increase flowering and fruiting. We will also total the NPK value of by adding the NPK values of each of these components. For beginners – NPK means Nitrogen, Phosphorous and Potassium which are the Major nutrients required for plant growth.
- COW DUNG: Whatever animal
manure you are using, whether horse dung or cow dung or even goat dung. Note
down its NPK value. Here we are using decomposed
cow dung. So NPK is 3-2-1.
We are taking 2000 grams of cowdung powder.
- COMPOST (
Whether home made compost or VERMICOMPOST): In this recipe, we are adding
vermicompost which also contains many useful trace elements, so no need to add
that micronutrient powder containing trace elements. The NPK of vermicompost is
1.78, 0.77,0.94
We are taking 2000 grams of Vermicompost.
- BONE MEAL POWDER, you can also use any of the other meals like sterameal, fishmeal or bloodmeal. If you are a pure vegetarian, you can use soya bean meals as a substitute for bone meal. So the NPK for bonemeal is 3.5, 18, 0
Here, will add both bone steamed meal
powder as well as coarse bone meal chips powder mixed. This fine powder is just
to make it quicker for release of nutrients.
We are taking 1000 grams of Bone meal powder.
- we shall also add some optional stuff into this for additional fortification which also act as soil pesticides or pest repelling agents, particularly neem cake powder or Karanj powder. Then we will also add Mustard cake powder. We will discuss the benefits of each of these some other time.
Well, the first one Neem Cake Powder: NPK of neem powder is here:
N(Nitrogen 2.0% to 5.0%), P(Phosphorus 0.5% to 1.0%), K(Potassium 1.0% to 2.0%).
N – 2.0% to 5.0%, P – 0.5% to 1.0%, K – 1.0% to 2.0%
We are taking 1000 grams of Neem cake powder +
1000 gms Karanj Powder +
- of Mustard cake powder.
- Optionally, You can add 500 gms of Epsom Salt + 500 Grams of Micronutrient Powder to include those trace elements or micronutrients like Mn, zinc, Fe, boron and many others to safeguard our plants from any deficiencies. Also you can add more ingredients you wish to like used tea powder and any other stuff, because this is a one time mix and you offer this on a periodic basis and only once in 15 days or so and you add almost all organic nutrients and this reduces burden and saves you a lot of time, plus this become a quality mix!.
Nothing to worry about over dosage which is an issue with chemical fertilizers which can cause chemical burns. This is pure organic fertilizer with hardly any adverse effect on over dosage.
After Approximate Calculation, the Total NPK value of this fertilizer mix is:
22, 25,07
Have a look at this equation in the table:
| Ingredient | N | P | K |
| Cow Dung (3-2-1)-2000g | 6 | 4 | 2 |
| Vermicompost -2000g | 3.5 | 1.5 | 2 |
| Bone Meal -1000g | 3.5 | 18 | 0 |
| Neem, Mustard etc | 9 | 1.5 | 3 |
| TOTAL | 22 | 25 | 7 |
Then optionally you can perform a soil PH test and mix either woodash or lime to make your soil more alkaline if its too acidic and if your soil is too alkaline, you can add alum powder into this mix.
And one more important point from storage point of view: you might feel some moisture in this mixture due to some moist ingredients like vermicompost. You can either use completely dry ingredients before mixing or you can dry this mixture in sunlight and then store in air tight containers. It will not loose its NPK value much on drying. Remember to mix the ingredients thoroughly well for best results.
RECOMMEDED DOSE PER PLANT? Depending on the plant, you can use one tablespoon once every 15 days, specially for flowering plants and once in a month for other plants. Make sure you apply this after tilling or raking the top soil and apply around the plant – not directly on roots.
Check out the Best Pure Organic Pesticide Recipe.
Well, before I show you the actual recipe or the Formula for the making of our so called magic solution, you must know some Basic concepts. Please do not skip these 5 points am gonna discuss now. Will try to make it as short and as simple as possible, specially for beginners.
1. What do you mean by foliar Spray? Foliage means leaves! So the term foliar spray says it all, that is Spraying a liquid fertilizer on your plants foliage which aids in absorption of certain essential elements like calcium, magnesium through their stomata. Stomata are pores found in the epidermis of leaves which help in nutrient absorption and also gas exchange.
2. Calcium and Its importance: Calcium is the most important component of a plants cell wall. Hence for cell division and growth its indispensable, especially in rapid growers like tomatoes. So we will keep this point in mind and add calcium into our mix.
3. Magnesium and Its importance: Did you know Magnesium is the central atom in between four nitrogen atoms in the chlorophyll molecule. For beginners, Chlorophyll is the pigment present in leaves which is essential for photosynthesis – that’s plant food production. So we will keep this point in mind and add magnesium into our mix using our famous organic Epsom salt.
4. Soil PH concept: We have discussed in detail about the importance of soil ph in nutrient absorption in my video titled Ideal Soil PH for plants. You can check that HERE. Well! when it comes to foliar spray of fertilizer solution, its completely independent of the soil PH, because nutrients are absorbed through leaves.
- And last concept: Many Experts recommend applying egg shells andcalcium tablets to soil and some evenmake a smoothie juice or paste using all kitchen waste like banana peels, fruit peels and what not. This in perhaps unscientific according to me to directly apply to your plants. I don’t know! If you have any scientific explanation to this, please do write in the comment box. What I feel is why not utilize this idea of making this smoothie and keeping a dedicated heavy duty blender or mixer for this purpose for faster composting. Yes! if you are adding this paste to your compost bin and feeding your earth worms, this can accelerate composting process.
So you can utilize this concept of foliar feeding if your plants are not performing well despite all your efforts, care, fertilizing, watering promptly and what not! Many viewers keep asking the same question. So why not make it a habit of alternating your feeds – that’s fertilizing your plants once in 15 days with foliar spray to feed your plants. Because this idea is independent of soil PH value.
Now The Formula or the recipe of this Magic Fertilizer liquid.
I will quickly list out the ingredients one by one and quickly explain the benefit of each of these components.
1. Water: Nothing to explain about this universal solvent. We will formulate this recipe for 1 liter of water.
2. Milk: You can use skimmed milk or if available Raw milk is best. You can even use spoilt milk, butter milk or stuff like that. Use it with lower than 20 percent dilution in water that is 1:5 dilution. So you can add about 100 ml or 200 ml milk to our universal solvent. Milk is not only a source of calcium, but also an antifungal for treatment of powdery mildew and blossom end rot disease on tomato and other vegetable plants. It also kills many plant viruses like tobacco mosaic virus. In place if milk you can add 1 liter of a special water. Yes that’s special calcium rich water for plants. It s nothing but the left over water after you hard boil few eggs. The egg shells release a lot of calcium into this water during boiling.
3. Epsom Salt that’s magnesium sulfate which is a greatest source of magnesium and sulfur. This is easily available at a gardening store or at your local pharmacist and even online. So the dosage is max 5 gms or little lesser than a teaspoon per 1 liter of water.
4. Then the Most important ingredient for adding the major NPK elements into the foliar spray is COMPOST TEA. So, how do you make compost tea? Its really simple. Just Add a handful of decomposed manure or compost like cowdung powder or vermicompost per liter of water. You can make your own quantity of 2 liters or 5 liters depending on your garden size. Allow this to brew for atleast 1 week. Make sure you stir this atleast once every 24 hours to oxygenate this mix till 1 week. Then strain out the liquid using a cloth and use this liquid. I shall make a detailed video some other time on how to use some simple gadgets like an aquarium air pump to quickly make your compost tea.
Well, For now, Once the compost tea is ready, you should dilute this like 1:5 in water and then add about 1 liter to the above solution. Normally if you are using only the compost tea as a foliar spray, you need to use 1:10 dilution. But here we are making a 2.1 liter solution in total. I Hope you got my point!
That’s it, mix it thoroughly and load the spray bottle or use your electric sprayer or whatever and foliar feed your plants. Spray very early in the morning or late in the evening because leaf stomatas are well opened at this period so that absorption happens at its best.
Many studies and research articles on goat dung as a fertilizer have been published on international journals. All of them say, Goat manure is one of the best animal manures for healthy soil and plants, specially for backyard organic vegetable gardening. And if you have couple of goats with you for their milk or whatever purpose, you should never throw away their droppings. You will learn a lot of important stuff about goat dung by the end of this video. Please watch it till the end and learn how to use it and how much to use in your home gardening or container gardening.
This is even available online at amazon. You can CHECK HERE.
So lets begin:
-
- Goat or sheep pellets are very much Dry compared with cow dung or horse dung. Hence these are very easy to collect or store.
- It is Virtually odourless and hence easy to work with and easy to spread on your soil Directly. You cannot directly apply cowdung or horsedung without decomposing, because this can burn your plants.
- Its relatively Free of insects and maggots unlike cow-dung. But drying in sulight for 2 to 3 days before using or before storing is always better.
- It’s a Cheap and Best Organic Fertilizer for your plants: As I said earlier, the pellets can be used for direct applications to flower and vegetable gardens without the fear of getting your plants burnt.
- Goat pellets contains lots of nutrients, the Major NPK elements – Nitrogen, Phosphorous and Potassium, and many trace elements like Calcium, Magnesium, Iron, Manganese and many others. The Nitrogen value may be higher than cowdung or horse dung especially when these goat pellets are mixed with goats urine, whether by default or by using some goat beds specially created to increase its nitrogen value. In this case, composting this prior to application is recommended.
- This manure Increases Flowering and Fruiting and Promotes overall Plant growth. Goat droppings can be used in nearly any type of garden, including that of flowering and fruiting plants or
- Use Goat dropping in your compost bin. It not only enriches your final compost value, but also it decomposes very faster. This is because pelletized droppings allow more airflow into compost piles, which speeds up composting time as well.
- It’s a Low-cost Pure Organic Fertilizer for your vegetable gardening. You can get it for almost free specially when you visit any rural area or you can also get it for free in cities. You know how I collected these pellets? These were collected during the Bakrid festival where you see lot of sheep brought into the city and homes. You get lots of this to collect and save for the whole year. For me this is the most important benefit. Because I never use any chemicals for my vegetable gardening, not even a chemical pesticide. Well..
- Goat dung is also an Excellent soil conditioner: you can mix it while making your potting mix, similar to how to add decomposed cowdung into your mix. You can watch a related video HERE.
- Mulching: for beginners, A mulch is a layer of material applied to the top surface of soil to prevent moisture evaporation, reduce weed growth like grass clipping, twigs, wood chips, bark chips, dry leaves, hay and so on..
One Caution regarding Fresh Sheep dropping or any animal manure for that matter – Just because goat manure is a natural product doesn’t mean it’s completely safe. They can release disease causing microorganisms into the food chain that can make you sick. So better always sun dry completely for 2 -3 days before application or compost it and then use.
Now How to use and how much to use? This is an organic fertilizer. So you can use it similar to how you use cowdung or horse dung. A handful of this on a container once every 15 days for flowering plants or Once in 30 days for your other general plants. Make sure you Apply this after raking or tilling the top layer of your soil.
So, there we have it folks, that was a short article on goat or sheep dung as fertilizer in gardening.
References:
https://scialert.net/fulltextmobile/?doi=ijss.2007.142.147
Healthy Soil = Healthy Plants
This means that you need to enrich your soil. Because most people are not making their own compost at home, they need to buy a fertilizer. Plant fertilizers purchased from the local nurseries often contain chemicals that may harm your plants. And also, these fertilizers can be a bit pricey. So why spend your hard earned money on these pricey fertilizers when you can make one yourself with just a little information?
So, How to Make Your Own Homemade Organic Fertilizers – Today I am gonna list out the Top 10 ways to enrich your soil.
Before that..
Making your own organic plant enriching formulas is really easy and fun. It should be noted that most people understand that the best way to get good garden soil is to use compost to amend the soil. Of course, that is true. Compost can be made at home out of leftover food scraps and lawn clippings, and so it is virtually cost-free.
While it may not be the most exciting of gardening topics, nothing is more important than having a basic understanding of fertilizer. All fertilizers are classified into two basic categories: chemical/synthetic – Inorganic and or natural/organic. I have discussed this in more depth in my previous video on NPK Crystals Fertilizer – the link is shown in description and also perhaps somewhere in a link towards top right corner of this video.
SO coming back to our List of Easy Household Fertilizers
There are actually quite a few common items found in your kitchen, and elsewhere around the house, that can be used as plant fertilizer.
The First in the List is – Aquarium Water
Water your plants with the aquarium water taken right out of the tank when cleaning it. Fresh water only please, do not use water from a salt water tank. The fish waste makes a grreat plant fertilizer.
Then Next – Bananas
Bananas are not only tasty and healthy for humans, but they also benefit many different plants. When planting roses, bury a banana (or just the peel) in the hole alongside the rose. As the rose grows, bury bananas or banana peels into the top layer of the soil – that’s called Top-soil. I have a separate video explaining what is Topsoil and subsoil in detail.
Anyways Both of these approaches will provide the much needed potassium that plants need for proper growth. So banana provide mainly potassium.
Cooking Water
Many different nutrients are released into the water that food is cooked in. Water that is used to boil potatoes, vegetables, eggs, and even pasta can be used as a fertilizer. Just remember to let the water cool before applying it to your soil.
Then very important one – the Egg Shells
Egg shells are rich in Calcium and contain about 1% nitrogen, about a half-percent phosphoric acid, and other trace elements that make them a practical fertilizer. Calcium is an essential plant nutrient which plays a fundamental part in cell manufacture and growth. Most roots must have some calcium at the growing tips to grow effectively. Plant growth removes large quantities of calcium from the soil, and calcium must be replenished, so this is an ideal way to “recycle” your egg shells. Simply crush them, powder them, and sprinkle them around your garden soil.
Epsom Salts
1 tablespoon of epsom salts can be combined with 1 gallon of water and put into a sprayer. Apply once a month, directly to the foliage for a quick dose of magnesium and sulfur.
Wood Ash (Like From Your Fireplace )
Ashes can be sprinkled onto your soil to supply potassium and calcium carbonate. Don’t use ash in areas where you are trying to maintain acid-loving plants – the ashes are alkaline and can increase alkalinity in the soil.
Green Tea
A weak solution of green tea can be used to water plants every four weeks. Use one teabag to 2 gallons of water.
Next interesting item is – Your Hair
Have you ever wondered, Hair is a good source of nitrogen. A good source for this hair is not only your hairbrush but also the local barbershop or beauty salon. Many of these establishments will save hair for your garden, if you ask them for it. But do not limit yourself to only human hair. Dog hair, horse hair, and cat hair also work very well.
Cow Dung or Horse Dung when dry and decomposed
- make an excellent fertilizer. It can be used as a soil amendment just by sprinkling it on top of the soil. Alternatively, it can be dissolved in water alone or combined with another organic fertilizer and applied.
Matches
The old fashioned easy strike matches are a great source of magnesium. To use this as a fertilizer, simply place the whole match in the hole with the plant, or soak the matches in water. The magnesium will dissolve into the water and make application easier.
Powdered Milk
Powdered milk is not only good for human consumption but also for plants. This source of calcium needs to be mixed in to the soil prior to planting. Since the milk is in powder form, it is ready for use by your plants.
NPK Crystals Fertilizer Video: https://www.youtube.com/watch?v=Y654mtxQKmY
Epsom Salt in Gardening: https://www.youtube.com/watch?v=P1jw4b1LelE
Milk in Gardening: https://www.youtube.com/watch?v=61WEepnGMYY
These fertilizers work quickly because they feed the plants directly. But they do come with a downside – they do not improve the soil itself and they can, over time, even destroy the beneficial organisms needed for healthy soil. When you use large quantities of this inorganic stuff over and over again, its byproducts will actually build up in the soil and in time they can hinder plant growth.
Organic/natural fertilizers often use alfalfa meal, cottonseed meal, or fish emulsion to provide nitrogen; bone meal or rock phosphate to provide phosphorus; and kelp meal or granite meal to provide potassium.
The downside here is that they work much more slowly, first breaking down in the soil into forms that the plant roots can more easily absorb, then making their way up the plant roots to your hungry plants.
Organic/natural fertilizers, on the other hand, don’t feed the plants directly but rather add essential nutrients to the soil where they become available to the plants, more slowly, over time.
Understanding the Basics about N-P-K
While there are also many important micronutrients in good fertilizer, it is understanding the “big 3,” the N-P-K, that is the key to making your own effective fertilizer at home. The N is for nitrogen, the P for phosphorus, and the K for Potassium. Each has an important role to play in the health of your garden.
Nitrogen is the nutrient plants use most to grow large and lush – tall stems with lots of good leafy growth. If you examine the N-P-K content of commercial products that advertise “miracle growth” you will find there is no real miracle at all – the amazing growth is due to a balanced but high N-P-K ratio with a hefty amount of nitrogen in the mix.
Phosphorus is needed to grow strong healthy root systems, and to promote vigorous flowering. Commercial “blooming” mixes are usually high in phosphorus.
Potassium helps with plant growth, protein production, plant hardiness, disease resistance, insect resistance and efficient water use. Plants without enough potassium grow slowly and can have yellow leaves.