These zero or low maintenance plants do not require any special fertilizers for growth and flowering. But you can add a handful of compost like cowdung or vermicompost or any compost once 3 to 6 months.
Here’s my list of top 10 low maintenance houseplants for lazy gardeners:
12: Norfolk Island pine: Also known by many as the Christmas Tree. This is a hard to kill plant in tropical climates and needs very little care to survive. It grows well in bright indirect sunlight and also direct sun. It needs watering every other day or even less depending on the climate you live in.
11: Succulents & Cacti: Most people think succulents are hard to maintain and they die even after proper and intensive care. This is the mistake they do. They actually thrive well on neglect. They need very less frequent watering like once or max twice a week. They do well in full sunlight as well as indirect bright light depending on the type of succulent.
10: Spider Plant (or Chlorphytums): This is one of the best starter plant. Spider plants are mostly grown in hanging baskets. But they thrive in any container or any type of soil or potting mix. They grow very well in shady places with indirect bright light. They do not need daily watering. you can water on alternate days or even once or twice a week depending on the climatic conditions.
9: Peace Lily: Peace Lily is one of the most beautiful low-maintenance flowering plants you can add to your home garden. Additionally, the Peace Lily is also a good air purifier plant. This can be grown indoor or outdoors and requires bright indirect sunlight. It has beautiful shiny green leaves with creamy-white hooded flowers. You can water it on alternate days or even lesser depending on the climate.
8: Jade Plant: This is actually a succulent plant which requires very less frequent watering, like once or maximum twice a week even in summer season. This plant requires at least 2 to 3 hours of direct sunlight for proper growth, preferably morning sunlight.
7: ZZ Plant: This is another attractive ornamental plant that requires very little care. It’s a beautiful plant with glossy green leaves and also an air purifier plant. It is a drought tolerant plant and requires very less frequent watering like once or twice a week. It can be grown indoors or outdoors in shady or bright locations. It doesn’t need direct sunlight.
6: Syngonium: This is another beautiful ornamental flowering plant with an attractive foliage. This needs alternate day watering or at least weekly twice watering. It grows in indirect bright locations as well as in direct sun. If kept in direct sun, avoid hot noon sun and water it daily.
5: Snake Plant (sansevieria): These are actually true zero maintenance plants and can survive the worst of the conditions. They require very less watering and even sunlight. They adapt to any conditions and grown in dark locations as well as bright locations and also in direct harsh sunlight. They come in many beautiful varieties and colors.
4: Lucky Bamboo: This is a dracaena species and grown mostly in water. But it grows equally well in soil too. If grown in water, this is a very low maintenance plant and requires changing water once in 10 to 15 days. Its grown indoors and needs very little light.
3: Philodendrons: These are again zero maintenance plants that need very little light to grow. They can be grown indoors or outdoors in shady places. They need less frequent watering like once or twice a week.
2: Aloevera: If you can’t remember the last time you watered your plants, aloe is perfect for you. This is a succulent plant which store water in its thick fleshy leaves and can survive many days without watering. It grows indoors as well as outdoors, but can get leggy if it does not get sufficient direct sunlight.
1: Money Plant or Pothos: This is also called Devil’s ivy, because it’s a hard to kill plant and survives even the worst conditions. Pothos come in a wide variety of beautiful colors and varieties like golden pothos, marble queen, marble prince, neon and so on. They are grow indoors mostly in water as well as outdoors in bright shady locations. You can check a detailed episode on Money plant and secrets to get very large size leaves in pothos, from a link in description below.
The other low maintenance plants that need a mention are: Dieffenbachias, Umbrella tree or schefflera, Plumeria or Champa tree, Dragon tree, Rubber tree, and Pepperomias – but not variegated ones – any variegated plant needs more sunlight exposure because the pigment chlorophyll essential for photosynthesis is lesser in variegated plants.
Now I will tell you two fruit trees I have grown that need no special care except watering, sunlight and occasional handful of compost. The first one and my most favourite tree is Mulberry tree, which can also be grown in containers to bear fruits. The second one is a fig tree. Choose grafted trees if you are growing in large containers.
- Rooting Hack: For faster and guaranteed rooting of stem or branch cuttings, take a small piece of fresh aloe vera leaf and insert the cutting into it and then plant into the soil. Roots grow as early as 10 days depending on the plant you choose.
- Candle Hack: Seal the upper cut end of your plant stem or branch cutting using few drops of candle wax. This helps prevent moisture evaporation and result in faster rooting.
- No Browns for Composting? Use a paper shredder and use the shredded paper and card board to add into your compost bin for faster and smell free composting.
- Easy Tomato Stakes: Tomato plants require support to avoid awkward bends and also to get the best yield. String Support your Tomato plants using a small piece of GI metal wire. Make it into a U-shaped loop and insert it near the roots. Tie one end of a string to this and the other end to some support at the top.
- Banana Peel Fertilizer for Flowering: To make banana peel tea, soak pieces of banana peels in water for 2 to 3 days. Dilute this liquid with water in 1:5 ratio and water your plants to provide potassium to your plants which increases flowering in plants and also makes the flower size bigger.
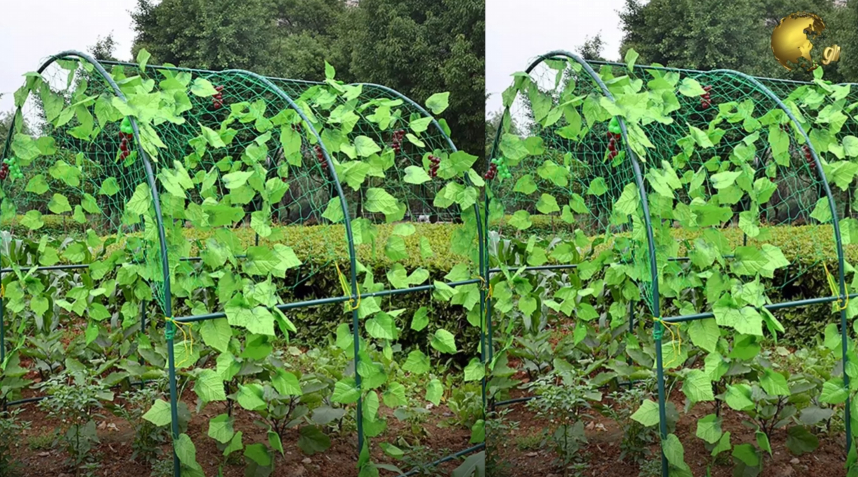
- Anti-Gravity Plant Support: While growing climber veggies, do not take them to a height above 6 feet, but instead support in a slope like fashion, like take it to a height and then slope the growing ends downwards to assist in long-distance transport of water and nutrients for healthy growth. The arch like trellis is the ideal support fence for growing climber or creeper veggies.
- Hairs to Roots: Insert tomato seedlings as deep as possible to increase the density of roots formed from tiny hairy projections from tomato stems and this makes the plant stronger to produce the best yield.
- Big Leaves: To get large sized leaves in your money plant, use a moss stick or coir stick to anchor the aerial roots to it. Wet the moss stick whenever you water the money plant.
- Onion + Aloe Vera Rooting Agent: Making a paste using onion and aloe vera gel and dipping the cuttings into it for few minutes before planting in soil will help in faster and guaranteed rooting.
- Spoon Transplant: To transplant your seedlings, use a spoon, dig out as much soil with it including the roots of the plant and hold the leaves of the plant and not the STEM to pull out, because this can squeeze and damage the water and food conducting tubes – xylem and phloem and the little plant may die.
- Grow From Junk: Never throw away a pine apple crown, just remove the bottom leaves and keep the bottom inserted into a glass of water for a week and then transfer to a container. It will bear fruits within a year.
- Eggshell Water: One eggshell contains about 2gms of calcium. When you boil eggs, a small percentage of this calcium and phosphorous is released into the water. Do not throw away this water, but use it to water your plants that require a lot of calcium – like tomatoes and peppers as well as flowering plants.
- Cello Tape Pest Trap: Wrap the cello tape in reverse on your fingers and use the sticky part to touch on leaves infested with pests like aphids, whiteflies and mealybugs.
- Clay Soil Hack: Remove Clayey or sticky soil from roots using this simple Hack: When you bring your plant from a nursery and start repotting, most often you find they have stuffed the plant in a clay-rich sticky soil. You can remove this soil without damaging the roots by soaking the root ball in water for few minutes till this soil dissolves. Then you can repot this plant in a well-draining potting mix.
- Root Teasing: Always Loosen up or tease your roots before repotting into a new container.
- Toilet Paper Cloning Hack: Use Aloe vera and Toilet paper to produce roots faster during air layering your favourite plant.
- Aspirin Hack: During conventional air layering to produce faster and better roots, use one tablet of aspirin 350mg per litre of water and add this water you’re the potting mix and then wrap it around the injured stem for faster and dense root formation.
- Hydroponic Cloner: For faster rooting, make your own hydroponic plant cloner using a plastic bucket and an aquarium pump. Healthy Roots develop within 8 days.
- Free Calcium: Egg shells easily dissolve in vinegar and release free calcium to your plants. Make egg shell powder and the add about a cup of vinegar to a cup of egg shell powder and stir nicely and leave it for any hour. Then dilute this to 1:100 or more to water your plants and treat acute calcium deficiencies which can produce blossom end rot disease in your fruits and veggies.
- Simplest Plant Cloner: Use any container and place a couple of aquarium air stones to pump oxygen into the water. This helps in faster and guaranteed rooting of any plant cuttings in water.
- Wheel-Barrow: No Wheelbarrow to move garden stuff? Do not worry, the cheapest alternative is a large cloth or an old bed sheet. Just load on the heavy objects and drag it along.
- Aspirin for Rooting: When you propagate cuttings in water, do not forget to add a small piece of Aspirin tablet into it for faster and stronger root development.
- Seed Split Trick: Split the Cilatro or Corinader seeds before planting them the sand paper paper method and apply gentle scraping pressure to split the seeds and do not crush or damage them using a heavy objects like these. This helps to grow enormous cilantro harvest.
- Scrape and Sow: Use sand paper to scrape the hard seed cover of certain seeds like apple, chickoo and those with hard seed over for faster seed germination.
- Treat Leaf Curl Virus using Asafoetida: Take 500ml of sour butter milk. Add one teaspoon or about 5 gms of Asafoetida powder to it and mix well. Let it stay for 1 or 2 hours. Sieve this solution and Spray thoroughly over the affected plant including the underside of the leaves. Repeat this, every 3 days for 3 – 4 times to completely cure the leaf curl disease.
- Egg Shell Planter: You can use egg shells to sow seeds. To make drainage holes, scrape with a sand paper and use a thin drill bit to make a hole without breaking the shell.
- Egg Trays: Card board Egg trays can be used as seed germination trays. You can directly transplant the seedling along with the card board into the soil, as this is bio-degradable.
- Chalk Sticks: Chalk is chemically Calcium Carbonate. You can bury a chalk stick into the soil while planting your veggies. This really works wonders for plants like Tomatoes, Peppers, squashes, egg plants and almost any vegetable plant.
- Strong Roots: Strong Roots means a healthier plant with a better yield. In its early growth phase, adding a source of phosphorous like bone meal powder or organic rock phosphate powder will produce stronger roots and produce a better harvest.
- Seed Viability Check: An Easy method to check viability of your larger seeds is to pour them into a bowl of water. If the seeds are floating, this means they are dry and not viable. Discard them and use only those seeds that sink to the bottom.
- No Garden Gloves? Scrape your nails into a soap before working with your garden soil or potting mix. This helps in cleaning your hands easily later on and also the dirt won’t enter into your nail beds.
- Repel Animals: A simplest way to repel Some animals like cats, dogs and rabbits – is to soak a some pieces of cloth with vinegar and stuff them in some areas of your garden. These animals cannot withstand the smell of vinegar and may not return if you repeat this process for few days. Similarly using Asafoetida wrapped in a piece of cloth will deter these animals and certain insects.
- Magnifying Lens: Use a Magnifying Glass to closely examine and diagnose your plant pests and insects to identify them and follow the treatment accordingly.
- Tea Fertilizer: You can also use tea waste or coffee grounds on flowering plants as an organic fertilizer to boost blooms.
- Tea waste compost: Add used tea waste or coffee grounds into your compost bin for faster composting because earth worms digest them very fast.
- Seed Spacing: You can do perfect seeds spacing for Tiny seeds like spreading them apart in a row on toilet paper – for better visibility and even spacing and sowing. You can make a seed tapes either in a row or a square or round seed board specially for carrot seeds for even spacing and better growth and ease of harvesting.
- Over-Ripe: Garden vegetables and fruits that become over-ripe are an easy target for pests. Remove them as soon as possible to avoid pest growth.
- Faster Germination: A simple hack for faster germination and healthy seedlings is to soak seeds in Epsom salt solution for a couple of hours before planting – like half a teaspoon of Epsom salt in 100 ml of water. You can also spray Epsom salt solution on your seeds and seedlings for healthy outcome.
- Pick Small: You can Pick small seeds for sowing with a stick or tooth pick dipped in water.
- Acidify Soil: For Acid loving plants like Rose, Hibiscus or Hydrangeas, use 5gms of Alum powder in 1 litre of water once every 15 days and this will boost flowering.
- Soil PH Test Using Litmus Paper: Mix Water and Soil in 1:1 ratio. Dip the litmus paper and match the color with your color coding chart that came along with your litmus paper kit.
- A Rough Soil PH Test Method: Take a soil sample and pour some vinegar. If it fizzes and bubbles you have an alkaline soil. What if the soil is acidic? Add baking soda one or two teaspoons and mix it with soil. Then wet the soil baking soda mix with distilled water. If it fizzes and bubbles your soil is acidic, because the acidic content in soil reacts with a base or alkaline stuff like baking soda.
- Free Bio Seed Pots: Never throw away the toilet paper card board roll. But use it to make seedling cups which are bio degradable and can be directly planted into soil without disturbing roots.
- Paper pots: You can also make seed pots by rolling newspaper and even this is bio degradable and similarly you can directly transplant with the pot into the soil or into a larger container.
- Mosquito Repelling Plants: Growing plants like Lemon grass, Citronella, catnip, basil, marigolds, eucalyptus and many other plants helps deter mosquitoes.
- Turmeric Treatment: You can use turmeric powder from your kitchen treat and prevent rose-dieback disease after pruning your rose bush.
- Silica Gel Packets: Never throw away these tiny sachets, use them in your seed storage container as desiccants which increases your seed life and protects them from fungus.You can also use these to preserve and protect powdered gardening stuff like bone meal, fungicide powder, rooting hormone, etc. Just tape the sachet to the underside of the container lid and that’s it.
- DIY Watering Can: Take the base of a soda bottle and place it around one end of a pvc pipe. Heat it up with a lighter. It should shrink and clamp around the open edge. No glue needed. Use a pin and poke some holes in the bottle base. Next, cut the edge of the pipe at an angle using a saw blade. Next insert the pipe into the inlet and use some hot glue to hold it in place. Optionally, colour it to get that beautiful look.
- Mini Green House: Use plastic bins or containers as mini green houses or poly houses for faster seed germinations.
- Do Not Kill: Avoid spraying a pesticide on the flowers. This is to avoid any harm to beneficial Pollinator insects like butterflies and honey bees which are essential for pollination and fruit formation.
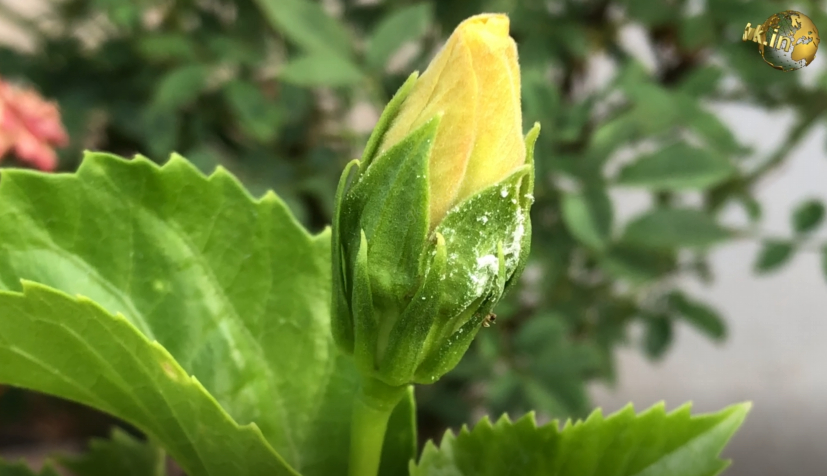
Every single bud in your garden is like a little promise from your plants. But, when these buds collapse and fall off for no reason, it may bring tears into gardener’s eyes.
So, What is Bud Blast? Bud blast is a term used to describe flowers that have prematurely aborted before blooming or soon after blooming, that means premature bud drop off. These also apply to vegetable and fruits: flower, bud or fruit drop off.
What Causes this premature Bud Drop in Flowers?
The good news is that the most common factors involved in this bud blast are external factors and hence can be easily diagnosed and treated.
- Temperature Extremes – Extremes in temperature can significantly influence the bud development, flowering and fruit formation and development. When temperatures fluctuate whether too high as in summer season or too low as in winter and frost, the plants get stressed and may respond by dropping their buds and flowers in an attempt to survive or conserve the overall plant energy.
Now the Solution to this problem: There are many solutions to this problem. Like, if its extreme summer, you can install shade nets or green nets of at least 50% to protect the plants from too hot sun. You can use any thin cloth to give them the filtered light if you do not have green net. You can also mist them with water atleast once daily especially in the noon sun.
If its extreme winter, Moving your plants may correct the problem, you can start bring them indoors or you can cover them with polythene covers by small making holes in them or you can also use some support sticks or a garden trellis and then wrap around with a blanket or a polythene cover to provide the correct temperature as required, specially in night time. - Water stress: Improper watering causes a great deal of stress to plants. Both Over-watering and Under-watering can cause this stress to plants. Under watering may cause plants to redirect water from enlarging buds to the food-producing areas of the plant which results in shrinking of buds, flowers and fruits which eventually dry and fall off. This is an act of self-preservation by the plant. And Over watering often leads to root rot, or other fungal infections that may destroy the developing flower buds.
Now The Solution to this problem: Always water the plants when the top one or two inches of the soil is dry. Best is Finger dip method to check moisture of top 1 or 2 inches of soil. You can also add a thick layer of mulch on the top soil to keep moisture levels more even.
- Humidity – Insufficient humidity can interfere with proper bud development. Also when humidity fluctuates considerably then it will lead to buds that drop off. If you want to increase humidity, you can make a humidity tray and place your container on this. Simplest humidity tray consists of some small pebbles in a tray filled with water, which can increase the humidity around the plant.
- Pest Attack: Pests also can cause bud drop in most plants. Insects like Aphids are small, sucking insects that will cluster on the new growths and buds will cause damage to the developing flowers or fruit which eventually fall off. Most of these pests are easily visible and can be easily diagnosed, and controlled by spraying a pesticide weekly for treatment and once in 15 days for prevention. Neem oil is the gold standard for organic gardening. It’s a broad spectrum natural pesticide. 5 to 10 ml neem oil with few drops of liquid soap will solve this problem.
- Improper Fertilizing: Nutrient deficiency is a common problem. It can be due to deficiency of both major nutrients – that’s NPK – nitrogen, phosphorous and potassium and also minor or trace nutrients like iron, copper, boron, sulphur, etc. It varies from plant to plant. Feeding your plant with a balance fertilizer containing all these elements will solve the problem. You can check how to prepare this type of cocktail mixed fertilizer here.
- Inadequate Pollination: Insufficiently pollinated young fruit will be shed. This can be caused by an inadequate presence of pollinator insects like bees and butterflies during the blooming period of your plants. You may encourage a greater population of bees and other beneficial insects by companion-planting roses and other garden plants that will attract them and alos avoid using chemical pest control sprays which can drive away or harm these pollinators.
- Wrong Lighting – This is also connected with temperature extremes. Light has a direct effect on how well the plant can produce food and survive. Often, buds fail when high light plants are in low light settings and vice versa, that is plants accustomed to low light situations may overheat in direct sun, causing buds to fall off. Move these plants to more appropriate lighting conditions. One hint here is: Avoid direct sunlight exposure during noon – that is when the sun is at its peak, especially in hot summer season.
- Young Plants – Younger plants often lack the root structure to support blooms and this might lead to aborted blossoms. So when you see young plants producing flowers, then simply pinch these off to divert plants energy to growth of foliage and branching rather than fruit products at such a young age.
- Transplant / Repotting Shock: Recent Repotting or Transplantation is another reason. What you can do in this case is, pick any blooms off the plant to allow the root system to develop better before permitting it to bloom again. You can also water the plant with Epsom salt solution once after repotting or transplanting. 1 teaspoon Epsom salt per litre of water is the recommended dosage. Another common mistake people make is immediately repot a newly purchased plant. You need to keep it away from hot sun and allow it get accustomed to its new home and then repot carefully.
- Transportation of the plant: which can be another reason that can be considered for buds falling off because of weakening due to the stress of transportation. Like for instance, you are buying a plant full of flowers and buds from a nursery or from online and while on its journey to new home, it may drop its flowers and buds. This is rather a mechanical cause.
Now, 2 extremely important bonus tips:
Firstly, Constraint Space Garden: using small containers or poor spacing between plants to grow plants that need larger space or large soil volume.
Secondly, In vegetable gardening especially while growing climbers or creepers, that need support. You must never take the plant too high, like not more than 7-8 feet. If you take them too high transport of water and nutrients against gravity will be difficult and this can result in flower and fruit drops. A slope or arch like support like this, can easily solve this problem.
- Placing or Planting Identical Plants together or in a row: This may sound weird but it’s true. Though it may look nice with a tidy row of similar trees in your garden or even if it’s container gardening, you tend to place one type of similar plants together. This is a bad idea because If pests or disease strikes, you’ll lose the whole row.
- Transplanting a Seedling: Many gardeners tend to hold the little ones with their tender stems. This is wrong, because stems are tender and this can damage the water and food conducting tubes – that’s xylem and phloem passing through the stem. Always lift the seedlings by their leaves and use a fork or a spoon to dig through the roots.
- Immediately Repotting a Newly Purchased Plant from a Nursery: If your plant just came home from a local garden centre or nursery, let it adjust to its new environment for atleast a week before repotting it. This is because the Plants are already in shock in their new place and they need to adapt to new factors like light, temperature, and humidity conditions. On the contrary, if your purchased a plant online, you have to repot it immediately for reasons, quite obvious.
- Over Confidence: One of the biggest mistakes sometimes experienced gardeners make is over-reliance on their own experience and knowledge. You are never perfect and the most successful gardeners are usually those who are willing to continue learning and growing in their knowledge.
- Removing the Root Ball while repotting: Never pull out the plant by its stem to remove the root ball. Just tap the container on a hard surface gently, it will easily come out. If it resists, run a knife around the container to loosen the root ball.
- Using Contaminated or Dirty Tools: We’ve all been guilty of this one time or another. Digging in different pots of soil with the same tool can transfer pathogens from an afflicted plant to a healthy one. Investing in multiple sets of trowels or spades may not seem to be practical. What you can do is disinfect or clean the tool after use or just wash it with water. You can use household baking soda or even vinegar for cleaning your tools.
- Placing a Repotted plant in Direct Sunlight: This is another common mistake most of us commit. The plant is already in transplant shock after repotting. Always keep the plant in indirect light or shade for at least a week before you shift to full sunlight.
- Planting Too Close Together: That’s Spacing: Whether its planting seeds or saplings, planting too close to each other is not useful and will lead to stunted growth of plants due to competition for nutrients in the soil.
- Sowing Too Deeply: This is a common mistake most neophytes commit. If you sow too deep, the seed may not germinate. The general rule of thumb is, the seeds should be sown twice or max thrice as deep as they are thick. For example, if the seeds are 5mm thick, sow them 10mm deep. If the seeds are too tiny like less than 1 mm, simply sprinkle them on the top of soil.
- Removing the Mother Soil during repotting: You should never remove the entire mother soil in which the plant came with during purchase, unless the soil is too clayey or if its afflicted with disease like fungus gnats or stuff like that. Just tease the roots and place the root ball into the new container while repotting.
- Killing Beneficial Insects and Pollinators like honey bees and butterflies. And also the pest eating insects like ladybugs, beetles and many more.
- Over Watering: This is the most common mistake and the biggest plant killer. Over watering or water suffocating the roots can lead to root rot and death of the plant. The best practice is to dip your finger to about an inch into the soil to check for moisture before watering.
- Over Fertilizing: Over feeding the plant with fertilizers especially the chemical fertilizers in an attempt to make them grow faster can literally kill your plant. The best fix to this problem is to use organic fertilizers like vermicompost, decomposed cowdung and stuff like that and stay away from chemical fertilizers.
- Not Following Hardening-Off Process: Hardening Off means you gradually expose your seedlings to the outside world mainly the sunlight and get them acclimatized. Once you get your first leaves on your seedlings, you introduce them to sunlight in an incremental or step by step exposure like for example,1 hour for the first day, 2 hours for the next 2 days and so on.
- Not Closely Inspecting Pest Attacks: Pests need to be identified and eliminated carefully. Failure to control the pests like aphids, whiteflies, mealy bugs and others can cause heavy damage to your plants.
- Hesitating to Prune or Trim Your Plants: Pruning or trimming is very much beneficial to the plant and promotes more branching and hence increases the yield. You can watch a detailed video on when and how to prune from a link in description below.
- Allowing Weeds to grow: This is an act of laziness rather than mistake. Unwanted plants or weeds will suck out the nutrients from the soil and cause deficiency issues in your main plant.
- Not knowing the Importance of Sunlight: Without Sunlight, Plants cannot prepare their food and survive. However the light requirement for every plant is different. But expecting to grow vegetables and fruits without full sunlight exposure is a mistake. As a general rule for most flowering and fruiting plants at least six to eight hours a day of direct sunlight is indispensable.
- Planting invasive plants close to other plants. This can cause deficiencies in the weaker plants closer to the stronger invasive ones. As You all know – SURVIVAL OF THE FITTEST!
- Relying on Unscientific Information in Gardening: This is the most dangerous mistake. Newbie gardeners tend to watch so many crappy non-scientific gardening information and advices on the internet and damage their plants. Little bit of common sense and applying some basic science is all that’s necessary for successful gardening.
Happy Gardening!
With summer in full swing, maintaining a vibrant garden is every
gardener’s main concern. A good drip irrigation system can be key to
maintaining a beautiful yard, while conserving water and maintaining lower
costs.
Some people consider drip irrigation as the concept of a Lazy Gardener. It’s
partly true! If you are young energetic and have time to spare an hour to water
your plants, this is not for you! This is for people who have a larger garden
or for those who do not have time or for elderly people, drip irrigation system
is certainly a boon.
Having said that, let’s do it! Remember you can easily do it yourself (DIY) and its really simple and you don’t have hire some professional for this job. I have done everything myself for the entire garden.
Well, We will Split this topic into 3 sections:
- Components of a Simple Drip Irrigation System.
- Planning the Installation.
- Actual Procedure.
Please watch it till the end. We will show you some important tips and tricks like how to adjust water flow to each and every plant because every plants has its own watering requirement.
First Step is knowing the COMPONENTS of a drip irrigation system.
- MAIN SUPPLY PIPE: Usually 16 mm in calibre.
- FEEDER LINE PIPE: Usually 4 mm in calibre.
- DRIP EMITTERS
- EMITTER STAKES
- PIN CONNECTORS – 4mm
- T – Connectors
- Straight Connectors
- Straight Connectors with Taps
- Elbow Connectors
- Dummy Pieces
- End Caps
- S hole puncher
- Water Tap Connector
- Teflon Tape.
- Optionally Water flow Controllers or Timers if you have the budget.
Next Step is Planning. This is nothing complicated but not
to be ignored.
Firstly count the number of containers you have in total. Then Arrange the
containers in one or multiple rows. Sort out the plants like water loving
plants that are exposed to maximum sun and shade loving plants, succulents and
others and keep them separate or arrange accordingly. You can exclude these
plants which require once or twice a week watering or connect a separate line
for these using a connector with valve or tap to close the supply and open only
once or twice a week. If this is not
possible, Do not worry, I will show you how to adjust the amount of water
flowing into each plant during the installation process. So, please watch it
till the end for many useful tips.
Well, You can even sketch this plan out on a piece of paper which might be
helpful during installation procedure.
Next step is approximately measuring the requirements to order either a 50 plant kit, 100 plant kit or 200 plant kit depending on your garden size. This one is a 150 plant kit with 30 metres of main supply pipe, 60 meter of feeder line and all these other components. The link to this item is given in video description below. You can check that if you are interested.
Well, The final step is how to install drip irrigation system for your home or terrace garden.
First Step is to Start with the Main Supply line, Just start
laying this pipe in between two rows or behind the containers. If you have two
rows, its wise to put this in between the rows. You will know the advantage of
this as we proceed further.
At corners or turnings, you can use elbow connectors to prevent kinks and
blockage. If you want to limit or cut off supply to a portion of your garden,
use the straight connector with tap. This is particularly useful if you do not
have sufficient water pressure in your garden, especially in your terrace
garden. In my case, I want one main supply to go to these hanging pots, so I
will use a T connector or splitter to take one line to the top and also I will
install straight connectors beyond this to close the valve and divert the flow
exclusively to the hanging containers. Also try to use straight connectors with
taps at multiple places, so that you can selectively water different portions
of your garden.
If you have some larger containers or plants not accessible to this main supply
line, then you can use these self watering drip needles. These fit into any
standard sized bottles like pepsi or sprite bottles. Cut the top of the bottle
and fill water and adjust the drip flow rate or drops per minute by rotating
the knob. For larger plants you use large sized bottles and vice versa.
You should use Teflon tape or glue if you want to prevent leaks from these joints.
Then, the Next step is to punch holes in the main supply pipe to connect feeder lines. You can punch one hole at diagonally opposite sides of the main supply pipe. This is to ensure proper distribution of pressure or flow of water. This is the reason, I said laying the main pipe in between the rows.
Insert the 4mm pin connectors to one end and then at the container end, first insert this stake to anchor the emitters to the soil. Then connect the drip emitters. This is the outlet and this is the inlet of a drip emitter. Repeat these connections for every container in your garden. To control the drip flow rate or the drops per minute, you need to adjust the water flow knob of each drip emitter.
Then make sure you close the end of the main supply pipe using the end caps. You just have to insert the end cap and then bend the pipe and loop it like this to block the pipe.
Then finally connect the main supply pipe to the water source. You can even use automatic timers and controller devices if you have the budget.
HAPPY GARDENING!
Birds are rightly called “The Beautiful Pest Eliminators” of our garden. If you have birds fluttering around your garden, it’s not only a beautiful sight, but also a sign of a healthy environment. You want to attract birds to establish an ecological balance in the garden and moreover attracting birds to your garden can be fun & educational.
Let’s list out the 5 important benefits of attracting birds to your garden:
- PEST ELIMINATION: As already said, they are the beautiful pest eliminators of our garden. They act as pest controllers of everything from snails, caterpillars, aphids, mealybugs and many other pests.
- POLLINATION: The birds help fertilize plants in the same way as any other pollinator like honey bees and butterflies, that is by transferring pollen from one flower to another.
- WEED CONTROL: Sparrows, finches, and other birds eat weed seeds, eliminating the unwanted plants or weeds.
- STRESS RELIEF: Yes! Watching birds, interacting with them, listening to their songs can certainly help relieve stress and promote well-being.
- WILDLIFE CONSERVATION.
Having said that, now let’s look into some easy ways to attract birds to your garden.
What do birds need? Well, they look out for three basic needs: Food, Water & Shelter.
- First step is to stop using chemical fertilizers and pesticides. I have discussed on these issues and using natural fertilizers and pesticides in my previous videos; you can check those from links in description.
- Provide Food and Water to birds – like installing simple bird feeders and bird baths in your favourite spots in garden. Add simple bird food like sunflower seeds or anything that’s available at your local pet store, including the mixed seeds to attract a variety of birds.
- Provide Shelter – like installing bird houses and stuff like that to provide shelter. If you have larger trees in your garden, it’s an added advantage.
Now lastly coming to the Bird Feeders: There are several
types of feeders to choose. You can hang feeders from hooks. You can even make
your own DIY bird feeders from plastic bottles.
Take any sized plastic plate or a tray like this.
Fix the bottle cork to the centre of this tray. Bolting this is a good idea to
make it sturdy. Also try to prevent any leaks.
Make holes like this near the bottle mouth.
Fill the bottle and cork the tray to the bottle and invert this set up.
You can hang this simple DIY water feeder for birds in your garden using some
strings.
This is an inexpensive plastic bird feeder.
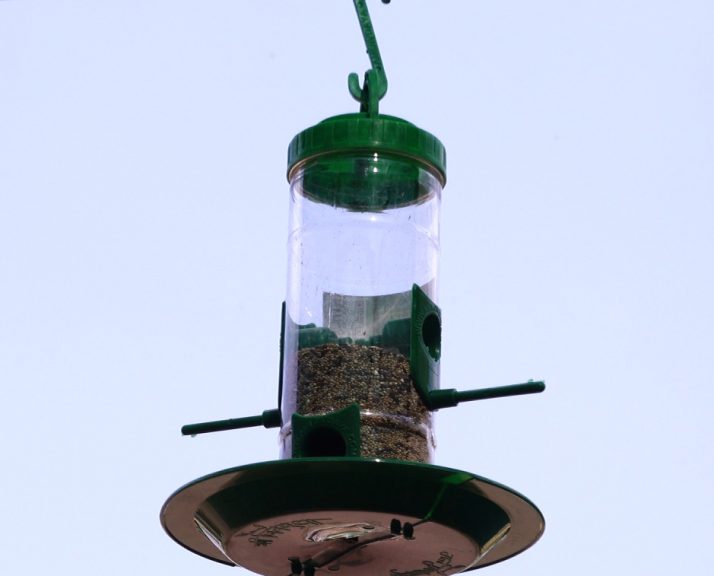
It’s easy to assemble. Just fix the plate with the provided screws. Then fill the bird food and hang it in your garden.
Remember! Attracting birds to your garden is not an instant process. It might take few days for birds to find your feeders and then become your frequent garden visitors.
Let’s look into the Topics Covered in this episode:
- Plant Purchase: Seed grown vs Cuttings grown vs Grafted Trees.
- Repotting: Should I repot immediately after purchase?
- 10 Golden Rules to Follow while repotting a plant
- Common Care Tips for Growing Fruit Trees.
Let’s begin:
- Plant
Purchase:
I am sure most of us might have this question in mind: Growing from Seeds vs
Growing from Branch Cuttings or Choosing to Purchase a Grafted tree. Which one
do you thing you should opt for?
First of all, growing from seeds is a great fun thing to do and we all have done it many times for gardening fun and experimenting. But the major disadvantage of seed grown tree is they are not “true to seed” – meaning they may not produce identical fruit tree and more over it might take ages for the seed grown trees to products fruits, but of course there are some exceptions.
Secondly, Plants grown from cuttings including the air layering method may produce the genetic clones of the parent tree. Fruit trees such as figs, pomegranates, mulberries and many others are generally grown by this method. But the major problem with this method is they do not have enough roots developed to support fruit production and more over there are only fibrous roots and no tap roots which are important for fruit trees for anchorage. Whereas Seed produced plants have a well developed tap root system and this concept is used in Grafting. The ‘root stock’ which is the lower portion of the plant with strong root system and the ‘scion’ which is the branch from selected delicious fruit tree which is grafted on to the root stock.
Having Said that, its time to choose which trees to purchase for your container gardening. It’s obvious that grafted trees, specially dwarf varieties are the best one to grow in containers.
- REPOTTING: Whether Purchased online or offline from a local nursery, people often have a misconception that immediately repotting a newly purchased plant into a larger container and a nutrient rich potting soil will make your plant grow like crazy. This is not always true.
Now let’s discuss some Very important points and concepts, that you must keep in mind if you want to keep your newly purchased plant healthy and avoid the so called repotting or transplant shock.
To answer this question, let us ask 2 QUESTIONS:
- When Do I repot a New Plant Purchased offline, that’s from a Local Nursery or Garden Store?
- When Do I repot a Plant Purchased Online? Like from nurserylive.com or amazon
Now, lets quickly look into the conceptual answers to these queries.
- If your plant just came home from a local garden centre or nursery, DO NOT REPOT IMMEDIATELY. Let it adjust to its new environment for few days or atleast a week before repotting it. This is because the Plants are already in shock at their new residence until they get used to new factors like light, temperature, and humidity conditions.
- Then in second scenario, that is when you purchase a plant online. Repotting immediately is the best solution in most cases. Because, it is very much likely that the plants would have travelled hundreds or thousands of miles and many days without any water or moisture before reaching its final destination. The plant will be going through a recovery period and an acclimation period during these days of transport in whatever medium the seller packs them in. So, Why let the plant re-acclimate twice in this situation.
- The 10 Golden Rules of Repotting:
Let’s quickly list them one by one:
- Water the plant the day before you plan to repot.
- Perform Repotting in the evening hours to prevent shock to the plant during sunlight that is the day time which is the active period for photosynthesis. Let it get overnight period of rest and recovery.
- To Remove the Root Ball, Gently Tap the rim of the pot to a hard surface like a table or a counter. This is to loosen the root ball instead of pulling it with force which can damage the roots or the stem. If the root ball resists to come out, run a knife between the pot and the root ball to loosen the root ball.
- Inspect the root ball for things like: any root worms or maggots, root disease and if they are root bound to decide whether you want to repot in a larger container or perform root pruning.
- Choosing the Right Container: For fruit and Vegetable plants especially if you are growing on terrace, choose fabric grow bags as your first preference. This is because they are not only light but also follow the principles of AIR PRUNING and can grow into healthy trees using this principle.
Then It’s also very important to choose a pot that is of appropriate size for the plant. Like, You should never pot a 6 inch pot plant into a 14 inch or a very large pot. Go Step by Step, Choose one or two steps higher, like 6 inch pot, you can plant in 8 inch or 10 inch pot and so on.
- Drainage Holes: This is probably the most important factor you should consider. If you do not make enough drainage holes at the bottom of the pot, your plant will stand in water and lead to root rot and death of the plant.
- Choosing the Right soil: . As a general rule use a well draining nutrient rich soil with atleast 30 percent compost like vermicompost or decomposed cowdung. To make it well draining, you might have to add cocopeat or peatmoss to garden soil in proper proportions. Make sure you also add stuff like bone meal or soya bean meal for inducing flowering and fruiting. Check the best Potting Mix recipe or formula from my post.
- Partially fill the container with potting mix and then place the root ball exactly in the center of the pot. Then add additional soil to cover the empty space. Make sure the surface of that root ball is below the rim so you can cover it adequately with potting soil or compost and also this good space for properly watering your plant.
- Gently tap the pot on a hard surface to remove air pockets and to level the soil from within.
- Finally After Repotting, water the plant thoroughly and this remove the left over air pockets and stuff like that. Then to counter the Repotting or Transplant Shock, you can follow these simple steps: Water the plant with Epsom salt solution weekly once for a about a month. The dosage is 1 teaspoon Epsom salt per litre of water. Finally keep the plant in indirect sunlight or under a green shade net for atleast a week, before shifting to full sunlight.
Happy Gardening!
In this post
we will try to simplify plant identification and will make an attempt to
classify and identify about 100 common house plants and quickly know their important
care tips – like watering and sunlight requirement. Of course these
requirements vary depending on the zone you live in. Please watch each of the plants carefully for
identification whether or not you possess them, because this knowledge will
certainly help you when you visit a plant nursery to purchase a plant.
We will try to make this post as short and concise as possible along with a
video at the end for you to identify common house plants easily. And you can
find detailed videos and articles on most of these plants on website.
Let’s Classify Common House plants as:
- Ferns
- Vines, Creepers and Climbers
- Small Trees
- Ornamental Plants
- Succulents and Cactii.
- Flowering and Fruiting Plants.
- FERNS
1. Asparagus Fern
Level: Easy
Indoor: Difficult
Sunlight: Avoid direct Noon sun, Indirect Light/Shade: Yes
Watering: Daily or Alternate Days (Finger Dip to Check)
Fertilizer: Occasional (once in 3 to 6 months)
2. Fox Tail Fern
Level: Easy
Indoor: Difficult
Sunlight: Avoid direct Noon sun, Indirect Sunlight/Shade: Yes
Watering: Daily or Alternate Days (Finger Dip to Check)
Fertilizer: Occasional (once in 3 to 6 months)
3. Boston Fern
Level: Easy
Indoor: Difficult
Sunlight: Indirect Light/Shade: Yes
Watering: Daily (Finger Dip to Check)
Fertilizer: Occasional (once in 3 to 6 months)
- VINES,
CREEPERS AND CLIMBERS
- Philodendrons
Level: Easy
Indoor: Yes
Sunlight: Indirect Sunlight/Shade: Yes
Watering: Daily or alternate days (Finger Dip to Check)
Fertilizer: Occasional (once in 3 to 6 months)
- Money Plant / Pothos
Level: Very Easy
Indoor: Yes
Sunlight: Indirect Light/Shade: Yes
Watering: Grown in Water or Soil.
Fertilizer: None / Occasional (once in 3 to 6 months)
- Pepperomias and Hoyas
Level: Easy
Indoor: Possible
Sunlight: Direct or Indirect Light/Shade: Yes
Watering: Alternate Days.
Fertilizer: Occasional (once in 3 to 6 months)
- Wandering Jew
Level: Very Easy
Indoor: No
Sunlight: Indirect Light/Shade: Yes
Watering: Daily or Alternate Days.
Fertilizer: None / Occasional (once in 3 to 6 months)
- Bougainvillea
Level: Easy
Indoor: No
Sunlight: Direct Sunlight at least 4 Hours.
Watering: Daily or Alternate Days.
Fertilizer: Once in a month.
- Alamanda
Level: Moderate
Indoor: No
Sunlight: Direct Sunlight at least 4-6 Hours.
Watering: Daily or Alternate Days.
Fertilizer: Once in a month.
- Scarlet clock vine
Level: Moderate
Indoor: No
Sunlight: Direct Sunlight at least 4-6 Hours.
Watering: Daily or Alternate Days.
Fertilizer: Once in a month.
- Betel Vine (Edible Paan)
Level: Moderate
Indoor: No
Sunlight: Indirect Sunlight or Early Sun.
Watering: Daily.
Fertilizer: Once in 3 months (Nitrogen rich).
- Ajwain Plant
Level: Easy
Indoor: Possible
Sunlight: Direct or Indirect Light/Shade: Yes
Watering: Alternate Days.
Fertilizer: Occasional (once in 3 to 6 months)
- SMALL
TREES & SHRUBS
- Ficus (All Types)
Level: Easy
Indoor: No
Sunlight: Indirect Bright light or Early Sun.
Watering: Daily or alternate days.
Fertilizer: Occasional (once in 3 to 6 months)
- Norfolk Island Pine (Christmas Tree)
Level: Moderate
Indoor: Possible
Sunlight: Indirect Bright light or Shade-net.
Watering: Daily or alternate days.
Fertilizer: Occasional (once in 3 to 6 months)
- Juniper (Cypress)
Level: Moderate
Indoor: No
Sunlight: Direct Sun, Shade-net, Avoid Noon Sun.
Watering: Daily or alternate days.
Fertilizer: Occasional (once in 3 to 6 months)
- Schefflera (Umbrella Tree)
Level: Easy
Indoor: No
Sunlight: Indirect Bright light or Shade-net.
Watering: Daily or alternate days.
Fertilizer: Occasional (once in 3 to 6 months)
- Plumeria (Champa)
Level: Easy
Indoor: No
Sunlight: Direct Sunlight at least 4-6 Hours.
Watering: Alternate Days.
Fertilizer: Once in a month.
- Oleander (Kaner)
Level: Easy
Indoor: No
Sunlight: Direct Sunlight at least 4-6 Hours.
Watering: Daily or Alternate Days.
Fertilizer: Once in a month.
- Euphorbia Mili (Christ plant /
Crown of Thorns)
Level: Easy
Indoor: No
Sunlight: Direct Sunlight at least 4-6 Hours.
Watering: Alternate Days.
Fertilizer: Once in a month.
- Neem Tree
Level: Easy
Indoor: No
Sunlight: Direct or Indirect Bright Light
Watering: Alternate Days.
Fertilizer: Occasional (once in 3 to 6 months)
- Dragon Tree (Dracaena Marginata)
Level: Easy
Indoor: No
Sunlight: Direct or Indirect Bright Light
Watering: Alternate Days.
Fertilizer: Occasional (once in 3 to 6 months)
- Song of India
Level: Easy
Indoor: No
Sunlight: Direct or Indirect Bright Light
Watering: Alternate Days.
Fertilizer: Occasional (once in 3 to 6 months)
- Palms (Areca palm, Table or
Umbrella Palm)
Level: Easy
Indoor: Possible
Sunlight: Indirect Bright light or Shade-net.
Watering: Daily or alternate days.
Fertilizer: Occasional (once in 3 to 6 months)
- Crotons
Level: Easy
Indoor: No
Sunlight: Direct or Indirect Bright Light
Watering: Alternate Days.
Fertilizer: Occasional (once in 3 to 6 months)
- COPPERLEAF (acalypha wilkesiana)
Level: Easy
Indoor: No
Sunlight: Direct or Indirect Bright Light
Watering: Alternate Days.
Fertilizer: Occasional (once in 3 to 6 months)
- ORNAMENTAL
PLANTS
- Coleus
Level: Easy
Indoor: Yes
Sunlight: Indirect Bright light or Shade-net
Watering: Daily or alternate days.
Fertilizer: Occasional (once in 3 to 6 months)
- Sanchezia
Level: Easy
Indoor: Yes
Sunlight: Indirect Bright light or Shade-net.
Watering: Daily or alternate days.
Fertilizer: Occasional (once in 3 to 6 months)
- SYNGONIUM (arrow head)
Level: Easy
Indoor: Yes
Sunlight: Indirect Bright light or Shade.
Watering: Daily or alternate days.
Fertilizer: Occasional (once in 3 to 6 months)
- Baby Tears Plant
Level: Easy
Indoor: No
Sunlight: Indirect Bright light or Shade.
Watering: Daily or alternate days.
Fertilizer: Occasional (once in 3 to 6 months)
- AMARYLLIS
Level: Moderate
Indoor: No
Sunlight: Direct Sun light or Shade-net
Watering: Alternate days.
Fertilizer: once a month in growing season
- Spider Lilly
Level: Moderate
Indoor: No
Sunlight: Direct Sun light or Shade-net
Watering: Alternate days.
Fertilizer: once a month in growing season
- Rain Lily
Level: Moderate
Indoor: No
Sunlight: Direct Sun light or Shade-net
Watering: Alternate days.
Fertilizer: once a month in growing season
- Tube Rose (Rajnigandha)
Level: Moderate
Indoor: No
Sunlight: Direct Sun light or Shade-net
Watering: Alternate days.
Fertilizer: once a month in growing season
- Anthurium
Level: Moderate
Indoor: Yes
Sunlight: Indirect Bright light or Shade.
Watering: Alternate days.
Fertilizer: once in 1 or 2 months
- Peace lily
Level: Moderate
Indoor: Yes
Sunlight: Indirect Bright light or Shade.
Watering: Alternate days.
Fertilizer: once in 1 or 2 months
- Calatheas
Level: Easy
Indoor: Yes
Sunlight: Indirect Bright light or Shade.
Watering: Alternate days.
Fertilizer: Occasional (once in 3 to 6 months)
- Dieffenbachia
Level: Easy
Indoor: Yes
Sunlight: Indirect Bright light or Shade.
Watering: Alternate days.
Fertilizer: Occasional (once in 3 to 6 months)
- Spider Plant (Chlorophytum)
Level: Easy
Indoor: Yes
Sunlight: Indirect Bright light or Shade.
Watering: Alternate days.
Fertilizer: None or Occasional (once in 3 to 6 months)
- Adenium (Desert Rose)
Level: Moderate
Indoor: No
Sunlight: Direct Sunlight / Shade-net.
Watering: Weekly Twice.
Fertilizer: Once monthly
- Jatropha
Level: Moderate
Indoor: No
Sunlight: Direct Sun light or Shade-net
Watering: Alternate days.
Fertilizer: once a month
- Lucky Bamboo
Level: Easy
Indoor: Yes
Sunlight: Indirect sunlight or Shade
Watering: In Water or Daily Watering in Soil.
Fertilizer: none
- Insulin Plant
Level: Moderate
Indoor: No
Sunlight: Direct or Indirect Sun light or Shade-net
Watering: Alternate days.
Fertilizer: Occasional (once in 3 to 6 months)
- Poinsettia
Level: Moderate
Indoor: No
Sunlight: Indirect Sun light or Shade-net
Watering: Alternate days.
Fertilizer: Occasional (once in 3 to 6 months)
- SUCCULENTS
& CACTII
- Common Care Tips
Level: Moderate to Difficult
Indoor: Yes
Sunlight: Indirect Sunlight / Shade / Shade-net.
Watering: Weekly Twice or Thrice.
Fertilizer: Once 3 months.
Jade
Plant (Crassula), Crassula Ovata, Ecchiverias, Flowering Kalanchoes, Kalanchoe
Thyrsiflora, Mother of Thousands, Sedums, Sedum Adolphi (Golden Sedum), Fish-bone Cactus, String of Bananas, Donkey’s
Tail – Sedum morganianum, Snake
Plants (Sanseivera), Aloe Vera, Haworthias, Haworthia Zebrina, Gasteria, Pencil Cactus, Baby Sunrose,
Portulaca,
Cactus Types
- FLOWERING
& FRUITING
Common Care Tips
Level: Easy to Moderate
Indoor: No
Sunlight: Direct Sunlight at least 4 to 6 Hours.
Watering: Daily or Alternate Days.
Fertilizer: At least Once in a month.
- Hibiscus ( All Types)
- Rose
- Ixora
- Vinca (Periwinkle)
- Marigold
- Lemon
- Pomegranut
- Chickoo
- Custard Apple
- Guava
Purchasing a plant from a plant nursery requires patience. Take your time and never purchase anything in a hurry. Remember! If your purchase a plant in a hurry, your time, money and efforts will be wasted.
Please follow these 10 useful tips while choosing your plant. And please watch all the tips till the end, else you will end up buying sick and unhealthy plants.
- Decide on the type of Plant You want to buy whether indoor or outdoor plant. You should know where to place it in your home garden, whether its shade loving, sun loving or semi-shady plant or indoor plant and whether it suits your climate and this knowledge is really important for the plant to survive.
- Do not hesitate to ASK: that is enquire with the nursery staff and question them regarding the name of the plant, how to care for the plant, the type of plant whether indoor or outdoor, fertilizer requirements and so on. Then cross check them at reliable sources at google search.
- The First Look of the Plant: First look on the plant itself will reveal its overall health. Take a Closer look and compare with other similar plants for more bushiness or more branches and new shoots. If its looking fresh and healthy, then decide on it and make further judgement by applying few more coming tips below.
- Overall Look and Hygiene of the Nursery or the Garden Store: Check whether they are maintaining it well like the overall appearance including arrangements of the plants, cleanliness of the nursery and so on.
- Soil and Watering: check whether they are using a good well draining soil for the plant and check whether the plant is watered adequately by the nursery staff. You can assess this by simply dipping your finger into the soil to check watering as well as the soil compactness. Your finger should be moist and should easily enter without much effort into the soil.
- Check for Weeds: If there are lot of weeds around the plant, it indicates poor maintenance by the nursery staff. The weeds actually rob off the nutrients from the main plant, stunting its growth.
- Look at Leaves not Flowers: Do not buy plants in Full Bloom, Instead, choose plants with healthy foliage and nice fresh growth with many flowering buds still to open. Even if its full bloomed plant, check whether it has lot of buds in it.
- Proportionate size of the Pot or the grow bag is also important factor. Check whether the plant is getting adequate space for its root development. Like if you see larger plants in small containers or grow bags, this can indicate poor maintenance and the plant can get root bound and stunted growth. That’s our next point.
- Inspect Roots wherever possible and check for Root Bound Plants: What is the meaning of root bound plants? This happens when the plant grows and matures and there is no space for root development and eventually, the roots grow to the shape of the pot and the growth of the plant stops and the plant may even die. But most of the times you cannot remove the plant and directly check this. But one tip to grossly check this is: Check whether the roots of the plant are coming out of the drainage holes and entering the ground. Better not buy such plants.
- Look for Pest attacks: Look at the plant very carefully especially underneath the leaves for insects & pests. Plus Also check for Damaged/curled leaves, you better reject such plants even if offered free of cost or as a gift. Because such plants may harm & contaminate your other garden plants.
This is 208th flowershow hosted at lalbagh – the largest botanical garden of india located at the garden city of india – Bangalore (Bengaluru).
The flower show was jointly organised by the Department of Horticulture and Mysore Horticulture Society. The theme of this years show is ‘Sevege Gaurvarpane’ which pays homage to the Armed Forces this time.
The Cost of the ticket is Rs. 70 for adults and Rs.20 for Children.
There is lot to see in the show, specially container vegetable gardening and succulent collection.